Colossus: Face To Face With The First Electronic Computer

When the story of an invention is repeated as Received Opinion for the younger generation it is so often presented as a single one-off event, with a named inventor. Before the event there was no invention, then as if by magic it was there. That apple falling on Isaac Newton’s head, or Archimedes overflowing his bath, you’ve heard the stories. The inventor’s name will sometimes differ depending on which country you are in when you hear the story, which provides an insight into the flaws in the simple invention tales. The truth is in so many cases an invention does not have a single Eureka moment, instead the named inventor builds on the work of so many others who have gone before and is the lucky engineer or scientist whose ideas result in the magic breakthrough before anyone else’s.

The history of computing is no exception, with many steps along the path that has given us the devices we rely on for so much today. Blaise Pascal’s 17th century French mechanical calculator, Charles Babbage and Ada, Countess Lovelace’s work in 19th century Britain, Herman Hollerith’s American tabulators at the end of that century, or Konrad Zuse’s work in prewar Germany represent just a few of them.

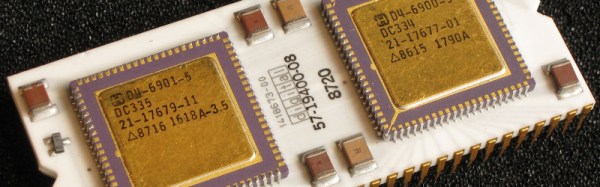
So if we are to search for an inventor in this field we have to be a little more specific than “Who invented the first computer?”, because there are so many candidates. If we restrict the question to “Who invented the first programmable electronic digital computer?” we have a much simpler answer, because we have ample evidence of the machine in question. The Received Opinion answer is therefore “The first programmable electronic digital computer was Colossus, invented at Bletchley Park in World War Two by Alan Turing to break the Nazi Enigma codes, and it was kept secret until the 1970s”.

It’s such a temptingly perfect soundbite laden with pluck and derring-do that could so easily be taken from a 1950s Eagle comic, isn’t it. Unfortunately it contains such significant untruths as to be rendered useless. Colossus is the computer you are looking for, it was developed in World War Two and kept secret for many years afterwards, but the rest of the Received Opinion answer is false. It wasn’t invented at Bletchley, its job was not the Enigma work, and most surprisingly Alan Turing’s direct involvement was only peripheral. The real story is much more interesting.

Continue reading “Colossus: Face To Face With The First Electronic Computer”

DIY Pressure Regulator For Exciting SCUBA

To get a SCUBA certification, a prospective diver will need to find a dive shop and take a class. Afterwards, some expensive rental equipment is in order. That is, unless you’re [biketool] who has found a way to build some of his own equipment. If you’re looking for a little bit of excitement on your next dive, this second stage regulator build might be just the thing for you.

It’s worth noting that [biketool] makes it explicitly clear that this shouldn’t be used on any living being just yet. The current test, though, was at 120 PSI using some soda bottles and some scrap bike parts. The OpenSCAD-designed regulator seems to work decently well for something that’s been homemade using some 3D-printed parts and other things available to most tinkerers/makers/hackers. [biketool] also goes over some issues with the regulator leaking and discusses porosity issues inherent in FDM printing but overall this project looks promising. Whether or not you want a pressurized 3D printed vessel that close to your face is rife for debate.

We don’t see a lot of SCUBA-related hacks around here. After all, it’s one thing to power an air horn with SCUBA tanks, but it’s a completely different thing to build something that keeps you from drowning.

Thanks to [dave] for the tip!

Commanding Kerbals With A Physical Interface

Kerbal Space Program will have you hurling little green men into the wastes of outer space, landing expended boosters back on the launchpad, and using resources on the fourth planet from the Sun to bring a crew back home. Kerbal is the greatest space simulator ever created, teaches orbital mechanics better than the Air Force textbook, but it is missing one thing: switches and blinky LEDs.

[SgtNoodle] felt this severe oversight by the creators of Kerbal could be remedied by building his Kerbal Control Panel, which adds physical buttons, switches, and a real 6-axis joystick for roleplaying as an Apollo astronaut.

The star of this build is the custom six-axis joystick, used for translation control when docking, maneuvering, or simply puttering around in space. Four axis joysticks are easy, but to move forward and backward, [SgtNoodle] replaced the shaft of a normal arcade joystick with a carriage bolt, added a washer on one end, and used two limit switches to give this MDF cockpit Z+ and Z- control.

The rest of the build is equally well detailed, with a CNC’d front panel, toggle switches and missile switch covers, with everything connected to an Arduino Mega. This Arduino interfaces the switches to the game with the kRPC mod, which creates a script-driven interface to the game. So, toggling the landing gear switch, for instance, triggers a script which interfaces with KSP to lower your landing gear prior to a nice, safe landing. Or, more likely, a terrifying crash.

Hackaday Prize Entry: A CPU For Balloons

Launching a high altitude balloon requires a wide breadth of knowledge. To do it right, you obviously need to know electronics and programming to get temperature, pressure, and GPS data. You’ll have to research which cameras will take good pictures and are easily programmable. It’s cold up there, and that means you need some insulation to keep the batteries warm. If you ever want to find your payload, you’ll also need an amateur radio license.

There’s a lot of work that goes into launching high altitude balloons, and for his Hackaday Prize entry, [Jeremy] designed a simple embedded data recorder capable of flying over 100,000 feet.

This flight data recorder for balloons is based on the ever popular ATMega328, and includes humidity, temperature, pressure, accelerometer, gyroscope, and magnetometer sensors. All of this data is recorded to an SD card. The Real Engineers™ who are wont to criticize design decisions they disagree with might laugh at the use of a 7805 voltage regulator, but in this case it makes a lot of sense. The power wasted by a linear regulator isn’t. It’s turned into heat which keeps the batteries alive a little bit longer.

This balloon data recorder has already flown, and [Jeremy] got some great pictures out of it. It’s a great piece of the puzzle for an exceptionally multidisciplinary project, and a great entry for the Hackaday Prize.

MagicShifter 3000: An Over-Engineered POV Stick With A 15-Year Journey

3 hackers, 16 LEDs, 15 years of development, one goal: A persistence of vision display stick that fits into your pocket. That’s the magicShifter 3000. When waved, the little, 10 cm (4 inches) long handheld device draws stable images in midair using the persistence of vision effect. Now, the project has reached another milestone: production.

The design has evolved since it started with a green LED bargraph around 2002. The current version features 16 APA102 (aka DotStar) RGB LEDs, an ESP-12E WiFi module, an NXP accelerometer/magnetometer, the mandatory Silabs USB interface, as well as a LiPo battery and charger with an impressive portion of power management. An Arduino-friendly firmware implements image stabilization as well as a React-based web interface for uploading and drawing images.

After experimenting with Seeedstudio for their previous prototypes, the team manufactured 500 units in Bulgaria. Their project took them on a roundtrip through hardware manufacturing. From ironing out minuscule flaws for a rock-solid design, over building test rigs and writing test procedures, to yield management. All magicShifter enclosures are — traditionally — 3D printed, so [Overflo] and [Martin] are working in shifts to start the 500 prints, which take about 50 minutes each to complete. The printers are still buzzing, but assembled units can be obtained in their shop.

Over all the years, the magicShifter has earned fame and funding as the over-engineered open hardware pocket POV stick. If you’re living in Europe, chances are that you either already saw one of the numerous prototype units or ran into [Phillip Tiefenbacher] aka [wizard23] on a random hacker event to be given a brief demo of the magicShifter. The project always documented the status quo of hardware hacking: Every year, it got a bit smaller, better, and reflected what parts happened to be en vogue.

magicshifter-timeline

The firmware and 3D-printable enclosure are still open source and the schematics for the latest design can be found on GitHub. Although, you will search in vain for layout or Gerber files. The risk of manufacturing large batches and then being put out of business by cheap clones put its mark on the project, letting the magicShifter reflect the current, globalized status of hardware hacking once more. Nevertheless, we’re glad the bedrock of POV projects still persists. Check out the catchy explanatory video below.

Continue reading “MagicShifter 3000: An Over-Engineered POV Stick With A 15-Year Journey”

DIY Coil Gun Redux: Life Really Is Easier With Arduino

A common complaint in the comments of many a Hackaday project is: Why did they use a microcontroller? It’s easy to Monday morning quarterback someone else’s design, but it’s rare to see the OP come back and actually prove that a microcontroller was the best choice. So when [GreatScott] rebuilt his recent DIY coil gun with discrete logic, we just had to get the word out.

You’ll recall from the original build that [GreatScott] was not attempting to build a brick-wall blasting electromagnetic rifle. His build was more about exploring the concepts and working up a viable control mechanism for a small coil gun, and as such he chose an Arduino to rapidly prototype his control circuit. But when taken to task for that design choice, he rose to the challenge and designed a controller using discrete NAND and NOR gates, some RS latches, and a couple of comparators. The basic control circuit was simple, but too simple for safety — a projectile stuck in the barrel could leave a coil energized indefinitely, leading to damage. What took a line of code in the Arduino sketch to fix required an additional comparator stage and an RC network to build a timer to deenergize the coil automatically. In the end the breadboarded circuit did the job, but implementing it would have required twice the space of the Arduino while offering none of the flexibility.

Not every project deserves an Arduino, and sometimes it’s pretty clear the builder either took the easy way out or was using the only trick in his or her book. Hats off to [GreatScott] for not only having the guts to justify his design, but also proving that he has the discrete logic chops to pull it off.

Continue reading “DIY Coil Gun Redux: Life Really Is Easier With Arduino”

A PDP-11 On A Chip

If you entered the world of professional computing sometime in the 1960s or 1970s there is a high probability that you would have found yourself working on a minicomputer. These were a class of computer smaller than the colossal mainframes of the day, with a price tag that put them within the range of medium-sized companies and institutions rather than large corporations or government-funded entities. Physically they were not small machines, but compared to the mainframes they did not require a special building to house them, or a high-power electrical supply.

A PDP-11 at The National Museum Of Computing, Bletchley, UK.

One of the most prominent among the suppliers of minicomputers was Digital Equipment Corporation, otherwise known as DEC. Their PDP line of machines dominated the market, and can be found in the ancestry of many of the things we take for granted today. The first UNIX development in 1969 for instance was performed on a DEC PDP-7.

DEC’s flagship product line of the 1970s was the 16-bit PDP-11 series, launched in 1970 and continuing in production until sometime in the late 1990s. Huge numbers of these machines were sold, and it is likely that nearly all adults reading this have at some time or other encountered one at work even if we are unaware that the supermarket till receipt, invoice, or doctor’s appointment slip in our hand was processed on it.

During that over-20-year lifespan of course DEC did not retain the 74 logic based architecture of the earliest model. Successive PDP-11 generations featured ever greater integration of their processor, culminating by the 1980s in the J-11, a CMOS microprocessor implementation of a PDP-11/70. This took the form of two integrated circuits mounted on a large 60-pin DIP ceramic wafer. It was one of these devices that came the way of [bhilpert], and instead of retaining it as a curio he decided to see if he could make it work.

The PDP-11 processors had a useful feature: a debugging console built into their hardware. This means that it should be a relatively simple task to bring up a PDP-11 processor like the J-11 without providing the rest of the PDP-11 to support it, and it was this task that he set about performing. Providing a 6402 UART at the address expected of the console with a bit of 74 glue logic, a bit more 74 for an address latch, and a couple of  6264 8K by 8 RAM chips gave him a very simple but functional PDP-11 on a breadboard. He found it would run with a clock speed as high as 11MHz, but baulked at a 14MHz crystal. He suggests that the breadboard layout may be responsible for this. Hand-keying a couple of test programs, he was able to demonstrate it working.

We’ve seen a lot of the PDP-11 on these pages over the years. Of note are a restoration of a PDP-11/04, this faithful reproduction of a PDP-11 panel emulated with the help of a Raspberry Pi, and an entire PDP-11 emulated on an AVR microcontroller. We have indeed come a long way.

Thanks [BigEd] for the tip.