Decoding NRSC-5 With SDR To Get In Your Car

NRSC-5 is a high-definition radio standard, used primarily in the United States. It allows for digital and analog transmissions to share the original FM bandwidth allocations. Theori are a cybersecurity research startup in the US, and have set out to build a receiver that can capture and decode these signals for research purposes, and documented it online.

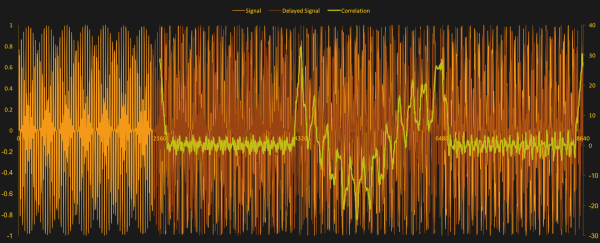
Their research began on the NRSC website, where the NRSC-5 standard is documented, however the team notes that the audio compression details are conspicuously missing. They then step through the physical layer, multiplexing layer, and finally the application layer, taking apart the standard piece by piece. This all culminates in the group’s development of an open-source receiver for NRSC-5 that works with RTL-SDR – perhaps the most ubiquitous SDR platform in the world. 

The group’s primary interest in NRSC-5 is its presence in cars as a part of in-car entertainment systems. As NRSC-5 allows data to be transmitted in various formats, the group suspects there may be security implications for vehicles that do not securely process this data — getting inside your car through the entertainment system by sending bad ID3 tags, for instance. We look forward to seeing results of this ongoing research.

[Thanks to Gary McMaster for the tip!]

The Silence Of The Fans

The good thing about using a server-grade machine as your desktop is having raw computing power at your fingertips. The downside is living next to a machine that sounds like a fleet of quadcopters taking off. Luckily, loud server fans can be replaced with quieter units if you know what you’re doing.

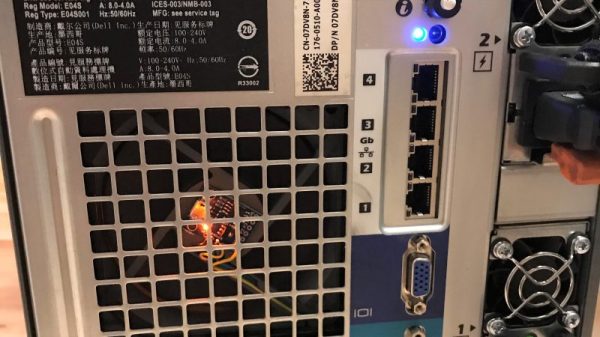
Servers are a breed apart from desktop-grade machines, and are designed around the fact that they’ll be installed in some kind of controlled environment. [Juan] made his Dell PowerEdge T710 tower server a better neighbor by probing the PWM signals to and from the stock Dell fans; he found that the motherboard is happy to just receive a fixed PWM signal that indicates the fans are running at top speed. Knowing this, [Juan] was able to spoof the feedback signal with an ATtiny85 and a single line of code. The noisy fans could then be swapped for desktop-grade fans; even running full-tilt, the new fans are quieter by far and still keep things cool inside.

But what to do with all those extra fans? Why not team them up with some lasers for a musical light show?

Robot Draws Using Robust CNC

While initially developed for use in large factory processes, computer numeric control (CNC) machines have slowly made their way out of the factory and into the hands of virtually anyone who wants one. The versatility that these machines have in automating and manipulating a wide range of tools while at the same time maintaining a high degree of accuracy and repeatability is invaluable in any setting. As an illustration of how accessible CNC has become, [Arnab]’s drawing robot uses widely available tools and a CNC implementation virtually anyone could build on their own.

Based on an Arudino UNO and a special CNC-oriented shield, the drawing robot is able to execute G code for its artistic creations. The robot is capable of drawing on most flat surfaces, and can use almost any writing implement that will fit on the arm, from pencils to pens to brushes. Since the software and hardware are both open source, this makes for an ideal platform on which to build any other CNC machines as well.

In fact, CNC is used extensively in almost everything now, and are so common that it’s not unheard of to see things like 3D printers converted to CNC machines or CNC machines turned into 3D printers. The standards used are very well-known and adopted, so there’s almost no reason not to have a CNC machine of some sort lying around in a shop or hackerspace. There are even some art-based machines like this one that go much further beyond CNC itself, too.

Continue reading “Robot Draws Using Robust CNC”

Dumping Synth ROMs And Avoiding Bitrot

Bitrot is setting in, and our digital legacy is slowly turning to dust. Efforts preserve our history are currently being undertaken numerous people around the Internet, and [Jason Scott] just got an automated CD ripper, so everything is kinda okay.

However, there is one medium that’s being overlooked. ROMs, and I don’t mean video game cartridges. In the 80s, mask ROMs were everywhere, found in everything from talking cars to synthesizers.

[Ali] bought a Korg i5m workstation from eBay a few years ago, but this unit had a problem. Luckily, he had a similar synth with the same samples stored on board. There was only one way to find out if bitrot was the cause: desoldering the chips and dumping all the information.

After fiddling around with his broken synth, [Ali] still had a problem with the sound output. Deciding the ROM chips had to be the issue, [Ali] desoldered the chips and ordered a breadboard SOP44 adapter after deciding soldering wires to each lead of the chip was a bad idea. This adapter was connected to an Arduino Mega — still the best tool for weird tasks like this — and the contents of the ROM were dumped to a PC with the help of a helpful Arduino sketch.

Dumping the ROMs took about 15 minutes, and that’s if he was able to maintain a good connection between the chip and Arduino for that long. [Ali] wrote an improved ROM reader after much trial and error, and was eventually able to get the same data out of the same chip eventually.

While the broken synth hasn’t been repaired yet, at least [Ali] has the important bits off of this antique instrument. That’s good enough for now, but [Ali] intends to take this project to completion and get those vintage samples playing out of this great old synth.


Hackaday Prize Entry: A Go-Kart For A Special Child

ScottCar is a go-kart for a special Kid and is [Alain]’s entry in this years Hackaday Prize. Will it race to victory?

The concept behind ScottCar is simple: There isn’t much out there for disabled kids when it comes to go-karts. [Alain Mauer] has an autistic son who isn’t quite capable of driving a Go-Kart as he would have trouble using pedals and brakes. He didn’t let that stand in his way, so he built a go-kart for his 11-year-old son. It incorporates an automatic braking system. In situations where the kart speeds up going down, brakes are automatically applied, slowing it down to a normal pace. It also features a remote emergency brake which would avoid crashes while supervising playtime. The braking system uses bike disc brakes controlled by an Arduino Nano. A Siemens Motor with a screw drive is what propels the vehicle, powered by a 12V Battery with a healthy 7.5Ah capacity.

The project is being released under GNU General Public License version 3, Will we be seeing ScottCar racing towards the Hackaday prize?

Panelizing Boards The Easy Way

For reasons that will remain undisclosed until some time in the future, I recently had a need to panelize a few PCBs. Panelization is the art of taking PCB designs you already have, whether they’re KiCad board files, Eagle board files, or just Gerbers, and turning them into a single collection of PCBs that can be sent off to a fab house.

Now this is panel racing

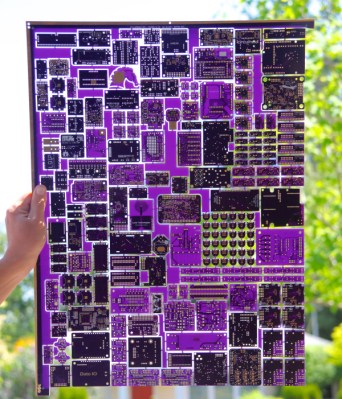
If you’re still wondering what this means, take a look at the last board you got from OSH Park, Seeed, Itead, or Dirty PCBs. Around the perimeter of your board, you’ll find some rough spots. These are ‘mouse bites’ and tabs, places where the boards are strung together to form a gigantic rectangular panel sent off to a manufacturer. You can check out this great interview with [Laen] from OSH Park to get an idea of how this works, but the basic process is to take a bunch of Gerbers, add tabs and mouse bites, solve the knapsack problem, and send the completed panel off to a board house.

Panelizing boards is something most of us won’t have to do often. Really, you only want a panel of boards when you’re manufacturing something. For small-scale production and prototypes, bare boards will do just fine. Simply by virtue of the fact that panelizing boards is far less common than throwing some Gerbers at OSH Park or Seeed, there aren’t many (good) tutorials, and even fewer (good) tools to do so. This is how you panelize boards quickly and easily using Open Source tools.

Continue reading “Panelizing Boards The Easy Way”

Friday Hack Chat: Perfect Purple PCBs

Every Friday, we gather ’round the hot air gun over on Hackaday.io, invite some cool people over, and get them to talk about what they do. This is the Hack Chat. It’s become a tradition, and already we’ve had a ton of awesome people walk through our doors.

This Friday, we’re going to sit down with the purveyors of perfect purple PCBs. Over the last decade or so, a lot has changed in the space of small-run PCB production. Ten years ago, PCBs were expensive, and it wouldn’t be abnormal to spend hundreds of dollars on a small run of tiny boards. Now, The DEF CON 24 badge, in a panel are cheaper than ever, giving industrious hardware creators access to professional quality manufacturing at a fraction of the price seen just a few years ago.

For the last few years, OSH Park has been a mainstay of low-volume PCB fabrication. Their website is as simple as it gets: Upload some Gerbers, an Eagle board file, or a KiCad PCB, press a few buttons, and in a week or so you’ll have a perfect purple PCB in your mailbox.

This week, we’re inviting [Drew Fustini] and [Dan Sheadel] to talk about what OSH Park does, how they became the first place that comes to mind when you need a PCB. They’ll explain why the boards are purple, environmental regulations for PCB manufacturing in the US, shared projects and tips and tricks for creating the perfect board.

What would you like to see from a PCB supplier? Would you like to see OSH Park expand further into their burgeoning Pog business? How about a sticker club? Who would win in a fight, a blue robot dog or a purple robot shark? All these questions and more will be answered; if you have a question for the OSH Park team, drop it in this spreadsheet.

Here’s How To Take Part:

join-hack-chatOur Hack Chats are live community events on the Hackaday.io Hack Chat group messaging. This hack chat will take place at noon Pacific time on Friday, June 23rd. Confused about where and when ‘noon’ is? Here’s a time and date converter!

Log into Hackaday.io, visit that page, and look for the ‘Join this Project’ Button. Once you’re part of the project, the button will change to ‘Team Messaging’, which takes you directly to the Hack Chat.

You don’t have to wait until Friday; join whenever you want and you can see what the community is talking about