Building A Safe ESP32 Home Energy Monitor

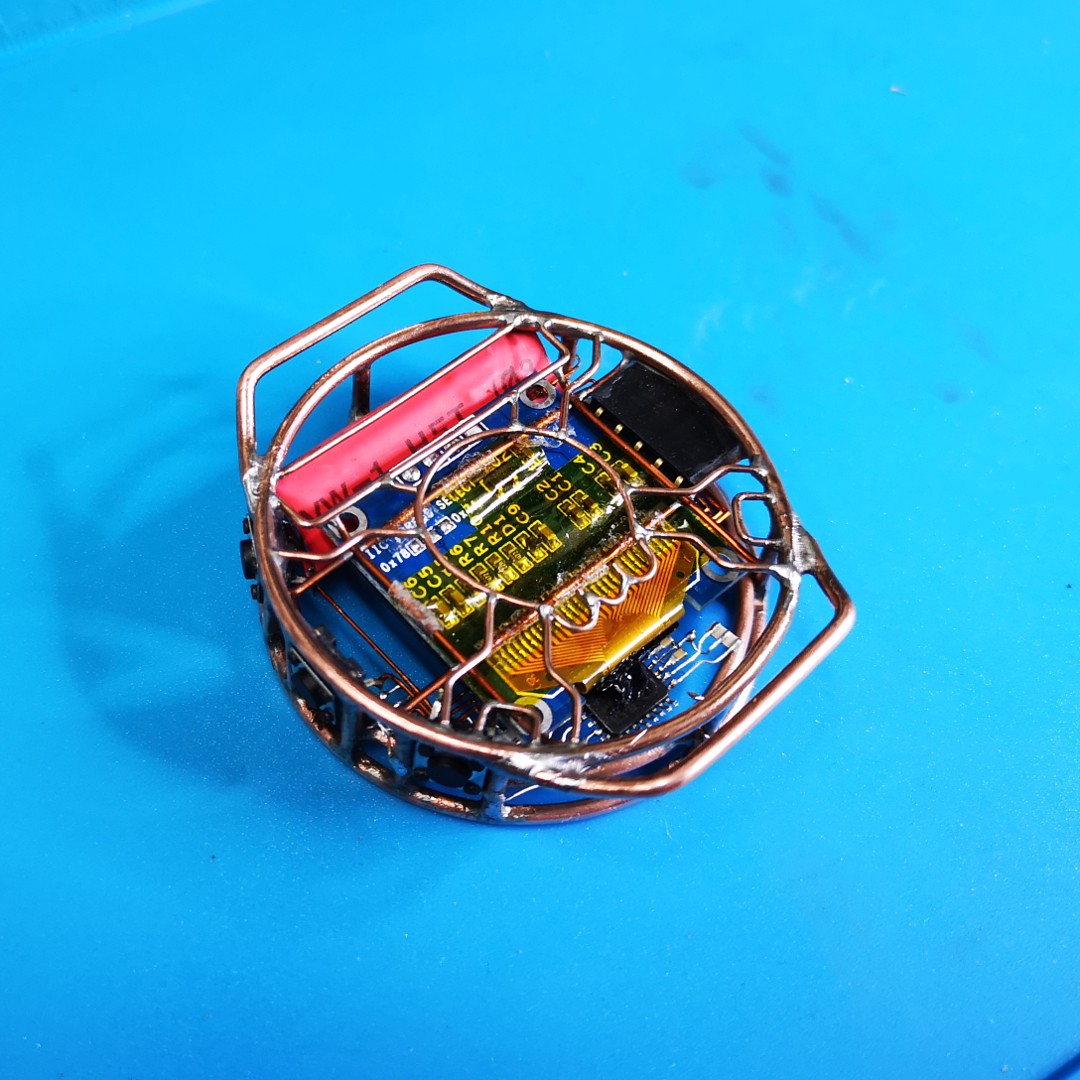
The first step to reducing the energy consumption of your home is figuring out how much you actually use in the first place. After all, you need a baseline to compare against when you start making changes. But fiddling around with high voltage is something a lot of hackers will go out of their way to avoid. Luckily, as [Xavier Decuyper] explains, you can build a very robust DIY energy monitoring system without having to modify your AC wiring.

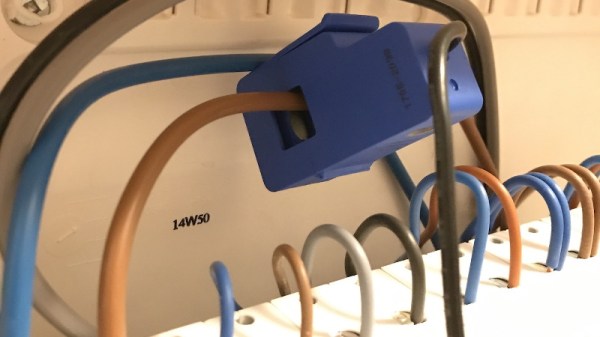
In the video after the break, [Xavier] goes over the theory of how it all works, but the short version is that you just need to use a Current Transformer (CT) sensor. These little devices clamp over an AC wire and detect how much current is passing through it via induction. In his case, he used a YHDC SCT-013-030 sensor that can measure up to 30 amps and costs about $12 USD. It outputs a voltage between 0 and 1 volts, which makes it extremely easy to read using the ADC of your favorite microcontroller.

Once you’ve got the CT sensor connected to your microcontroller, the rest really just depends on how far you want to take the software side of things. You could just log the current consumption to a plain text file if that’s your style, but [Xavier] wanted to challenge himself to develop a energy monitoring system that rivaled commercial offerings so he took the data and ran with it.

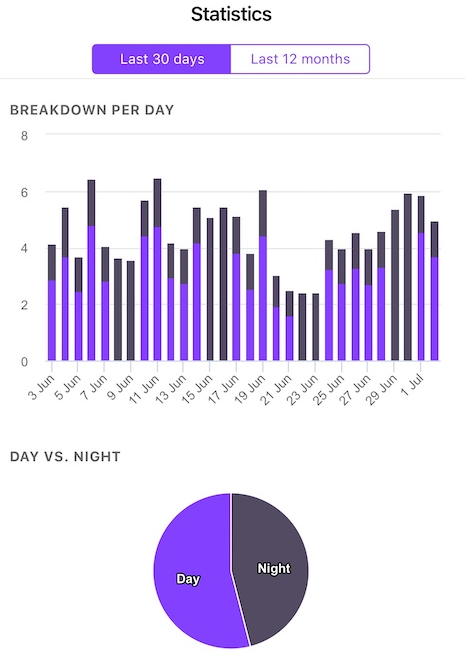
A good chunk of his write-up explains how the used Amazon Web Services (AWS) to process and ultimately display all the data he collects with his ESP32 energy monitor. Every 30 seconds, the hardware reports the current consumption to AWS through MQTT. The readings are stored in a database, and [Xavier] uses GraphQL and Dygraphs to generate visualizations. He even used Ionic to develop a cross-platform mobile application so he can fawn over his professional looking charts and graphs on the go.

We’ve already seen how carefully monitoring energy consumption can uncover some surprising trends, so if you want to go green and don’t have an optically coupled electricity meter, the CT sensor method might be just what you need.

Continue reading “Building A Safe ESP32 Home Energy Monitor”

This Wristwatch Is A Free Form Work Of Art

Free-form circuitry built as open wire sculpture can produce beautiful pieces of electronics, but it does not always lend itself to situations in which it might be placed under physical stress. Thus the sight of [Mile]’s free-form wristwatch is something of a surprise, as a wristwatch cam be exposed to significant mechanical stress in its everyday use.

A wire Wrencher graces thewe underside.
A wire Wrencher graces the underside.

The electronic side of this watch is hardly unusual, the familiar ATmega328-AU low-power microcontroller drives a tiny OLED display. Mechanically though it is a different story, as the outline of a wristwatch shell is traced in copper wire with a very neat rendition of a Wrencher in its base, and a glass lens is installed over the screen to take the place of a watch glass. A strap completes the wristwatch, which can then be worn like any other. Power comes from a small 110 mAh lithium-polymer cell, which it is claimed gives between 6 and 7 hours of on time and over a month of standby with moderate use.

Unfortunately there does not seem to be much detail about the software in this project, but since ATmega328 clocks and watches are ten a penny we don’t think that’s a problem. The key feature is that free-form construction, and for that we like it a lot.

Does This Timber Have The Right Timbre?

A hi-fi amplifier used to be a rite of passage for the home electronic constructor, back in the days when consumer electronics was still dominated by analogue entertainment. It’s unusual then to see [carbono.silício]’s stereo amplifier project, constructed in an open-wire circuit sculpture form on a log. You didn’t read that incorrectly, it’s built not on a breadboard but on a piece of Olea Maderensis, or Madiera Olive wood, complete with bark. This endangered tree was not felled, instead it was a piece blown down after a storm.

The circuit is slightly unusual for a project such as this, in that it uses a pair of LM386 audio amplifier chips. This isn’t an unusual component, but it’s one more commonly seen providing the amplification for a small speaker project than in a stereo hi-fi amplifier. But the construction is beautifully done, with very neatly routed wires, a single central volume knob, and a blue LED power light. A particularly nice touch are the aluminium electrolytic capacitors, we suspect having had their plastic sleeving removed.

We’ve had our share of stereo amp projects here, and some of them are surprisingly simple. We have even been known to partake of them ourselves.

Add An Ant To Your Desk For Some Compact PCB Manufacturing

Usually when one thinks of using a CNC machine for producing PCBs, one thinks of those big, bulky CNC machines that pretty much fill an entire desk. But what if a CNC machine could be small enough to fit on a desk without getting in the way, yet still be useful enough to make single- and double-sided PCBs? This was the idea behind The Ant, the compact PCB manufacturing machine which [Mattia] and [Angelo] designed and open sourced.

In addition to the above linked Bitbucket repository for the project, the ‘Ant Team’ has a YouTube channel on which they have a range of rather professionally edited videos on the project, ranging from constructing the little machine, to various updates and more  Also see the video that is attached after the link for a visual introduction to the project.

Support and community interaction is mostly performed via the Reddit group for the project, where the diminutive machine finds a welcoming community as it continues to evolve. The machine itself is specified at this point as being able to built from commercially available and 3D printed parts, requiring no further tools for cutting or shaping. The precision is about 0.2 mm trace spacing.

Optical alignment for double-sided boards is achieved using a USB micro camera and the bCNC software, while the cost for materials is said to be quite inexpensive when compared with commercial solutions

Honestly, after seeing the machine in action, wouldn’t you want to have a CNC machine that’s so small and good-looking on your desk? If there’s one thing one might want to add, it’s probably a way to deal with the copper dust that’s produced while creating PCBs. Having to clean that off the desk after each PCB manufacturing session would get a bit cumbersome, we imagine.

Continue reading “Add An Ant To Your Desk For Some Compact PCB Manufacturing”

Familiar Parts Make Interfacing Weather Station Easy

Hackers love to measure things, and enjoy monitoring the world around them. Weather stations are a big part of this, and many tinkerers have tried to interface such hardware with varying levels of success. [Ray] is one such individual, and was pleasantly surprised when working on a recent project.

Unlike more old-school models, the model [Ray] found himself working on was a modern unit with a significant number of sensors, a WiFi interface, and even a color screen. Reading the manual, [Ray] noted the device used the IP 192.168.4.1, which is commonly used by the ESP8266 when running in AP mode. The hunch proved to be correct, and opening the device revealed an ESP-WROOM-2 running the show.

Now working with familiar parts, it was simple to hook up to the onboard serial port to scope for data. To [Ray]’s delight, the device was outputting all the weather data out over the connection, and in plaintext to boot. The station also featured the ability to connect to Weather Underground, and watching the debug messages during this process helped [Ray] to understand the format of the information.

It’s rare that manufacturers make it so easy, but debug ports can often be a treasure trove of information to the budding hacker. We’ve seen others cracked before, too.

A Capacitive Soil Sensor Hack For Lower Voltage Supplies

A frequent beginner project involves measuring soil moisture levels by measuring its resistance with a couple of electrodes. These electrodes are available ready-made as PCBs, but suffer badly from corrosion. Happily there is a solution in the form of capacitive sensor probes, and it is these that [Electrobob] is incorporating in to a home automation system. Unfortunately the commercial capacitive probes are designed to run from a 3.3 V supply and [Bob]’s project is using a pair of AA cells, so a quick hack was needed to enable them to be run from the lower voltage.

The explanation of the probe’s operation is an interesting part of the write-up, unexpectedly it uses a 555 configured as an astable oscillator. This feeds an RC low pass filter of which the capacitor is formed by the soil probe, which in turn feeds a rectifier to create a DC output. This can be measured to gain a reading of the soil moisture level.

The probe is fitted with a 3.3 V LDO regulator, which is simply bypassed. Measurements show its output to be linear, so if the supply voltage is also measured an accurate reading can be gleaned. These probes are still a slightly unknown quantity to many who might find a use for them, so it’s extremely useful to be given this insight into them.

Jazzberry Bakes The Pi Into A Mechanical Keyboard

If you hang around Hackaday long enough, pretty soon you’ll start to see some patterns emerging. As the nexus of all things awesome in the hacking world, our front page offers a unique vantage point by which you can see what’s getting folks excited this particular month, year, or decade. Right now we can tell you hackers love the Raspberry Pi, 3D printing, and perhaps above all, they can’t get enough mechanical keyboards.

So that makes the Jazzberry by [Mattis Folkestad] something of a perfect storm in the hacker world. The project uses a 3D printed enclosure to combine a Raspberry Pi 3B+ and an Ajazz AK33 mechanical keyboard into a single unit like the home computers of old. Honestly, we’re just glad he didn’t sneak an ESP8266 in there; as the resulting combination might have been enough to crash the site.

That being said, we can’t help but notice there’s a lot of open space inside the 3D printed enclosure. Right now there’s nothing inside but the Raspberry Pi, which only takes up a fraction of the internal volume. Adding a battery and hard drive would be the logical next steps, but it could also be outfitted with a suite of radios and various other hacking and security research accoutrements. We’ve seen an influx of such builds over the last few months, and the Jazzberry seems like it could make a very slick entry into this burgeoning category of mobile pentesting devices.

The STL files are designed specifically for the combination of hardware that [Mattis] used, but it shouldn’t be too difficult to modify them for your own purposes. Even if you stick with the same AK33 keyboard, an upgrade to the impressively powerful Raspberry Pi 4 would be more than worth the time fiddling with the STLs in your CAD tool of choice. If you really want to go all in, add a display and you’re well on the way to that cyberdeck you’ve always wanted.