Shapeshifter – An Open Source Drum Machine

With microcontrollers growing ever more powerful each new generation, things that were mere pipedreams before are now readily possible. The Shapeshifter drum machine is a perfect example.

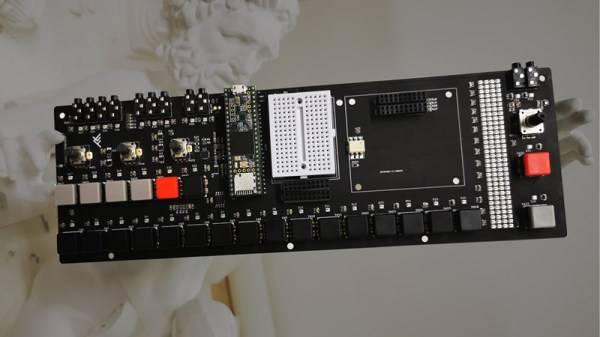
Shapeshifter’s design is open-source, with everything available on Github for the curious musical tinkerers out there. The device is built around a PCB with only through-hole components, making assembly easy for even the least experienced enthusiasts out there. A Teensy 3.6 is then slotted into the socket on the board, providing 180MHz of grunt to run the show. It’s an excellent choice, as the Teensy platform has a huge range of libraries which make it simple to work with audio.

Being open-source, not only is it a cinch to make your own, but there’s plenty of room to remix the design to your personal tastes. There’s even a breadboarding area and the capability to add an expansion card for even more possibilities. Some users have even gone so far as to add displays and filter mods to really open things up.

We love a good drum machine at Hackaday, from the Amstrad-based to pocket-sized wonders. If you’ve got a build of your own, be sure to drop it in the tips line.

Nixie Clock Failure Analysis, [Dalibor Farný] Style

We’ve become sadly accustomed to consumer devices that seem to give up the ghost right after the warranty period expires. And even when we get “lucky” and the device fails while it’s still covered, chances are that there will be no attempt to repair it; the unit will be replaced with a new one, and the failed one will get pitched in the e-waste bin.

Not every manufacturer takes this approach, however. When premium quality is the keystone of your brand, you need to take field failures seriously. [Dalibor Farný], maker of high-end Nixie tubes and the sleek, sophisticated clocks they plug into, realizes this, and a new video goes into depth about the process he uses to diagnose issues and prevent them in the future.

One clock with a digit stuck off was traced to via failure by barrel fatigue, or the board material cracking inside the via hole and breaking the plated-through copper. This prompted a board redesign to increase the diameter of all the vias, eliminating that failure mode. Another clock had a digit stuck on, which ended up being a short to ground caused by pin misalignment; when the tube was plugged in, the pins slipped and scraped some solder off the socket and onto the ground plane of the board. That resulted in another redesign that not only fixed the problem by eliminating the ground plane on the upper side of the board, but also improved the aesthetics of the board dramatically.

As with all things [Dalibor], the video is a feast for the eyes with the warm orange glow in the polished glass and chrome tubes contrasting with the bead-blasted aluminum chassis. If you haven’t watched the “making of” video yet, you’ve got to check that out too.

Continue reading “Nixie Clock Failure Analysis, [Dalibor Farný] Style”

Prusa Unveils New Mini 3D Printer, Shakes Up The Competition

For the last couple of years, consumer desktop 3D printer choices in the under $1,000 USD range have fallen into two broad categories: everything bellow $500 USD, and the latest Prusa i3. There are plenty of respectable printers made by companies such as Monoprice and Creality to choose from on that lower end of the scale. It wasn’t a luxury everyone could justify, but if you had the budget to swing the $749 for Prusa’s i3 kit, the choice became obvious.

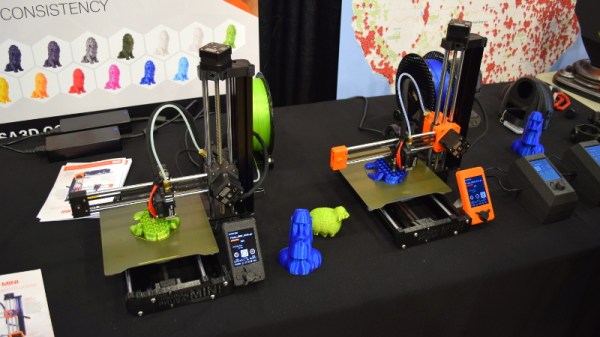
Of course, that was before the Prusa Mini. Available as a kit for just $349, it’s far and away the cheapest printer that Prusa Research has ever offered. But this isn’t just some rebranded hardware, and it doesn’t compromise on the ideals that have made the company’s flagship machine the de facto open source FDM printer. For less than half the cost of the i3 MK3S, you’re not only getting most of the larger printer’s best features and Prusa’s renowned customer support, but even capabilities that presumably won’t make it to the i3 line until the MK4 is released.

Josef Průša was on hand to officially unveil his latest printer at the 2019 East Coast Reprap Festival, where I got the chance to get up close and personal with the diminutive machine. While it might be awhile before we can do a full review on the Mini, it’s safe to say that this small printer is going to have a big impact on the entry-level market.

Continue reading “Prusa Unveils New Mini 3D Printer, Shakes Up The Competition”

Not All 7-Segment Displays Are Electronic

There are a variety of means by which numbers can be displayed from an electronic circuit, and probably the most ubiquitous remains the seven-segment display. Take seven LEDs, lamps, LCDs, VFD segments or mechanical flip-dot style units in the familiar rectangular figure eight, and your microcontroller or similar can display numbers. There are a variety of different interfaces, but at most all that is needed is a level shifter and a driver.

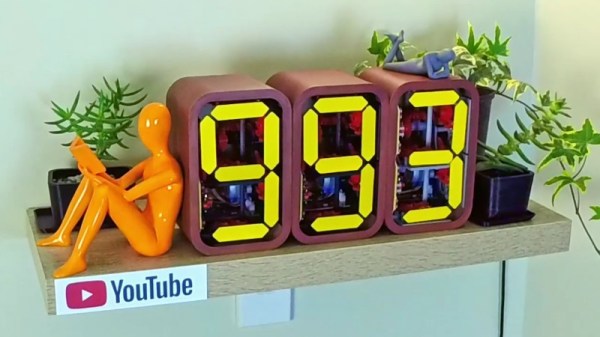
Sometimes though we encounter a completely novel 7-segment display, and such is the case with [Fhuable]’s all mechanical single digit display. It bears a superficial resemblance to a flipdot display, but instead of a magnetic actuator, it instead uses a complex system of gears and cams to flip the segments sequentially from the turning of a small crank. It appears to be the same mechanism he’s used in his subscription counter project whose video we’ve placed below the break, and it is truly a thing of beauty. We’re not entirely certain how useful it would be as a general-purpose display in its current form, however, we can see it being adapted with relative ease. A clock might, for example, be an eye-catching project.

Most displays that make it here have some electrical components, so it’s unusual to see an entirely mechanical one. But that’s not necessarily always the case.

Continue reading “Not All 7-Segment Displays Are Electronic”

DIY MIDI Looper Controller Looks Fantastic!

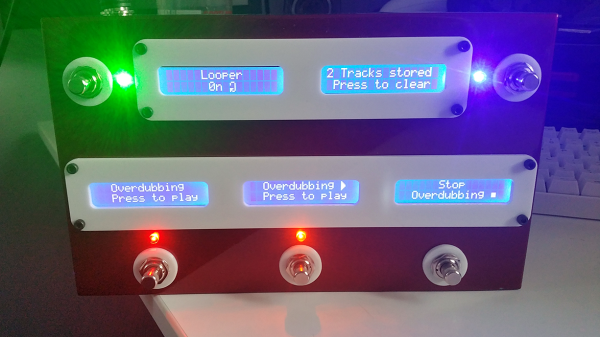
Due to pedalboard size, complicated guitar pedals sometimes reduce the number of buttons to the bare minimum. Many of these pedals are capable of being controlled with an external MIDI controller, however, and necessity being the mother of invention and all, this is a great opportunity to build something and learn some new skills at the same time. In need of a MIDI controller, Reddit user [Earthwin] built an Arduino powered one to control his Boss DD500 Looper pedal and the result is great looking.

Five 16×2 LCD screens, one for each button, show the functionality that that button currently has. They are attached (through some neat wiring) to a custom-built PCB which holds the Arduino that controls everything. The screens are mounted to an acrylic backplate which holds the screens in place while the laser-cut acrylic covers are mounted to the same plate through the chassis. The chassis is a standard Hammond aluminum box that was sanded down, primed and then filler was used to make the corners nice and smooth. Flat-top LEDs and custom 3D printed washers finish off the project.

[Earthwin] admits that this build might be overkill for the looper that he’s using, but he had fun building the controller and learning to use an Arduino. He’s already well on his way to building another, using the lessons learned in this build. If you want to build your own MIDI controller, this article should help you out. And then you’re ready to build your controller into a guitar if you want to.

[Via Reddit]

Quality Sound-Proof Cans From Personal Protective Equipment

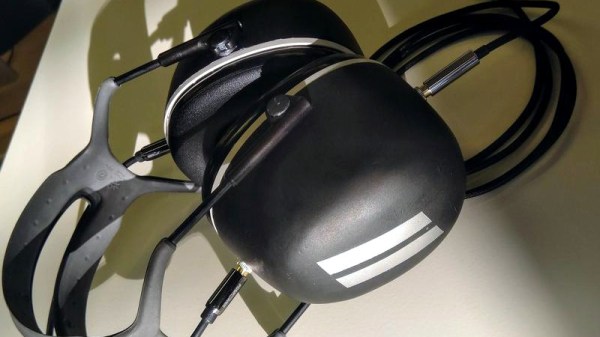
Working in a noisy office can be distracting. To combat the problem in his workplace [Rikard Anglerud] bought himself a pair of 3M ear defenders. They were good, but not quite good enough to completely extinguish the noise, so he inserted the drivers from a pair of cheap headphones and played a low-level white noise. This prototype proved effective, so he returned to the project and produced a much nicer pair that approach much more costly cans in their execution.

[Rikard’s] first set of headphones left something to be desired in the quality department. The second set followed with a pair of better-quality drivers sourced online, and more care was taken with cable routing and in their fitting. Finally some filler was used to remove the moulded 3M branding, and make them look more hi-fi than workwear.

From an audiophile perspective these cans might not approach a very high quality pair because their drivers are unlikely to be matched to the acoustic properties of their enclosures. But it sounds as though he’s achieved an adequate result despite that, and completely satisfied his need to exclude office noise.

This Micro Deltesian Is Easy For Children To Use

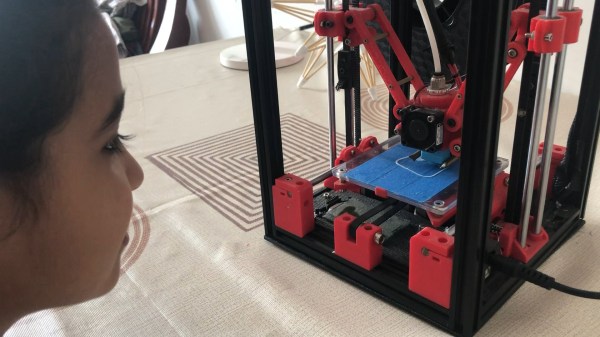
[Ekaggrat Singh Kalsi] submits this interesting printer he built for his daughter to use. He admits that the project started simply out of curiosity about the strange deltesian movement. In this configuration, the X and Z-axis are a delta mechanism while the Y-axis is a regular Cartesian bed on rails. There’s not a load of advantages to this movement, but it is really neat.

Eventually, he had a hammer in search of a nail and decided to make the printer easy enough for his daughter to use. To this end, he added a few kid-friendly modifications. The unheated bed is removable and snaps in and out of place with magnets. Considerable attention was paid to the filament loading and unloading to make it easy for small hands to perform the process. This was accomplished through a lever based latch mechanism.

As you can see in the video after the break, the project was a success, and his daughter is growing up with access to her very own 3D printer. If you’re curious abou the classic delta robot, check out this golf ball sorter.

Continue reading “This Micro Deltesian Is Easy For Children To Use”