Your Own Electronic Drum Kit

[Jake_Of_All_Trades] wanted to take up a new drumming hobby, but he didn’t want to punish his neighbors in the process. He started considering an electric drum kit which would allow him to practice silently but still get some semblance of the real drumming experience.

Unfortunately, electric drum kits are pretty expensive compared to their acoustic counterparts, so buying an electric kit was a bit out of the question. So, like any good hacker, he decided to make his own.

He found a pretty cheap acoustic drum kit on Craigslist and decided to convert it to electric. He thought this would be a perfect opportunity to learn more about electric drum kits in general and would allow him to do as much tweaking as he wanted to in order to personalize his experience. He also figured this would be a great way to get the best of both worlds. He could get an electric kit to practice whenever he wanted without disturbing neighbors and he could easily convert back to acoustic when needed.

First, he had to do a bit of restorative work with the cheap acoustic kit he found on eBay since it was pretty worn. Then, he decided to convert the drum heads to electric using two-ply mesh drum heads made from heavy-duty fiberglass screen mesh. The fiberglass screen mesh was cheap and easy to replace in the event he needed to make repairs. He added drum and cymbal triggers with his own DIY mechanism using a piezoelectric element, similar to another hack we’ve seen. These little sensors are great for converting mechanical to electrical energy and can feed directly into a GPIO to detect when the drum or cymbal was struck. The electrical signal is then interpreted by an on-board signal processing module.

All he needed were some headphones or a small amplifier and he was good to go! Cool hack [Jake_Of_All_Trades]!

While you’re here, check out some of our best DIY musical projects over the years.

Software Defined Radio Academy Goes Virtual

They say every cloud has a silver lining. It’s hard to find a positive among all the bad news about the current global pandemic, but it has pushed more conferences and events to allow online participation either live or after the fact. A case in point: The Software Defined Radio Academy’s annual event is all on a YouTube channel so you can attend virtually.

Not all the videos are there yet, but the keynote along with some very technical talks about techniques ranging from FPGAs to spectrum monitoring and spectral correlation density — you can see that video, below. We presume you’ll eventually be able to watch all the presentations listed in the program.

Continue reading “Software Defined Radio Academy Goes Virtual”

This Freezer Failure Alarm Keeps Your Spoils Unspoiled

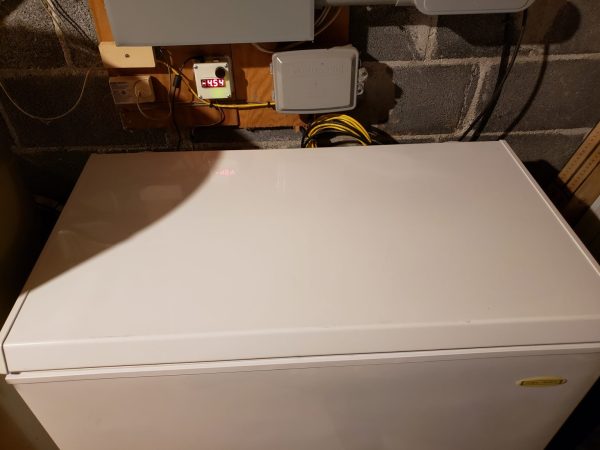
Deep freezers are a great thing to have, especially when the world gets apocalyptic. Of course, freezers are only good when they’re operating properly. And since they’re usually chillin’ out of sight and full of precious goods, keeping an eye on them is important.

When [Adam] started looking at commercial freezer alarms, he found that most of them are a joke. A bunch are battery-powered, and many people complain that they’re too quiet to do any good. And you’d best hope that the freezer fails while you’re home and awake, because they just stop sounding the alarm after a certain amount of time, probably to save battery.

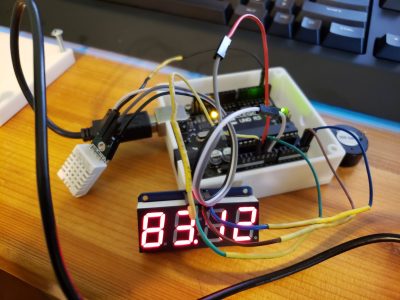
If you want something done right, you have to do it yourself. [Adam]’s homemade freezer failure alarm is a cheap and open solution that ticks all the boxen. It runs on mains power and uses a 100dB piezo buzzer for ear-splitting effectiveness to alert [Adam] whenever the freezer is at 32°F/0°C or above.

If the Arduino loses sight of the DHT22 temperature sensor inside the freezer, then the alarm sounds continuously. And if [Adam] is ever curious about the temperature in the freezer, it’s right there on the 7-segment. Pretty elegant if you ask us. We’ve got the demo video thawing after the break, but you might wanna turn your sound down a lot.

You could assume that the freezer is freezing as long as it has power. In that case, just use a 555.

Continue reading “This Freezer Failure Alarm Keeps Your Spoils Unspoiled”

Synthesizer Gets An External Touch Screen

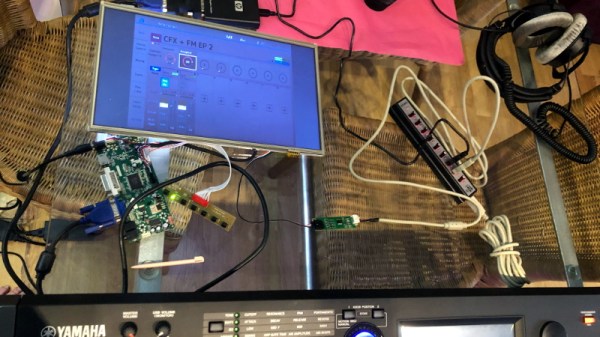
Like other owners of the high-end Yamaha MODX, [sn00zerman] wasn’t happy with the synthesizer’s integrated touch screen. It’s a bit small, and not at a very good angle for viewing. So he made it his mission to find some way of adding a larger external touch screen without making any permanent modifications to the expensive instrument.

This might seem like a tall order, but he wasn’t starting from zero. It was already known that you could plug an external display into it if you used a USB to DVI/HDMI adapter; but without the touch overlay it wasn’t a particularly useful trick. He pondered adding an external connector for the device’s built-in touch screen overlay, but that broke his no modifications rule. Considering how much one of these things cost, we can’t blame him for not wanting to put a hole in the side.

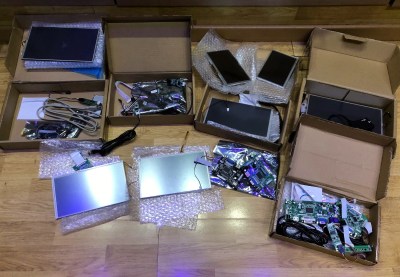
Sometimes you just have to dig out the right parts.

So he started to look for a software solution to get him the rest of the way. Luckily the MODX runs Linux, and Yamaha has made good on their GPL responsibilities and released the source code for anyone who’s interested. While poking around, he figured out that the device uses tslib to talk to the touch screen, which [sn00zerman] had worked with on previous projects. He realized that the solution might be as simple as finding a USB touch screen controller that’s compatible with the version of tslib running on the MODX.

In the end, a trip through his parts bin uncovered a stand-alone touch screen controller that he knew from experience would work with the library. Sure enough, when plugged into the MODX, the OS accepted it as an input device. With the addition of a USB hub, he was able to combine this with an existing display and finally have a more comfortable user-interface for his synthesizer.

Now all he’s got to do is plug in a USB floppy drive, and he’ll have the ultimate Yamaha Beat Laboratory.

Continue reading “Synthesizer Gets An External Touch Screen”

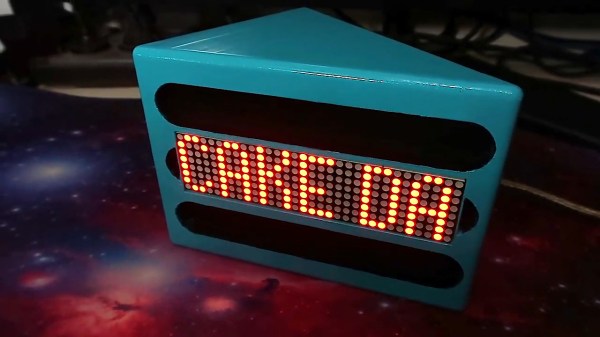
Cakeday Countdown Clock Is A Sweet Little Scroller

If you want strangers to give you well wishes on your birthday out in the real world, you have call attention to the occasion by wearing a pointy hat or a button that says ‘today is my birthday, gimme presents’. But on your reddit cakeday, aka the day you joined, you’re automatically singled out with the addition of a slice of 8-bit cake next to your username. The great thing about your cakeday is that you’re almost guaranteed to get some karma for once, especially if you make something cakeday related like [ScottyD]’s cakeday countdown clock. But plenty of people forget what their cakeday is and miss out on the fun.

This countdown clock works like you might expect — every day that isn’t your cakeday, a message scrolls by with the number of days remaining until your next one. When the big day comes, the message becomes TODAY IS YOUR CAKE DAY. Both messages are bookended by cute little pixelated cake slices that we would apply liberally to the day-of message if we made one of these.

This simple but fun project shouldn’t put too big of a dent in your parts box, since it’s essentially an Arduino, a real-time clock module, and a 32×8 LED matrix to display the text. We love the uni-body design of the enclosure because it creates a shelf for the Arduino and gives easy access for gluing in the display from the rear. If for some reason you don’t reddit, then make one anyway and use it to count down to your IRL birthday or something. We’ve got the build video cut and plated for you to consume after the break.

We would understand if 2020 is supplying you with enough existential crises, but if not, consider building a clock that counts down the rest of your life expectancy.

Continue reading “Cakeday Countdown Clock Is A Sweet Little Scroller”

Art of 3D printer in the middle of printing a Hackaday Jolly Wrencher logo

3D Printering: Selling Prints, And Solving The Pickup Problem

After getting a 3D printer up and running, it’s not uncommon for an enterprising hacker to dabble in 3D printing to make a little money on the side. Offering local pickup of orders is a common startup choice since it’s simple and avoids shipping entirely. It’s virtually tailor-made to make a great bootstrapping experiment, but anyone who tries it sooner or later bumps up against a critical but simple-seeming problem: how to get finished prints into a customer’s hands in a sustainable way that is not a hassle for either the provider, or the customer?

It’s very easy to accept a 3D file and get paid online, but the part about actually getting the print into the customer’s hands does not have a one-size-fits-all solution. This is what I call The Pickup Problem, and left unsolved, it can become unsustainable. Let’s look at why local pickup doesn’t always measure up, then examine possible solutions.

The Problems with Local Pickup

Local pickup for delivery of print jobs is great because there is no mucking about with shipping supplies or carriers. Also, many 3D prints when starting out will be relatively low-value jobs that no one is interested in stacking shipping fees onto, anyway.

“Your order is complete. Come to this address to pick up your order.” It is straightforward and hits all the bases, so what’s the problem?

Continue reading “3D Printering: Selling Prints, And Solving The Pickup Problem”

Heater Joins The Internet Of Things With ESP32 Board

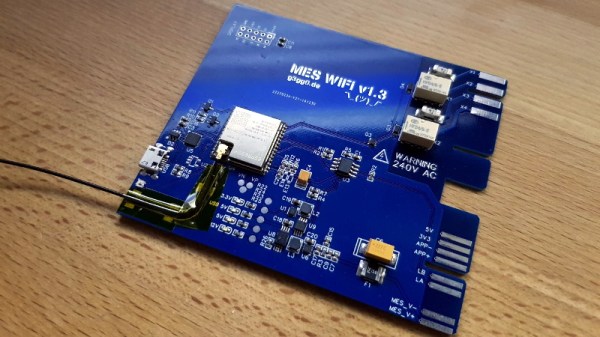
The wood-burning heater [g3gg0] has at home works perfectly, except for one flaw: the pellet reservoir needs to be manually refilled every few days. Humans being notoriously unreliable creatures, this critical task is sometimes overlooked, which naturally leads to literally chilling results.

With automatic fill systems expensive and difficult to install, [g3gg0] wanted to find some kind of way for the heater to notify its caretakers about any potential fault conditions. Not just the fact that it was out of fuel (though that would naturally be the most common alert), but any other issue which would potentially keep the heater from doing it’s job. In short, the heater was going to get a one-way ticket to the Internet of Things.

As it turns out, this task was not quite as difficult as you might expect. The Windhager heater already had upgrade bays where the user could insert additional modules and sensors, as well as a rudimentary data bus over RS-485. All [g3gg0] had to do was tap into this bus, decode what the packets contained, and use the information to generate alerts over the network. The ESP32 was more than up to the task, it just needed a custom PCB and 3D printed enclosure that would allow it to slot into the heater like an official expansion module.

When an interesting message flashes across the bus, the ESP32 captures it and relays the appropriate message to an MQTT broker. From there, the automation possibilities are nearly endless. In this case, the heater’s status information is being visualized with tools like Grafana, and important alerts are sent out to mobile devices with PushingBox. With a setup like this, the Windhager will never go hungry again.

Continue reading “Heater Joins The Internet Of Things With ESP32 Board”