Documentation Is Hard, Let The SkunkWorks Project Show You How To Do It Well

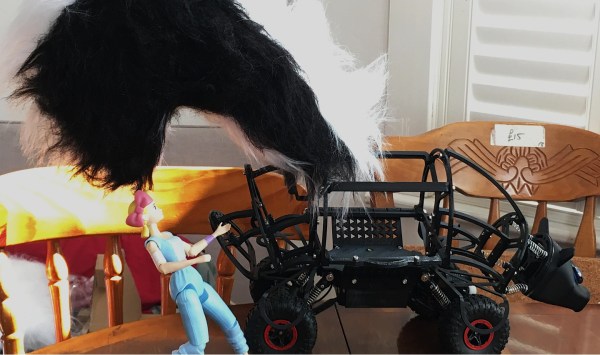
Documentation can be a bit of a nasty word, but it’s certainly one aspect of our own design process that we all wish we could improve upon. As an award-winning designer, working with some of the best toy companies around, [Jude] knows a thing or two about showing your work. In his SkunkWorks Project, he takes a maker’s approach to Bo Peep’s Skunkmobile and gives us a master class on engineering design in the process.

As with any good project brief, [Jude] first lays out his motivation for his work. He was very surprised that Pixar hadn’t commercialized Bo Peep’s Skunkmobile and hoped his DIY efforts could inspire more inclusive toy options from the Toy Story franchise. He does admit that the Skunkmobile presents a more unique design challenge than your standard, plastic, toy action figure. Combining both the textile element to create the illusion of fur and the RC components to give the toy its mobility requires careful thought. You definitely don’t want the wheels ripping into the fabric as you wheel around the backyard or for the fur to snag every object you pass by in the house.
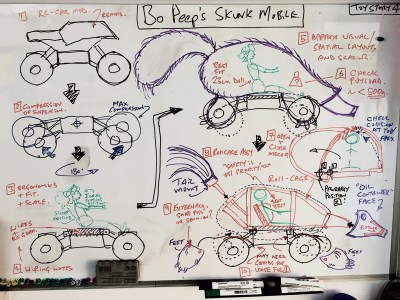
Given the design challenges of making the Skunkmobile from scratch, [Jude] decided the best way forward was to retrofit a custom-designed skunk-shaped body onto a standard RC car chassis. The difficulty here lies in finding a chassis that can support the weight of the retrofitted body as well as one big enough to hold a 9-inch Bo Peep doll inside the driver’s compartment. Before spending endless hours 3D printing (and re-printing) his designs, [Jude] first modeled the Skunkmobile in card (using cardboard), a practice we’ve seen before, and are always in love with. He continually emphasized the form of his device was probably even more important than its function as capturing the essence as well as the “look and feel” of the Skunkmobile were critical design criteria. You can even see the skunk wagging its tail in all his demo videos. Prototyping in card gave [Jude] a good feel for his Skunkmobile and the designs translated pretty well to the 3D printed versions.

What really impressed us about [Jude’s] project is the incredible detail he provides for his entire design process from his backstory, to the initial prototypes, to the user testing, and, finally, to the realization of the final product. Remember, “We want the gory details!”

Continue reading “Documentation Is Hard, Let The SkunkWorks Project Show You How To Do It Well”

Overengineering A Smart Doorbell

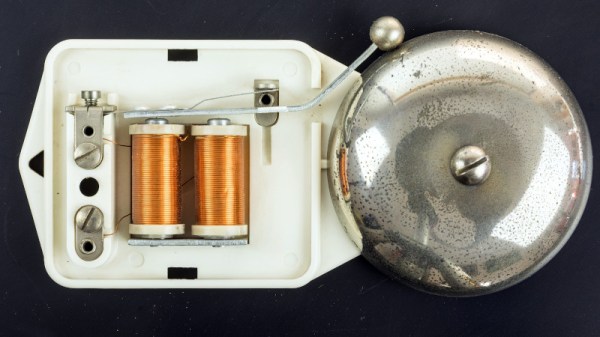
Fresh from the mediaeval splendour of the Belgian city of Gent, we bring you more from the Newline hacker conference organised by Hackerspace Gent. [Victor Sonck] works at the top of his house, and thus needed a doorbell notifier. His solution was unexpected, and as he admits over engineered, using machine learning on an audio stream from a microphone to detect the doorbell’s sound.

Having established that selling his soul to Amazon with a Ring doorbell wasn’t an appropriate solution, he next looked at his existing doorbell. Some of us might connect directly to its power to sense when the button was pressed, but we’re kinda glad he went for the overengineered route because it means we are treated to a run-down how machine learning works and how it can be applied to audio. The end result can sometimes be triggered by a spoon hitting a cereal plate, but since he was able to demonstrate it working we think it can be called a success. Should you wish to dive in further you can find more in his GitHub repository.

How would you overengineer a doorbell? Use GNU radio and filters? Or maybe a Rube Goldberg machine involving string and pulleys? As always, the comments are open.

Continue reading “Overengineering A Smart Doorbell”

Hackaday Links Column Banner

Hackaday Links: September 12, 2021

The last thing an astronaut or cosmonaut on the International Space Stations wants to hear from one of their crewmates is, “Do you smell plastic burning?” But that’s apparently what happened this week aboard the increasingly problematic spacecraft, as the burning smell and visible smoke spread from the Russian Zvezda module to the American side of town. The reports say it occurred while charging the station’s batteries, and we all know how dicey that can get. But apparently, the situation resolved itself somehow, as normal operations continued soon after the event. Between reports of cracks, air leaks, problems with attitude control, and even accusations of sabotage, the ISS is really starting to show its age.

Speaking of burning and batteries, normally a story about burning Tesla batteries wouldn’t raise our eyebrows much. But this story out of California introduces a potential failure mode for Tesla batteries that we hadn’t considered before. It seems a semi-truck with a load of Tesla batteries lost its brakes on Interstate 80 in the Sierra Nevada mountains and ended up flipping across the highway. Video from the scene shows the cargo, which looks like replacement batteries or perhaps batteries salvaged from wrecked cars, scattered across the highway on their shipping pallets. A fire was reported, but it’s not clear whether it was one of the batteries which had gotten compromised in the crash, or if it was something other than the batteries. Still, we hadn’t considered the potential for disaster while shipping batteries like that.

Attention all GNURadio fans — GRCon21 is rapidly approaching. Unlike most of the conferences over the last year and half, GRCon21 will actually be both live and online. We always love the post-conference dump of talks, which cover such a wide range of topics and really dive deeply into so many cool areas. We’re especially looking forward to the SETI talks, and we’re pleased to see our friend Hash, who was on the Hack Chat a while back, scheduled to talk about his smart-meter hacking efforts. The conference starts on September 20 and is being held in Charlotte, North Carolina, and virtually of course. If you attend, make sure to drop tips to your favorite talks in the tips line so we can share them with everyone.

We got a tip this week on a video about how 1/4-wave tuning stubs work. It’s a simple demonstration using a length of coax, a signal generator, and an oscilloscope to show how an unterminated feedline can reflect RF back to the transmitter, and how that can be used to build super-simple notch filters and impedance transformers. We love demos that make the mysteries of RF a little simpler — W2AEW’s videos come to mind, like this one on standing waves.

Continue reading “Hackaday Links: September 12, 2021”

Two hands on a book labeled "hardware crowdfunding"

Successfully Crowdfunded Hardware: Everything Behind The Scenes

Crowdfunding hardware has its own unique challenges, and [Uri Shaked] wrote a fascinating report that goes into excellent detail about his experience bringing a crowdfunded hardware project to life.

A skull-shaped PCB with two red eyes[Uri]’s project was The Skull CTF, an electronic hardware puzzle that came in the shape of a PCB skull, and his detailed look behind the scenes covers just about every angle, from original concept to final wrap-up, along with his thoughts and feedback at every stage. His project reached its funding goal, got manufactured and shipped, and in the end was a success.

[Uri] started with a working project, but beyond that was virtually a complete novice when it came to crowdfunding. He eventually settled on using Crowd Supply to make his idea happen, and his writeup explains in great detail every stage of that process, including dollar amounts. What’s great to see is that not only does [Uri] explain the steps and decisions involved, but explains the research that went into each, and how he feels each of them ended up working out.

The entire thing is worth a read, but [Uri] summarizes the experience of crowdfunding a hardware project thus: an excellent way to test out the demand for an idea and bring a product into existence, but be aware that unless a project is a runaway success it probably won’t be much of an income generator at that stage. It was a great learning experience, but involved a lot of time and effort on his part as well.

[Uri] really knows his stuff, and considering his skill at hunting down pesky bugs, it’s probably no surprise that this wasn’t his first hardware puzzle.

An Atari 800 XL, partially covered in battery residue

Massive Cleaning Effort Saves Acid-Drenched Atari

Anyone who’s ever had to deal with the aftermath of a leaking battery knows how much damage such a failure can cause. Degrading batteries leak corrosive chemicals that eat away PCB traces, clog up connectors and generally leave everything looking nasty. Getting your gadget working again usually calls for lots of scrubbing, followed by patiently tracing suspect connections and restoring any broken ones.

We doubt, however, that anyone has ever gone through as much effort as [Lee Smith] has on his Atari 800 XL. This example was listed on eBay in a severely damaged state, having been stored under an entire box of leaking batteries. [Lee] put in a bid and, to his own bemusement, won the auction. He was now the proud owner of a classic gaming machine which was covered in a thick brown crust of battery residue.

A first inspection showed that the damage was more than skin-deep: even inside the computer’s case it was one big mess of crusty brown junk. [Lee] first spent several hours on the plastic case, using different cleaning agents and an ultrasonic bath, and managed to get the case almost spotless again. The keyboard presented a larger challenge however: not only did it require thorough cleaning of every single switch and keycap, the keyboard’s matrix on the PCB had several connections missing, which had to be restored using bodge wires.

With the keyboard working again, [Lee] turned to the mainboard. This turned out to be an even greater challenge, with several components (including a few custom chips) damaged beyond repair. With the help of a few eBay replacements parts and (again) countless hours of scrubbing, the mainboard started to look healthy again. After a few tests, [Lee] felt confident enough to hook up the entire system and turn it on. And his efforts had paid off: the battered Atari dutifully displayed its BASIC prompt, ready for its second lease of life.

We’ve seen before what kind of damage a leaking battery can do to an Amiga, or faulty caps to an Xbox. But both of these seem minor inconveniences compared to what happened to this poor Atari. Thanks to [Simon] for the tip.

Continue reading “Massive Cleaning Effort Saves Acid-Drenched Atari”

Making A Car Key From A Ratcheting Wrench

Car keys these days are remarkably complex beasts. Covered in buttons and loaded with security transponders, they often cost hundreds of dollars to replace if you’re unlucky enough to lose them. However, back in the day, keys used to just be keys — a hunk of metal in a mechanical pattern to move some levers and open a door. Thus, you could reshape a wrench into a key for an old car if that was something you really wanted to do.

The concept is simple. Take a 12mm ratcheting wrench, and shape the flat section into a profile matching that of a key for an older car without any electronic security features. The first step is to cut down the shaft, before grinding it down to match the thickness and width of the original key.

The profile of the key is then drawn onto the surface, and a Dremel used with a cutting disc to create the requisite shape.  Finally, calipers are used to mark out the channels to allow the key to slide into the keyway, before these are also machined with the rotary tool.

Filing and polishing cleans up the final result to create a shiny, attractive ratchet wrench key. Even better, it does a great job of opening the car, too.

Similar machining techniques can be used to duplicate a key from just a photo (something I did back in 2019 to prank my friend). Alternatively, 3D printing can be great for reproducing even high-security keys. Video after the break.

Continue reading “Making A Car Key From A Ratcheting Wrench”

Measuring current draw of home shop tools

Using Homebrew Coils To Measure Mains Current, And Taking The Circuit Breaker Challenge

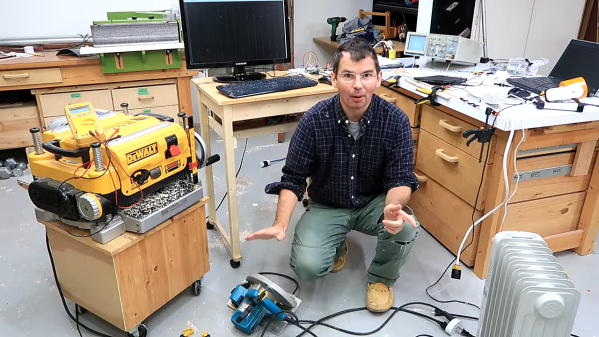
Like many hackers, [Matthias Wandel] has a penchant for measuring the world around him, and quantifying the goings-on in his home is a bit of a hobby. And so when it came time to sense the current flowing in the wires of his house, he did what any of us would do: he built his own current sensing system.

What’s that you say? Any sane hacker would buy something like a Kill-a-Watt meter, or even perhaps use commercially available current transformers? Perhaps, but then one wouldn’t exactly be hacking, would one? [Matthias] opted to roll his own sensors for quite practical reasons: commercial meters don’t quite have the response time to catch the start-up spikes he was interested in seeing, and clamp-on current transformers require splitting the jacket on the nonmetallic cabling used in most residential wiring — doing so tends to run afoul of building codes. So his sensors were simply coils of wire shaped to fit the outside of the NM cable, with a bit of filtering to provide a cleaner signal in the high-noise environment of a lot of switch-mode power supplies.

Fed through an ADC board into a Raspberry Pi, [Matthias]’ sensor system did a surprisingly good job of catching the start-up surge of some tools around the shop. That led to the entertaining “Circuit Breaker Challenge” part of the video below, wherein we learn just what it really takes to pop the breaker on a 15-Amp branch circuit. Spoiler alert: it’s a lot.

Speaking of staying safe with mains current, we’ve covered a little bit about how circuit protection works before. If you need a deeper dive into circuit breakers, we’ve got that too.

Continue reading “Using Homebrew Coils To Measure Mains Current, And Taking The Circuit Breaker Challenge”