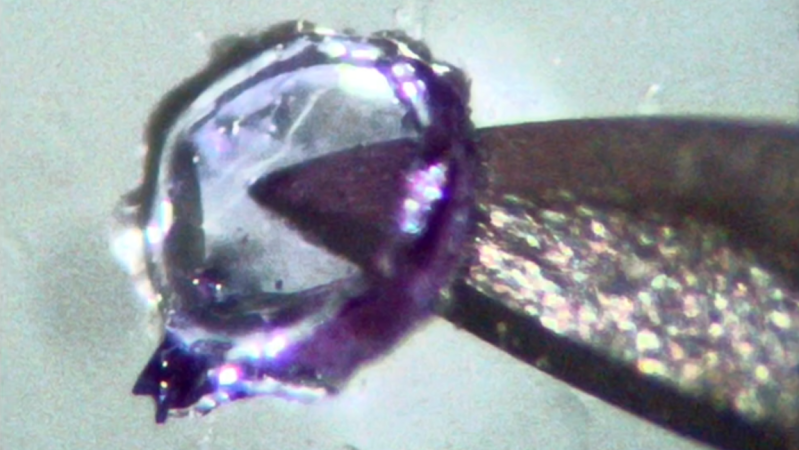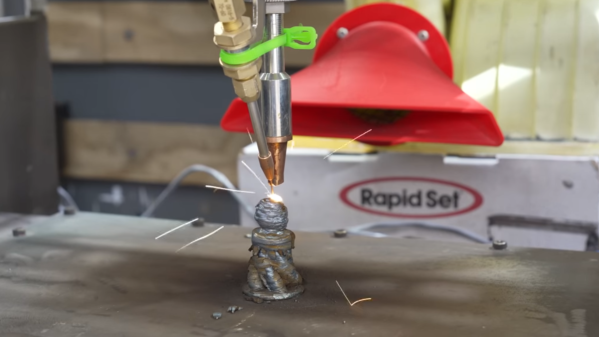
A bed of metal powder is visible through a green-tinted window. A fused metal pattern, roughly square, is visible, with one corner glowing white and throwing up sparks.

Printing In Metal With DIY SLM

An accessible 3D printer for metals has been the holy grail of amateur printer builders since at least the beginning of the RepRap project, but as tends to be the case with holy grails, it’s proven stubbornly elusive. If you have the resources to build it, though, it’s possible to replicate the professional approach with a selective laser melting (SLM) printer, such as the one [Travis Mitchell] built (this is a playlist of nine videos, but if you want to see the final results, the last video is embedded below).

Most of the playlist shows the process of physically constructing the machine, with only the last two videos getting into testing. The heart of the printer is a 500 Watt fiber laser and a galvo scan head, which account for most of the cost of the final machine. The print chamber has to be purged of oxygen with shielding gas, so [Travis] minimized the volume to reduce the amount of argon needed. The scan head therefore isn’t located in the chamber, but shines down into it through a window in the chamber’s roof. A set of repurposed industrial servo motors raises and lowers the two pistons which form the build plate and powder dispenser, and another servo drives the recoater blade which smooths on another layer of metal powder after each layer.

As with any 3D printer, getting good first-layer adhesion proved troublesome, since too much power caused the powder to melt and clump together, and too little could result in incomplete fusion. Making sure the laser was in focus improved things significantly, though heat management and consequent warping remained a challenge. The recoater blade was originally made out of printed plastic, with a silicone cord along the edge. Scraping along hot fused metal in the early tests damaged it, so [Travis] replaced it with a stainless steel blade, which gave much more consistent performance. The final results looked extremely promising, though [Travis] notes that there is still room for redesign and improvement.

This printer joins the very few other DIY SLM machines we’ve seen, though there is an amazingly broad range of other creative ideas for homemade metal printers, from electrochemical printers to those that use precise powder placement.

Continue reading “Printing In Metal With DIY SLM”

A tab-based terminal window is shown, with the label “brow6l – Hackaday.” The Hackaday website is visible in the upper part of the terminal screen, and in the lower part is a text display containing information about the website and interface information.

Terminal-Based Web Browsing With Modern Conveniences

Programmers hold to a wide spectrum of positions on software complexity, from the rare command-line purists to the much more common web app developers, and the two extremes rarely meet. One point of contact, though, might be [Jan Antos]’s Brow6el, which uses sixel graphics to display a fully graphical web browser within a terminal.

Behind the scenes, the Chromium Embedded Framework renders webpages headless, then Brow6el uses libsixel to convert the rendered output image to sixels, a simple kind of console-based graphics representation, which it then outputs to the terminal. It regularly re-renders the page to catch page updates and display them in real time, and it can send mouse or keyboard input back to the webpage. For more advanced work, it also has a JavaScript development console, and it’s possibly to manually inject scripts into rendered webpages, or inject them automatically using URL match patterns. Continue reading “Terminal-Based Web Browsing With Modern Conveniences”

A grey and blue coreXY 3D printer is shown, with a small camera in place of its hotend. On the print bed is a ChArUco pattern, a grid of square tiles containing alternating black fill and printed patterns.

Calibrating A Printer With Computer Vision And Precise Timing

[Dennis] of [Made by Dennis] has been building a Voron 0 for fun and education, and since this apparently wasn’t enough of a challenge, decided to add a number of scratch-built improvements and modifications along the way. In his latest video on the journey, he rigorously calibrated the printer’s motion system, including translation distances, the perpendicularity of the axes, and the bed’s position. The goal was to get better than 100-micrometer precision over a 100 mm range, and reaching this required detours into computer vision, clock synchronization, and linear algebra.

To correct for non-perpendicular or distorted axes, [Dennis] calculated a position correction matrix using a camera mounted to the toolhead and a ChArUco board on the print bed. Image recognition software can easily detect the corners of the ChArUco board tiles and identify their positions, and if the camera’s focal length is known, some simple trigonometry gives the camera’s position. By taking pictures at many different points, [Dennis] could calculate a correction matrix which maps the printhead’s reported position to its actual position.

Continue reading “Calibrating A Printer With Computer Vision And Precise Timing”

A browser window is shown, in which a web page is displaying a green trace of a square wave.

A Compact, Browser-Based ESP32 Oscilloscope

An oscilloscope is usually the most sensitive, and arguably most versatile, tool on a hacker’s workbench, often taking billions of samples per second to produce an accurate and informative representation of a signal. This vast processing power, however, often goes well beyond the needs of the signals in question, at which point it makes sense to use a less powerful and expensive device, such as [MatAtBread]’s ESP32 oscilloscope.

Continue reading “A Compact, Browser-Based ESP32 Oscilloscope”

A device within a vertical rectangular frame is shown, with a control box on the front and an LCD display. Within the frame, a grid of syringes is seen held upright beneath two parallel plates.

Building A Multi-Channel Pipette For Parallel Experimentation

One major reason for the high cost of developing new drugs and other chemicals is the sheer number of experiments involved; designing a single new drug can require synthesizing and testing hundreds or thousands of chemicals, and a promising compound will go through many stages of testing. At this scale, simply performing sequential experiments is wasteful, and it’s better to run tens or hundreds of experiments in parallel. A multi-channel pipette makes this significantly simpler by collecting and dispensing liquid into many vessels at once, but they’re, unfortunately, expensive. [Triggy], however, wanted to run his own experiments, so he built his own 96-channel multi-pipette for a fiftieth of the professional price.

The dispensing mechanism is built around an eight-by-twelve grid of syringes, which are held in place by one plate and have their plungers mounted to another plate, which is actuated by four stepper motors. The whole syringe mechanism needed to move vertically to let a multi-well plate be placed under the tips, so the lower plate is mounted to a set of parallel levers and gears. When [Triggy] manually lifts the lever, it raises the syringes and lets him insert or remove the multi-well. An aluminium extrusion frame encloses the entire mechanism, and some heat-shrink tubing lets pipette tips fit on the syringes.

[Triggy] had no particularly good way to test the multi-pipette’s accuracy, but the tests he could run indicated no problems. As a demonstration, he 3D-printed two plates with parallel channels, then filled the channels with different concentrations of watercolors. When the multi-pipette picked up water from each channel plate and combined them in the multi-well, it produced a smooth color gradient between the different wells. Similarly, the multi-pipette could let someone test 96 small variations on a single experiment at once. [Triggy]’s final cost was about $300, compared to $18,000 for a professional machine, though it’s worth considering the other reason medical development is expensive: precision and certifications. This machine was designed for home experiments and would require extensive testing before relying on it for anything critical.

Continue reading “Building A Multi-Channel Pipette For Parallel Experimentation”

A blue screen is visible, with an ASCII image of the text "Hello World" is displayed.

Designing A CPU For Native BASIC

Over the years there have been a few CPUs designed to directly run a high-level programming language, the most common approach being to build a physical manifestation of a portable code virtual machine. An example might be the experimental Java processors which implemented the JVM. Similarly, in 1976 Itty Bitty Computers released an implementation of Tiny BASIC which used a simple virtual machine, and to celebrate 50 years of Tiny BASIC, [Zoltan Pekic] designed a CPU that mirrors that VM.

The CPU was created within a Digilent Anvyl board, and the VHDL file is freely available. The microcode mapping ROM was generated by a microcode compiler, also written by [Zoltan]. The original design could execute all of the 40 instructions included in the reference implementation of Tiny BASIC; later iterations extended it a bit more. To benchmark its performance, [Zoltan] set the clock rate on the development board equal to those of various other retrocomputers, then compared the times each took to calculate the prime numbers under 1000 using the same Tiny BASIC program. The BASIC CPU outperformed all of them except for Digital Microsystems’ HEX29. Continue reading “Designing A CPU For Native BASIC”

Liberating AirPods With Bluetooth Spoofing

Apple’s AirPods can pair with their competitors’ devices and work as basic Bluetooth earbuds, but to no one’s surprise most of their really interesting features are reserved for Apple devices. What is surprising, though, is that simple Bluetooth device ID spoofing unlocks these features, a fact which [Kavish Devar] took advantage of to write LibrePods, an AirPods controller app for Android and Linux.

In particular, LibrePods lets you control noise reduction modes, use ear detection to pause and unpause audio, detect head gestures, reduce volume when the AirPods detect you’re speaking, work as configurable hearing aids, connect to two devices simultaneously, and configure a few other settings. The app needs an audiogram to let them work as hearing aids, and you’ll need an existing audiogram – creating an audiogram requires too much precision. Of particular interest to hackers, the app has a debug mode to send raw Bluetooth packets to the AirPods. Unfortunately, a bug in the Android Bluetooth stack means that LibrePods requires root on most devices.

This isn’t the first time we’ve seen a hack enable hearing aid functionality without official Apple approval. However, while we have some people alter the hardware, AirPorts can’t really be called hacker- or repair-friendly.

Thanks to [spiralbrain] for the tip!