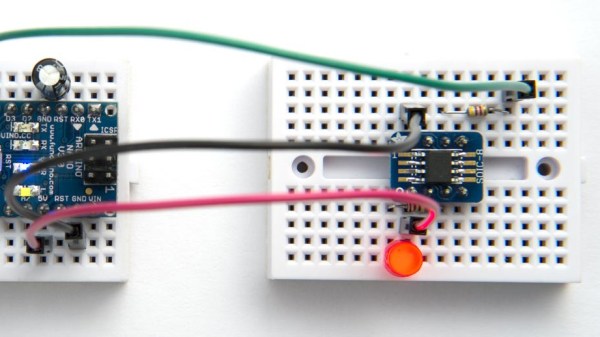
Showing a new generation ATTiny on an SMD breakout plugged into a breadboard, being programmed

Come Learn About New ATtiny Generations

As the chip shortage hit, a lot of the familiar ATtiny chips have become unavailable and overpriced, and it mostly stayed the same since then. If you ever searched for “ATtiny” on your favourite electronics component retailer website, however, you’d notice that there’s quite a few ATtiny chips in stock most of the time – just that they’re from a much newer generation than we commonly see, with incompatible pinouts, slightly different architecture and longer model numbers like 412 and 3227. [David Johnson-Davies] from [technoblogy] is here to clarify things, and provide a summary of what the new ATtiny generations have to offer.

In 2019, he posted about 0- and 1-series ATtiny chips, comparing them to the ATtiny series we knew, decyphering the part numbering scheme for us, and providing a comparison table. Now, he’s returned to tell us about the 2- series ATtiny chips, merging the comparison tables together so that you can quickly evaluate available parts by their ROM/RAM size and the SMD package used. He also describes which peripherals are available on which series, as well as nuances in peripheral operation between the three generations. In the end, he reminds us of a simple way to program all these new parts – as it stands, you only need a USB-UART adapter and a 4.7K resistor.

Over the last decades, we’ve seen plenty of inspiring ATtiny projects – squeezing out everything we could out of 5 GPIOs, or slightly more for larger-package ATtiny chips. [David] has been setting an example for us, bringing projects like this function generator, this continuity tester, or an IR receiver with an OLED screen for diagnostics – all with an ATtiny85. It’s not the just pin count that’s a constraint, but the RAM and flash amounts as well – nevertheless, people have fit machine learning and an entire graphics stack into these chips before. If you’re stuck at home unable to do anything, like many of us were during lockdowns, you can always breadboard an ATtiny and see just how much you can get done with it.

A display with the magic mirror webpage shown running on it

Magic Mirror – On A Low CPU Budget

For quite a few hackers out there, it’s still hard to find a decently powerful Raspberry Pi for a non-eye-watering price. [Rupin Chheda] wanted to build a magic mirror with a web-based frontend, and a modern enough Raspberry Pi would’ve worked just fine. Sadly, all he could get was single-1 GHz-core 512MB-RAM Zero W boards, which he found unable to run Chromium well enough given the stock Raspbian Desktop install, let alone a webserver alongside it. Not to give up, [Rupin] gives us a step-by-step breakdown on creating a low-footprint Raspbian install showing a single webpage.

Starting with Raspbian Lite, a distribution that doesn’t ship with any desktop features by default, he shows how to equip it with a minimal GUI – no desktop environment needed, just an X server with the OpenBox window manager, as you don’t need more for a kiosk mode application. In place of Chromium, you can install Midori, which is a lean browser that works quite well in single-website mode, and [Rupin] shows you how to make it autostart, as well as the little quirks that make sure your display doesn’t go to sleep. The webserver runs in Heroku cloud, but we wager that, with such a minimal install, it could as well run on the device itself.

With these instructions, you can easily build a low-power single-page browser when all you have is a fairly basic Raspberry Pi board. Of course, magic mirrors are a well-researched topic by now, but you can always put a new spin on an old topic, like in this this retro-tv-based build. You don’t have to build a magic mirror to make use of this hack, either – build a recipe kiosk!

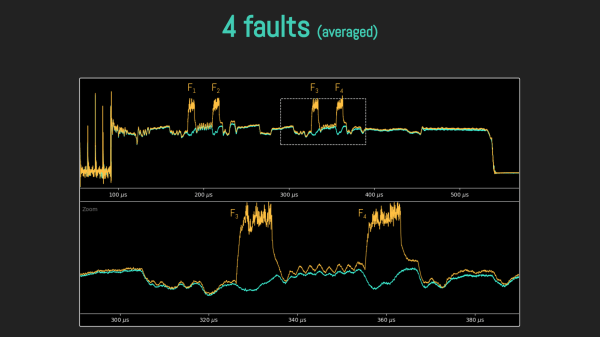
A slide from the presentation, showing the power trace of the chip, while it's being pulsed with the laser at various stages of execution

Defeating A Cryptoprocessor With Laser Beams

Cryptographic coprocessors are nice, for the most part. These are small chips you connect over I2C or One-Wire, with a whole bunch of cryptographic features implemented. They can hash data, securely store an encryption key and do internal encryption/decryption with it, sign data or validate signatures, and generate decent random numbers – all things that you might not want to do in firmware on your MCU, with the range of attacks you’d have to defend it against. Theoretically, this is great, but that moves the attack to the cryptographic coprocessor.

In this BlackHat presentation (slides), [Olivier Heriveaux] talks about how his team was tasked with investigating the security of the Coldcard cryptocurrency wallet. This wallet stores your private keys inside of an ATECC608A chip, in a secure area only unlocked once you enter your PIN. The team had already encountered the ATECC608A’s predecessor, the ATECC508A, in a different scenario, and that one gave up its secrets eventually. This time, could they break into the vault and leave with a bag full of Bitcoins?

Lacking a vault door to drill, they used a powerful laser, delidding the IC and pulsing different areas of it with the beam. How do you know when exactly to pulse? For that, they took power consumption traces of the chip, which, given enough tries and some signal averaging, let them make educated guesses on how the chip’s firmware went through the unlock command processing stages. We won’t spoil the video for you, but if you’re interested in power analysis and laser glitching, it’s well worth 30 minutes of your time.

You might think it’s good that we have these chips to work with – however, they’re not that hobbyist-friendly, as proper documentation is scarce for security-through-obscurity reasons. Another downside is that, inevitably, we’ll encounter them being used to thwart repair and reverse-engineering. However, if you wanted to explore what a cryptographic coprocessor brings you, you can get an ESP32 module with the ATECC608A inside, we’ve seen this chip put into an IoT-enabled wearable ECG project, and even a Nokia-shell LoRa mesh phone!

Continue reading “Defeating A Cryptoprocessor With Laser Beams” →

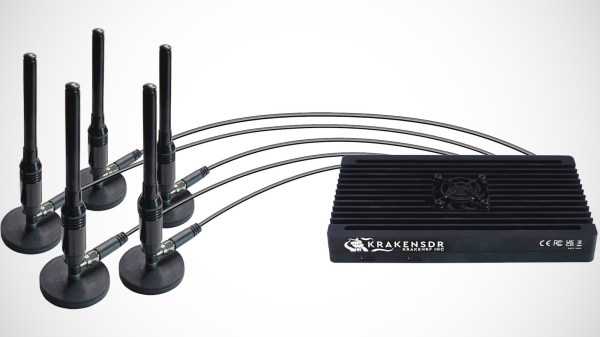
The KrakenSDR in its metal case, with five small antennas connected to it

Open-Source Passive Radar Taken Down For Regulatory Reasons

Open-source technology brings a world that laws and regulations are not quite prepared for. As a result, every now and then, open projects need to work around governmental regulations. In today’s news, KrakenRF team has stumbled into an arms-trafficing legal roadblock for their KrakenSDR-based passive radar code, and is currently figuring it out. There’s no indication that there’s been any legal action from the USA government – the team’s being proactive, as fas as we’re told.

KrakenSDR hardware, to simplify it a lot, is five RTL-SDRs on one PCB – with plenty of work put in to do it the right way. It gets you much further than a few dongles – there’s shielded case, suitable connectors, reliable power distribution, a proper USB hub, and importantly, receiver synchronization hardware. Naturally, there’s nice things you can build with such a hefty package – one of them is passive radar, which was a prominent selling point on both KrakenSDR’s pre-launch page back in 2021, and on their crowdfunding page just a week ago. How does that work?

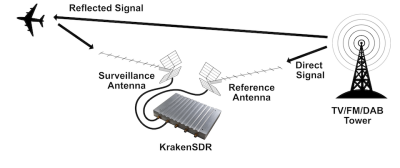
There’s RF emissions floating around you in the air, unless you’re at sea or in the desert. Whether it’s airplane transponders, cell towers, or a crappy switch-mode PSU, the radiowaves emitted interact with objects all around you. If you have multiple receivers with directional antennas, you can catch waves being reflected from some object, compare the wave reflected wave to the wave received from the initial source, and determine the object’s properties like location and speed. If you’d like to know more, IEEE Spectrum has covered this topic just a week ago, and the previously-deleted KrakenSDR wiki page has more details for you to learn from.
Through exposure in IEEE Spectrum, the KrakenSDR work has received plenty of attention and comments. And this is where the International Traffic in Arms Regulations (ITAR) laws come in. We’re not lawyers, but it does look like passive radar is on the list. Today, the code repository and the documentation pages are scrubbed clean while the team is talking to legal experts.

Dealing with this is intimidating, and we wish them luck in clearing this with legal. In the bad old days, certain encryption algorithms were famously in scope, which appeared absolutely ridiculous to us at the time. The laws did eventually change to better reflect reality, but the wheels of justice turn slowly.

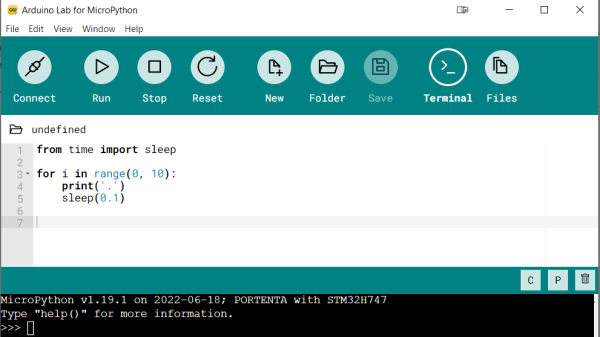
Screenshot of the Arduino Lab for MicroPython

Arduino Brings A MicroPython IDE

Both Arduino and MicroPython are giants when it comes to the electronics education area, and each one of them represents something you can’t pass up on as an educator. Arduino offers you a broad ecosystem of cheap hardware with a beginner-friendly IDE, helped by forum posts explaining every single problem that you could and will stumble upon. MicroPython, on the other hand, offers a powerful programming environment ripe for experimentation, and doesn’t unleash a machine gun fire of triangle brackets if you try to parse JSON slightly incorrectly. They look like a match made in heaven, and today, from heaven descends the Arduino Lab for MicroPython.

This is not an Arduino IDE extension – it’s a separate Arduino IDE-shaped app that does MicroPython editing and uploads code to your board from a friendly environment. It works over a serial port, and as such, the venerable ESP8266-based boards shouldn’t be be left out – it even offers file manager capabilities! Arduino states that this is an experimental effort – it doesn’t yet have syntax checks, for instance, and no promises are made. That said, it already is a wonderful MicroPython IDE for beginner purposes, and absolutely a move in the right direction. Want to try? Download it here, there’s even a Linux build!

High-level languages let you build projects faster – perfect fit for someone getting into microcontrollers. Hopefully, what follows is a MicroPython library manager and repository! We’ve first tried out MicroPython in 2016, and it’s come a long way since then – we’ve seen quite a few beginner-friendly MicroPython intros, from a gaming handheld programming course, to a bipedal robot programming MicroPython exploration. And, of course, you can bring your C libraries with you.

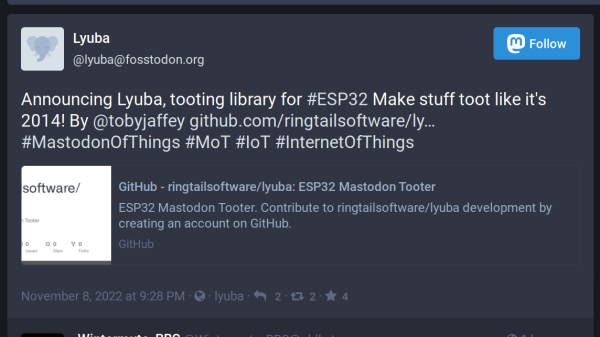
The demo toot screenshot, showing a text-only message sent from the ESP32 using the library.

Moved Off Twitter? Make Your ESP32 Toot

Since Twitter was officially taken over by Elon Musk a few days ago, there’s been significant staff cuts, a stream of questionable decisions, and uncertainty about the social media platform’s future. So it’s little surprise that a notable number of people, those in the tech and hacker scenes in particular, have decided to move over to (or at least bridge their accounts with) the distributed and open source Mastodon service.

Of course, the hacks would follow closely, and [Toby] shares a simple ESP32-based Mastodon client library for us to start with. Instead of “tweets”, messages on Mastodon instances are called “toots”, in line with the platform’s mammoth-like mascot. The library, called Luyba, is able to send toots and includes a demo firmware. Built using C++ and with support for Platform.IO, it should fit into quite a few projects out there, letting you easily send toots to whichever instance you find your home, as the library-aided demo toot shows.

What could you do with such a library on your MCU? Turns out, quite a few fun things – a home automation interface, a critter trap, an online BBC Basic interpreter, or, given image support, a camera that tweets whatever it’s pointed at. There’s quite a bit of fun hackers can have given a micro-blogging service API access and a bit of code that works with it. That said, for all the good that Twitter brought us over the years, there’s a lot that Mastodon can easily do better, between easily game-able “Trending” sidebar, bias found in auto-cropping algorithms and disarrayed internal security policies.

Photo of the back of a slingbox appliance, with ports shown and arrows going to them describing what each of the ports does.

Slingbox Getting Bricked – You Have Less Than 24 Hours

The Slingbox devices used to let you catch up with the programming on your TV when you weren’t near it, using your Internet-connected mobile device. As cable TV became less popular, their business model faded away, and in 2020, they scheduled a service shutdown for November 9th, 2022. If you own a Slingbox, it’s getting bricked tomorrow – for those reading this in EU, that’ll be today, even. Do you have a Slingbox? You might still be able to repurpose it, let’s say, for local media streaming – but only if you waste no time.

[Gerry Dubois] has been developing the “Slinger” software for the past few months, a small app you run locally that proxies commands and video for your Slingbox, thanks to reverse-engineering communications with Slingbox servers. However, it needs a “hardware password” alphanumeric string, that you need to get from the Slingbox service web interface – which is to be promptly shut down. If you think you might have a use for what’s essentially a network-connected analog/digital video capture card with decent hardware, the GitHub repo has a lively discussion tab for any questions you might have.

One one hand, Slingbox shouldn’t be bricking the devices in a way that requires you act fast – perhaps, releasing a final update that makes the device hacker-friendly, like O2 did with their Joggler appliance back in the day, publishing the hardware documentation, or at least setting up a service up that lets anyone retrieve their hardware password indefinitely. On the other hand, at least they gave us two years’ notice, something less than usual – the amount of time between bricking and an announcement can even be a negative number. For those of us stuck with no operational device, a hardware exploration might be in order – for instance, we’ve torn down the Sling Adapter and even ran simple custom code on it!