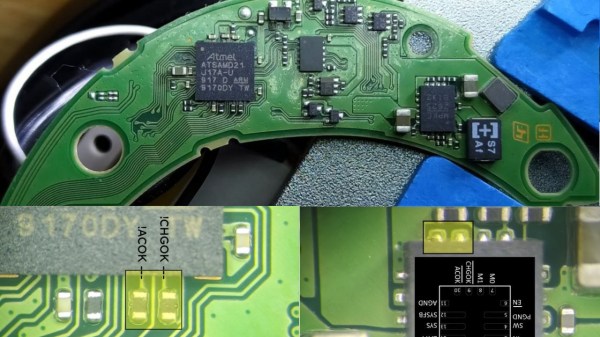
A collage of three images. On top is the main PCB of the headphones, with a charger IC and the main MCU. On the bottom left, it shows ACOK and EN signals going to pullup resistors near the MCU. On bottom right, it shows the charger chip with its pinout overlaying it, highlighting the pads to be probed and later cut.

One Hacker’s Battle To Slightly Improve A Sadistic Sony Headset

One thing you won’t read in reviews of pricey Sony WH-1000XM3 headphones – if you choose them, you’re going to find yourself in a one-sided abusive relationship. A button press or low-battery notification makes the headphones scream at you, ignoring the actual sound volume of what you’re currently listening to. Once they’re discharged, they suddenly emit loud noises, lecture you about how the battery is low, then shut down. Oh, and you can’t use them as they’re charging – if your voicecall lasts longer than expected, you might find yourself being shouted at and forced to fumble around with wires, silently pleading for call participants to wait while you change over to a different headset.
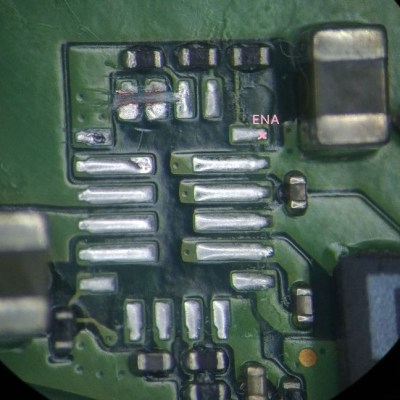
On-PCB footprint for the IC, with two pads carefully cut in half as mentioned in the article[MisterHW] decided to dig in and figure out how to work around at least some of the shortcomings. Naturally, the “no charge while using” limit looked like low-hanging fruit, and a hefty usability improvement too – plus, he suspected the charge cutoff to be masking noise issues already abundant on these headphones. Some painful disassembly later, he was inspecting the charger IC , the MP2625, responsible for power management. Its signals were connected to the MCU using via-in-pad – and some pads had to be cut in half to disconnect the vias.

However, the laborious pad cutting and subsequent careful soldering didn’t turn out to be fruitful. Even with external control of the output inhibition pins, the shutoff still continued – something affected the circuit, whether it was VBUS detection, some other unnoticed via-connected pins on the charger, or sensing on D+/D-. About to run out of life force for this mod, [MisterHW] added a Qi charging circuit, powering a TP4056 wired in parallel with the MP2625. The mod, dubbed HW-1000XM3, made these headphones all that more reliable and less annoying – charger and MCU none the wiser.

Now, all that’s needed to charge these headphones is to slap a magnetic charger coil onto them, and it doesn’t interfere with voicecalls as much as the screaming and forced shutoffs do. Hopefully, Sony eventually learns to test their headphones by having humans use them – it’s far from the only gripes with this lineup, after all. We also hope that the voice notifications will be conquered eventually – this summer, we’ve seen a hacker firmware mod a Bluetooth speaker to make the sounds more pleasant. If your headphones are based on a relatively popular module, repurposing them might be even easier than that!

All About USB-C: Connector Mechanics

There’s two cases when hackers have to think about USB-C connector mechanics. The first is when a USB-C connector physically breaks, and the second is when we need to put a connector on our own board. Let’s go through both of them.

Clean That Connector

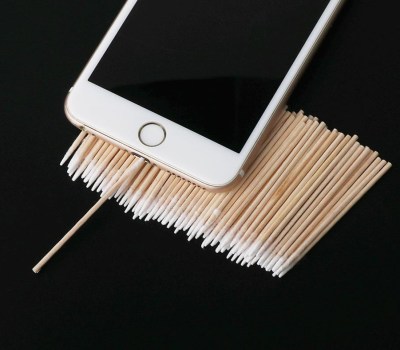
What if a socket on your phone or laptop fails? First off, it could be due to dust or debris. There’s swabs you can buy to clean a USB-C connector; perhaps adding some isopropyl alcohol or other cleaning-suitable liquids, you can get to a “good enough” state. You can also reflow pins on your connector, equipped with hot air or a sharp soldering iron tip, as well as some flux – when it comes to mechanical failures, this tends to remedy them, even for a short period of time.
How could a connector fail, exactly? Well, one of the pins could break off inside the plastic, or just get too dirty to make contact. Consider a device with a USB-C charging and data socket, with USB 2.0 but without high-speed pairs – which is to say, sadly, the majority of the phones out there. Try plugging it into a USB-A charger using a USB-A to USB-C cable. Does it charge, even if slowly? Then, your VBUS pins are okay.

Plug it into a Type-C charger using a Type-C cable, and now the CC pins are involved. Does it charge in both orientations? Then both of your CC pins are okay. Does it charge in only one orientation? One of the CC pins has to be busted. Then, you can check USB 2.0 pins, used for data transfer and legacy charging. Plug the phone into a computer using a USB-A to USB-C cable. Does it enumerate as a device? Does it enumerate in both orientations? If not, you might want to clean D- and D+ pins specifically, maybe even both sets. Continue reading “All About USB-C: Connector Mechanics” →

All About USB-C: Cable Types

USB-C cables and connectors: these are controversial topics, and rightfully so – I don’t want to pull any punches. I will also show you that things don’t have to be that bad for you, as long as you’re willing to apply a few tricks and adjust your expectations.

Wild West of Wiring

You might have a bunch of USB-C cables, and they all might look exactly the same, but you’ve likely experienced that they’re not the same internally, and often there’s not a label in sight. Yes, it’s pretty bad, and one could argue it’s getting worse.

I’d like to clarify that I’m only talking about USB C male – USB C male cables here. While cables like USB-A to USB-C are popular, they are quite simple; you get USB 2.0 or USB 3.0 data and 2 A of current at most, and the USB-C plug is usually hardwired as “host, will supply five volts”, which is defined by a pullup resistor. Also, while cables like “Type-C to DisplayPort” might look like cables at a glance, they are adapters with a meaningful amount of active circuitry in them.

Purely following the specification, there used to be six types of USB-C to USB-C cables out there. Then, it became eight. Now, I’m afraid, there’s twelve of them, purely following the spec, and there’s way more when counting all the out-of-spec cables. Good news is – for most of the time, majority of these cables will be suitable for simple tasks like charging and data transfer, and situations where you need a very specific cable are going to be rare enough. Still, let’s go through it, and you’ll see that they’re easier to tell apart than it might look. Continue reading “All About USB-C: Cable Types” →

All About USB-C: Introduction For Hackers

We’ve now had at least five years of USB-C ports in our devices. It’s a standard that many manufacturers and hackers can get behind. Initially, there was plenty of confusion about what we’d actually encounter out there, and manufacturer-induced aberrations have put some people off. However, USB-C is here to stay, and I’d like to show you how USB-C actually gets used out there, what you can expect out of it as a power user, and what you can get out of it as a hobbyist.

Modern devices have a set of common needs – they need a power input, or a power output, sometimes both, typically a USB2 connection, and often some higher-speed connectivity like a display output/input or USB 3. USB-C is an interface that aims to be able to take care of all of those. Everything aforementioned is optional, which is a blessing and a curse, but you can quickly learn to distinguish what to expect out of a device based on how it looks; if ever in doubt, I’d like to show you how to check.

Continue reading “All About USB-C: Introduction For Hackers” →

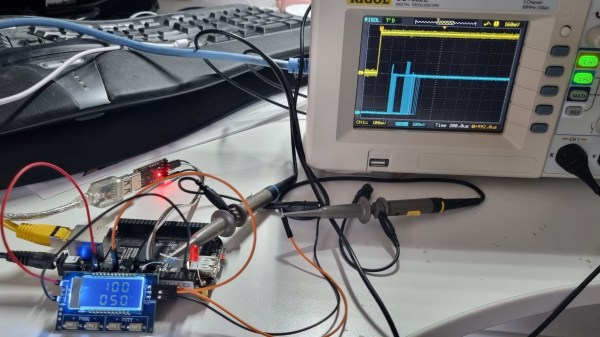
Showing the scope screen and the BeagleBone setup side by side, with GPIO input and output traces shown on the scope screen.

How Realtime Is Your Kernel? Scope A GPIO To Find Out

When debugging something as involved as kernel scheduler timings, you would typically use one of the software-based debugging mechanisms available. However, in cases when software is close to bare metal, you don’t always need to do that. Instead, you can output a signal to a GPIO, and then use a logic analyzer or a scope to measure signal change timing – which is what [Albert David] did when evaluating Linux kernel’s PREEMPT_RT realtime operation patches.

When you reach for a realtime kernel, latency is what you care about – realtime means that for everything you do, you need to get a response within a certain (hopefully very short) interval. [Albert] wrote a program that reads a changing GPIO input and immediately writes the new state back, and scoped both of the signals to figure out the latency of of the real-time patched kernel as it processes the writes. Overlaying all the incoming and outgoing signals on the same scope screen, you can quickly determine just how suitable a scheduler is when it comes to getting an acceptable response times, and [Albert] also provides a ready-to-go BeagleBone image you can use for your own experiments, or say, in an educational environment.

What could you use this for? A lot of hobbyists use realtime kernels on Linux when building CNC machine controllers and robots, where things like motor control put tight constraints on how quickly a decision in your software is translated into real-world consequences, and if this sounds up your valley, check out this Linux real-time task tutorial from [Andreas]. If things get way too intense for a multi-tasking system like Linux, you might want to use a RTOS to begin with, and we have a guide on that for you, too.

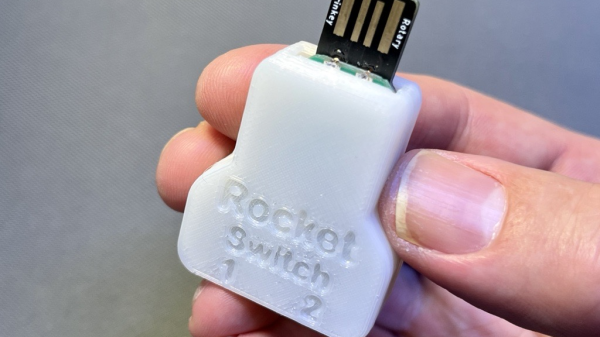
The fully assembled RocketSwitch, with a 3D printed case on it and a USB-A connector sticking out, being held in someone's hand.

Rocket Switch – Accessibility Done With Elegance

Quite a few makers try and create devices helpful to others – today’s hack, Rocket Switch, is a lovely example of that. It’s a design by [Neil Squire] of [Makers Making Change], with a PCB that plugs onto an Adafruit Rotary Trinkey, soldering onto its exposed pads, equipping it with two headphone jacks connected to GPIOs. This is a simple design – only two headphone jacks and resistors, complete with a 3D printed case. The value is not as much in its construction, but more in what the Rocket Switch provides to its users.

This is an accessibility-enabling controller, a USB HID device which interfaces to a wide variety of headphone-jack-connectable switches. With this device, someone unable to use a computer mouse can use two tactile buttons to control their computer, either by imitating mouse clicks or by sending keypresses into accessibility software equipped a control flow for such two-switch arrangements.

Everything is open-source, and there’s an impressive amount of documentation – for 3D printing, ordering, usage, design choice explanations, and of course, a picture-peppered 15-page tutorial PDF with detailed assembly instructions for anyone who might need a Rocket Switch. Plus, [Makers Making Change] created a page where both people in need and makers with some free time can sign up to exchange these devices. It’s not the first time we see a design like this – perhaps the most famous example is Microsoft’s Xbox Adaptive Controller, something that we’ve seen a dad use to build an entertainment platform for his daughter.

Continue reading “Rocket Switch – Accessibility Done With Elegance” →

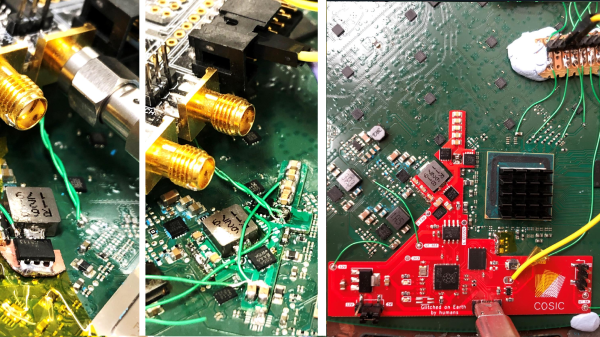
side by side, showing hardware experiments with capacitor gating through FETs, an initial revision of the modchip board with some fixes, and a newer, final, clean revision.

A Modchip To Root Starlink User Terminals Through Voltage Glitching

A modchip is a small PCB that mounts directly on a larger board, tapping into points on that board to make it do something it wasn’t meant to do. We’ve typically seen modchips used with gaming consoles of yore, bypassing DRM protections in a way that a software hacks couldn’t quite do. As software complexity and therefore attack surface increased on newer consoles, software hacks have taken the stage. However, on more integrated pieces of hardware, we’ll still want to return to the old methods – and that’s what this modchip-based hack of a Starlink terminal brings us.

[Lennert Wouters]’ team has been poking and prodding at the Starlink User Terminal, trying to get root access, and needed to bypass the ARM Trusted Firmware boot-time integrity checks. The terminal’s PCB is satellite-dish-sized, so things like laser fault injection are hard to set up – hence, they went the voltage injection route. Much poking and prodding later, they developed a way to reliably glitch the CPU into verifying a faulty firmware, and got to a root shell – the journey described in a BlackHat talk embedded below. Continue reading “A Modchip To Root Starlink User Terminals Through Voltage Glitching” →