New Part Day: Very Cheap LIDAR

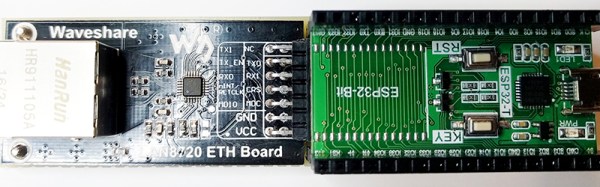
Self-driving cars are, apparently, the next big thing. This thought is predicated on advancements in machine vision and cheaper, better sensors. For the machine vision part of the equation, Nvidia, Intel, and Google are putting out some interesting bits of hardware. The sensors, though? We’re going to need LIDAR, better distance sensors, more capable CAN bus dongles, and the equipment to tie it all together.

This is the cheapest LIDAR we’ve ever seen. The RPLIDAR is a new product from Seeed Studios, and it’s an affordable LIDAR for everyone. $400 USD gets you one module, and bizarrely $358 USD gets you two modules. Don’t ask questions — this price point was unheard of a mere five years ago.

Basically, this LIDAR unit is a spinning module connected to a motor via a belt. A laser range finder is hidden in the spinny bits and connected to a UART and USB interface through a slip ring. Mount this LIDAR unit on a robot, apply power, and the spinny bit does its thing at about 400-500 RPM. The tata that comes out includes distance (in millimeters), bearing (in units of degrees), quality of the measurement, and a start flag once every time the head makes a revolution. If you’ve never converted polar to cartesian coordinates, this is a great place to start.

Although self-driving cars and selfie drones are the future, this part is probably unsuitable for any project with sufficient mass or velocity. The scanning range of this LIDAR is only about 6 meters and insufficient for retrofitting a Toyota Camry with artificial intelligence. That said, this is a cheap LIDAR that opens the door to a lot of experimentation ranging from small robots to recreating that one Radiohead video.

A Simple, Easy To Use ESP32 Dev Board

The ESP32 is Espressif’s follow-up to their extraordinarily popular ESP8266 WiFi chip. It has a dual-core, 32-bit processor, WiFi, Bluetooth, ADCs, DACs, CAN, a Hall effect sensor, an Ethernet MAC, and a whole bunch of other goodies that make this chip the brains for the Internet of Everything. Everyone has been able to simply buy an ESP32 for a few months now, but the Hackaday tip line isn’t exactly overflowing with projects and products built around this wonderchip. Perhaps we need an ESP32 dev board or something.

The Hornbill is the latest crowdfunding campaign from CrowdSupply. It’s an ESP32 dev board, packed with the latest goodies, a single cell LiPo charger, and a USB to serial chip that will probably work with most operating systems. The Hornbill comes in two varieties, a breadboardable module, with a breakout board that includes an SD card slot, sensors, an RGB LED, and a bunch of prototyping space. The second version is something like an Adafruit Flora with big pads for alligator clips.

While this isn’t the first ESP32 breakout we’ve seen — Adafruit, Sparkfun, and a hundred factories in China are pumping boards with this chip out — it is a very easy and inexpensive way to get into the ESP32 ecosystem.

Flying The First Open Source Satellite

The Libre Space Foundation is an organization dedicated to the development of libre space hardware. It was born from the SatNOGS project — the winners of the first Hackaday Prize — and now this foundation is in space. The Libre Space Foundation hitched a ride on the Orbital ATK launch yesterday, and right now their completely Open Source cube sat is on its way to the International Space Station.

The cube sat in question is UPSat, a 2U cubesat that is completely Open Source. Everything from the chassis to the firmware is completely Open, with all the source files hosted on GitHub.

UPSat is currently on its way to the International Space Station stowed in an Orbital ATK Cygnus cargo spacecraft. From here, the UPSat will be unloaded by members of the current ISS expedition and deployed with help from NanoRacks. Basically, the first Open Source satellite will be tossed overboard from the International Space Station. If you want to listen in on the data UPSat is beaming down, build a SatNOGS ground station and tune into 435.765 MHz. With a good antenna, you should be able to hear it when the ISS is in the sky, or a few times a week.

You can check out the launch of the Cygnus the UPSat is flying on in the video below. NASA also recorded a 360° video from the launch pad that unfortunately cuts out in the first few seconds after launch.

Continue reading “Flying The First Open Source Satellite”

Call For Hack Chat Hosts

Every week Hackaday.io features an AMA of sorts. This is the Hack Chat, a chatroom where we sit down with the best in the business to talk about manufacturing techniques, engineering, and how to build the best hardware around. Over the last few months, we’ve hosted a few hardware celebrities, from [Sprite_TM] talking about the ESP32, [Lady Ada] and MicroPython, [Roger Thornton] of Raspberry Pi discussing how to build everyone’s favorite Linux computer, [Samy Kamkar] talking about reverse engineering, and heard [bunnie’s] take on making and breaking hardware.

Now we’re looking for new co-hosts to lead a discussion and be the expert in the room. If you have the skills, we want to hear from you.

We’re looking for experts to lead a discussion on what they’re doing. If you have a new hardware product and want to share the story of taking it to production while getting some feedback from the Hackaday community, this is the place to do it. We’re looking for a wide range of people who will allow us to pick their brains. If you’ve ever designed a 16-layer PCB, we want to know how (and why) you did it. If you’re into building robotics, we want to hear from you. If you’re an embedded systems wizard, this is your time to shine.

If you want to get in on this, send us an email. We’re doing one Hack Chat a week, every Friday, sometime around noon, Pacific time. This is a great opportunity for you to share what you know with one of the best hardware communities on the Internet. It’s also great practice if you’re thinking about presenting at the Hackaday SuperConference in November.

This Week: How do Magnets Work Anyway?

Do you know how magnets work? Of course you don’t, nobody does. But one of the people with the deepest knowledge on the topic is Jeremy Chan who is a Prototype Engineer at Nano Magnetics Ltd. This Friday at noon PST Jeremy leads a Hack Chat on magnetism.

What is there to talk about? Jeremy will cover how magnets are manufactured and magnetized. He’ll cover the different grades of magnets, and the different magnetic sensing mechanisms. He’ll also go into some of the most interesting magnetic phenomenon. How often do you get to hang out with a magnet expert? See you this Friday!

Discontinued Nintendo Consoles And Raspberry Pis

Nintendo has discontinued a Classic gaming console. It’s a pity, yes, but with the release of Nintendo’s new gaming console, they probably have bigger fish to fry. That doesn’t mean these discontinued Nintendo consoles will die a slow, miserable death locked away in a closet; at least one of them will live on with the heart of a Raspberry Pi.

This is a project [Liam] has been working on since 2012, just after he got the first edition of the Raspberry Pi. While some people were figuring out how to stuff the Pi inside a Nintendo Entertainment System or a Super Nintendo Entertainment System, [Liam] decided to embed the Pi inside a console of a more recent vintage: the Nintendo GameCube.

The first phase of this project was simply to get the Pi running inside the enclosure of the non-working GameCube he picked up. The power supply in this console was well designed, and after a quick perusal through some online documentation, [Liam] found a stable 5V with enough amps to power the Pi. After ripping out the internals of this console with the help of a quickly hacked together ‘Nintendo screwdriver’, [Liam] had a perfectly functional Pi enclosed in a Nintendo chassis.

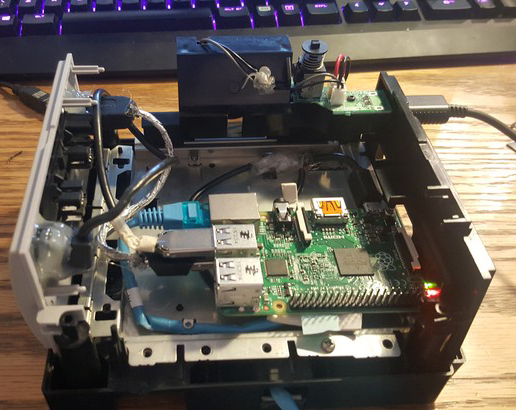
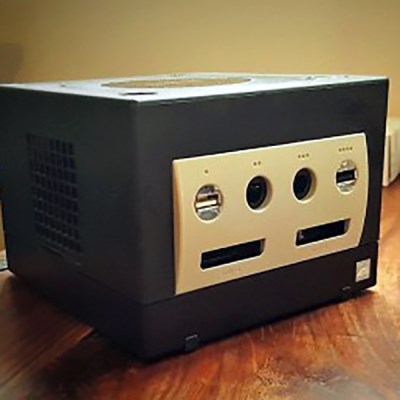
Time marches on, and after a while, the Raspberry Pi 2 was released. By this time, retro emulation was hitting the big time, and [Liam] decided it was time for an upgrade. He disassembled this Nintendo console again, routed new wires and inputs to the original controller ports, and used a Dremel to route a few holes for the HDMI and SD card slot.

With the addition of a few SNES-inspired USB controllers, RetroPi, and a few ROMs, [Liam] has a wonderful console full of classic emulation goodness, packaged in an enclosure Nintendo isn’t making any more.

Enabling Ethernet On The ESP32

The ESP32 is the latest and greatest wonderchip from Espressif. It’s a 32-bit, dual-core chip with WiFi, Bluetooth, and tons of peripherals such as CAN and Ethernet. For most of these peripherals, Espressif already has a few bits of example code, but [Frank Sautter] didn’t like the Ethernet implementation. The ‘stock’ code calls for a TLK110 Ethernet PHY, but that’s an expensive chip when bought in quantity one. A better chip would be the LAN8720, so [Frank] built a board to enable Ethernet on the ESP32 with this chip.

The ESP32 only needs a few components to wire it into an Ethernet network. Just a few resistors, capacitors, and an RJ45 jack will take care of most of the work, but because he’s taking the Ethernet ‘shield’ route, he needs to add his own Ethernet PHY. The Waveshare LAN8720 is the chip for this, but there’s an issue with the pin configuration of the ESP32. GPIO0 on the ESP32 has two functions — the first is pulling it low during startup for serial programming, and the second is the clock input for the EMAC function block. Some bit of circuitry must be devised to allow for both conditions to enable Ethernet on the ESP32.

[Frank]’s solution is to add a few pull-up and pull-down resistors to a breakout board, and use an unused GPIO pin to switch GPIO0 high during startup, but allows a crystal to grab it a bit later. It’s a hack, certainly, but it does allow for some much cheaper chips to be used to give the ESP32 Ethernet.

Electronifying A Horror Fraught Hydraulic Press

[Josh] is replacing the springs in his car’s suspension. He wanted to know the travel rates of these springs, but apparently, this is a closely guarded trade secret in the industry. One company did manage to publish the spring rates, but they weren’t believable. Instead of taking this company’s word, [Josh] built a spring tester.

The theory behind a spring tester is pretty simple: apply a force to a spring, measure it, then measure how much the spring has traveled. Or compress a spring an inch or so, measure the force, and compress it some more. Either gets you the same data.

This spring tester is built around a Harbor Freight hydraulic press. Yes, the spring is completely captured and won’t fly out of the jig if you look at it wrong. The bottom of the press contains a few load cells, fed into an ATmega8, which displays a value on an LCD. For the displacement measurement, a ruler taped to the side of the press will suffice, but [Josh] used a Mitutoyo linear scale.

What were the results of these tests? You shouldn’t buy coils from Bilstein if these results are correct. The rates for these springs were off by 70%. Other springs fared better and won’t bind when going over bigger bumps. That’s great work, and an excellent application of Horror Fraught gear.