DIYing Huge BGA Packages

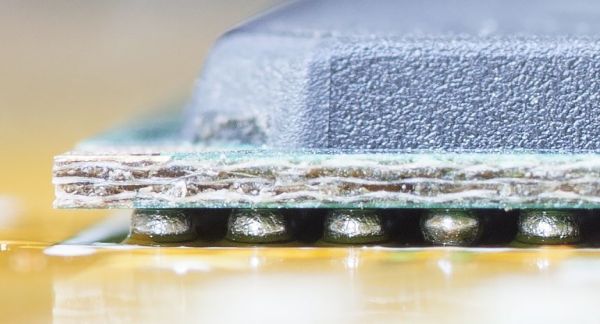
One day [Andy] was cruising around eBay and spotted something interesting. Forty Virtex-E FPGAs for two quid each. These are the big boys of the FPGA world, with 512 user IO pins, almost 200,000 logic gates, packed into a 676-ball BGA package. These are not chips designed for the hobbyist. These chips are not designed for boards with less than six layers. These chips aren’t even designed for boards with 6/6mil tolerances from the usual suspects in China. By any account, a 676-ball package is not like a big keep out sign for hobbyists. You don’t turn down a £2 class in advanced PCB design, though, leading to one of the most impressive ‘I just bought some crap on eBay’ projects we’ve seen.
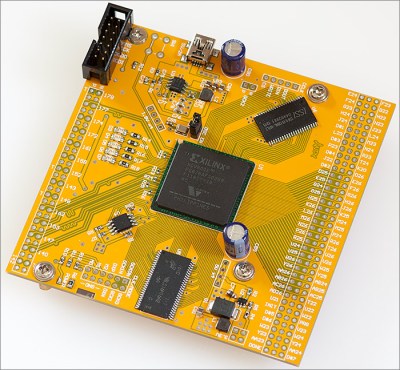
halfbuiltThe project [Andy] had in mind for these chips was a generic dev board, which meant breaking out the IO pins and connecting some SRAM, SDRAM, and Flash memory. The first issue with this project is escape routing all the balls. Xilinx published a handy application note that recommends specific design parameters for the traces of copper under the chip. Unfortunately, this was a six-layer board, and the design rules in the application note were for 5/5mil traces. [Andy]’s board house can’t do six-layer boards, and their design rules are for 6/6mil traces. To solve this problem, [Andy] just didn’t route the inner balls, and hoped the 5mil traces would work out.

With 676 tiny little pads on a PCB, the clocks routed, power supply implemented, too many decoupling caps on the back, differential pairs, static RAM, a few LEDs placed just for fun, [Andy] had to solder this thing up. Since the FPGA was oddly one of the less expensive items on the BOM, he soldered that first, just to see if it would work. It did, which meant it was time to place the RAM, Flash, and dozens of decoupling caps. Everything went relatively smoothly – the only problem was the tiny 0402 decoupling caps on the back of the board. This was, by far, the hardest part of the board to solder. [Andy] only managed to get most of the decoupling caps on with a hot air gun. That was good enough to bring the board up, but he’ll have to figure some other way of soldering those caps for the other 30 or so boards.


Continue reading “DIYing Huge BGA Packages”

Hackaday Prize Entry: Electronics Anywhere, Any Time

There has always been a need for electronic graph paper – a digital device that records ones and zeros, writes bits, and keeps track of analog voltages. Many moons ago, this sort of device was graph paper, wrapped around a drum, slowly spinning around once per day. With the advent of cheap, powerful microcontrollers and SD cards these devices have become even more capable.

For their entry to the Hackaday Prize, [Kuldeep] and [Sandeep] have built Box0. It’s a lab in a bag, an open source data acquisition unit, and a USB device that toggles pins, all in one simple device.

The hardware for this devices consists of an STM32F0 microcontroller, a USB port, and enough pins to offer up a few SPIs, an I2C bus, eight channels of digital output, two PWM channels, a UART, analog in, and analog out.

Of course, hardware is the easy part. If you want to do something useful with a device like this, you need some software. Here is where the project really shines. They have libraries for Python, Julia, C, Java, and JavaScript. That’s enough to make anyone happy, and makes this Box0 exceptionally capable. For a demonstration, they’ve built a curve tracer for transistors and red, green, and blue LEDs with the Box0. It works, and it looks like this actually is an exceptionally useful device.

Make Your Own Transparent Wood

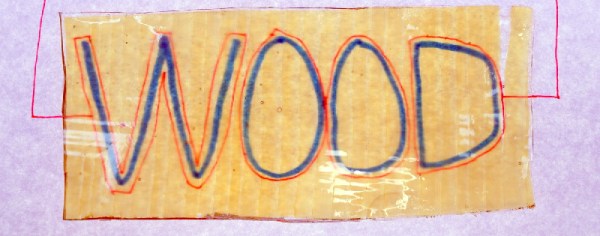
Want to bring your fine antique furniture into the 21st century? Make it clear with transparent wood. That’s what [blorggg] is doing over on Hackaday.io, and it looks cool enough to have a some interesting and novel applications besides small, clear test pieces.

The recipe for transparent wood is surprisingly simple, and all the ingredients are readily available from a drug store or home supply store. First, the wood is soaked in a bath containing lye and sodium sulfite for several hours. The wood is then bleached in a bath of hydrogen peroxide. After this, the wood is transparent, but very weak. Infusing the wood with epoxy resin strengthens the wood.

We first heard about this process back in May when the the paper [blorggg] based his recipe on came to light. the lye and sodium sulfite are frequently used in the paper industry to dissolve the lignin in wood. By removing the lignin, the microscopic structure of a piece of wood becomes just a series of tubes and thin cell walls. After bleaching, adding the epoxy shores up the now exceptionally weak structure of a block of wood.

While the original researchers only made two pieces of transparent wood – end grain and cross grain basswood, inexplicably referred to as R-wood and L-wood – [blorggg] is taking this much further. He’s using plywood to great effect, and the process is simple enough to expand to woods a bit weirder than basswood. If you have some scrap walnut, burl, or some exotic wood, this might be something to try out.

Hackaday Prize Entry: MiniSam-Zero

Thanks to the Arduino, Atmel’s SAM line of ARM microcontrollers are seeing a lot of use as 32-bit learning tools. For his Hackaday Prize project, [Jeremey] is using one of these chips without all the Arduino drama. He’s built a tiny Atmel SAM dev board that’s cheap, simple, and interestingly for a 32-bit ARM board, easy to program.

For this board, [Jeremy] is using Atmel’s SAM D09, the smallest member of the family that also includes the chip on the new Arduino Zero and the Arduino M0 (built by the other Arduino). The MiniSam-Zero uses a slightly smaller chip with 8 kB of on-chip Flash. Eagle-eyed complainers will notice the SAM D09 does not have internal EEPROM, so an EEPROM is added on-board. Also on board is a temperature sensor and a Silicon Labs CP2102 for serial communications.

That last chip – the Serial USART – allows for a rather interesting build if the firmware is done right. Instead of futzing about with ARM SWD while programming the device, a serial bootloader would allow anyone to plug a USB cable into this board and upload code straight from an IDE. This is perhaps the coolest feature of the MiniSam-Zero, and something [Jeremy] has worked tirelessly to get right. He can upload directly from Atmel Studio, and after a bit more work, [Jeremy] will be able to program this board directly from the Arduino IDE. That’s great work, and although this board isn’t as capable as other ARM microcontroller offerings, it’s still a fantastically useful device.

The HackadayPrize2016 is Sponsored by:

Cracking The Sega Saturn After 20 Years

When it was released 20 years ago, the Sega Saturn was by far the most powerful video game console available. It was a revolutionary device, had incredible (for the time) graphics, and a huge library of IP Sega could draw from. The Saturn was quickly overshadowed by the Sony Playstation, and soon these devices found themselves unused, unloved, and fetching high prices on the collectors market.

After finding a Sega Saturn on a trip to Japan, [jhl] decided he would like to write some code for this machine. Unlike earlier consoles, where Flash cartridges are readily available, or later consoles, where writing directly to the on-board storage is easy, bringing up a development environment for the Saturn isn’t easy. The best method is installing a mod chip and working off of burned CDs. Instead of writing a game or two for the Saturn, [jhl] got distracted for a few years and developed an optical drive emulator.

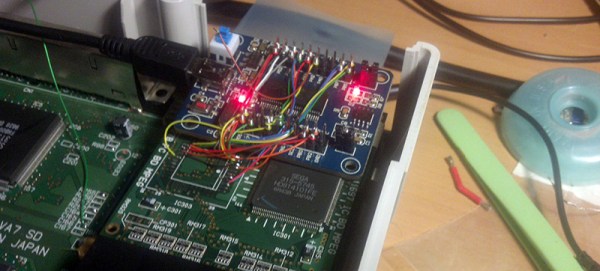
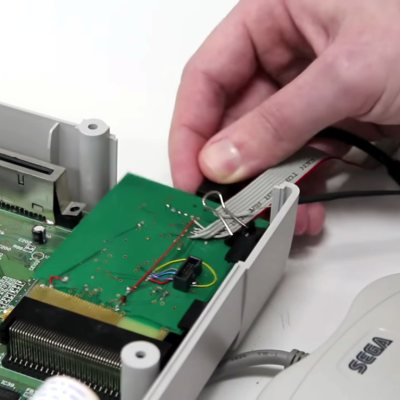
cracking-the-sega-saturn-thumbAccording to [jhl], the design of the Sega Saturn is tremendously complicated. There’s an entire chip dedicated to controlling the CD drive, and after some serious reverse engineering work, [jhl] had it pretty much figured out. The question then was how to load data onto the Saturn. For that. [jhl] turned to the internal expansion port on the Saturn. This internal expansion port was designed to accept an MPEG decoder card for playing video CDs on the Saturn, but the connector presents the entire bus. By attaching a Game Boy Flash cartridge, [jhl] was able to dump the ROM on the CD controller.
With a little bit of work, a fast ARM microcontroller, and a CPLD for all the logic glue, [jhl] was built an adapter to push CD data to the Saturn through this internal expansion port. Not only is this a boon for homebrew Saturn development, but this build also completely replaces the CD drive in the Saturn – a common failure point in this 20-year-old machine.

The formal release for this ultimate Saturn crack isn’t out yet, but it’s coming shortly, allowing anyone who still has a Saturn to enjoy all those very blocky games and develop their own games. You can check out a short, amateur documentary made on [jhl]’s efforts below.

Continue reading “Cracking The Sega Saturn After 20 Years”

STM32 And FPGAs In A Tiny Package

Slowly, very slowly, the time when we don’t subject embedded beginners to AVRs and PICs is coming. At a glacial pace, FPGA development platforms are becoming ever more capable and less expensive. [Eric Brombaugh] has been playing around with both ARMs and FPGAs for a while now and decided to combine these two loves into a single board that’s capable of a lot.

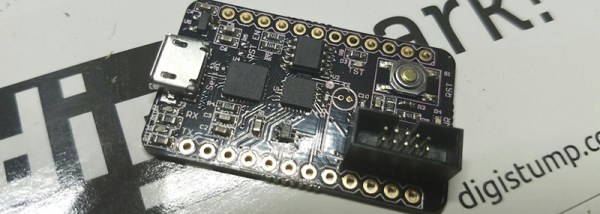
This board is fittingly called an STM32F303 + ice5 development board, and does exactly what it says on the tin. There’s an STM32F303 on board providing a 32-bit CPU running at 72 MHz, 48 kB of SRAM, a quarter meg of Flash, and enough peripherals to keep anyone happy. The FPGA side of this board is a Lattice iCE5 with about 3k Look Up Tables (LUTs), and one time programmable non-volatile config memory.

The connections between the ARM and FPGA include a dedicated SPI port, and enough GPIOs to implement full-duplex I2S and a USART. Like all good projects, [Eric] has shared all the files, schematics, and BOMs required to make this board your very own reality, and has provided a few links to the development toolchains. While the FPGA is from Lattice’s ice40 family, it’s not supported by the Open Source Project Icestorm toolchain. Still, it’s a very capable board for ARM and FPGA development.