2022 Hackaday Prize: Reuse, Recycle, And Revamp All The Things

Where has the year gone? It’s already summer in the Northern Hemisphere, and the second Challenge of the 2022 Hackaday Prize ends this weekend, along with your chance at one of ten $500 prizes. If you thrive on last-minute challenges, consider the eleventh hour upon you. But don’t panic; there’s still a decent amount of time left to start a new project over on Hackaday.io and get it entered into the contest.

The second Challenge focuses on creating new ways of recycling materials. What does this look like? That’s a pretty broad topic, but it could be anything from a better method of chip harvesting to an inexpensive and/or low-energy process for shredding used plastic and forming it into millable blocks.

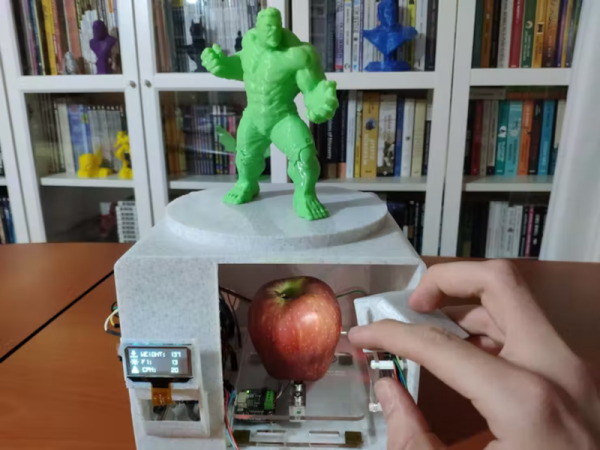
Don’t just think big on a commercial scale — imagine what people can do at home with the stuff in their recycle bin or their neighbor’s trash. If everyone had access to one of [Jerzeek]’s plastic scanners for identifying the type of plastic that mystery bucket or old watering can was made of, just think what could be done. As long as your project focuses on reusing, recycling, or revamping, we want to see it!

So far, we’ve seen a bunch of excellent projects, many of which are focused on recycling plastic. There’s the Pullstruder, which creates PET filament from plastic bottles, and a method for vacuum-forming HDPE plastic directly from milk jugs. There has to be more than one way to upcycle acrylic scraps into new sheets and jewelry, but the best one definitely involves a panini press and a car jack.

Recycling plastic is totally fantastic, but it’s not the only material available at the dump. You’ll probably have no trouble finding tires from which to make footstools and tables, and if you’re lucky, there’ll be an old phone that could be turned into an IoT assistant. If you want to take the circularity thing literally, dig up a printer and and old CD player and turn them into a mini pottery machine that uses cornstarch.

So basically, we have a bunch of awesome entries right now, but we don’t have yours! Remember: it doesn’t have to be a new project, just a new project page. Did you revolutionize recycling during lockdown? Make a new project and tell us about it! Just don’t forget to actually enter the thing by using the drop-down on the left before 7AM PDT on Sunday, June 12th. Need a time converting countdown thingy? We’ve got you.

After the recycle bin is empty, we’ll be moving on immediately to the Hack It Back challenge. This time, we’ll be asking you to teach old tech new tricks, or to bring a piece of gear back from the dead. Turn a blender into a Dremel-like tool, or give an old ‘scope a screen upgrade. You know what to do!

Wooden Keycaps Minus The CNC

What’s the most important part of the keycap? The average user-who-cares might tell you it’s the look and feel, but a keyboard builder would probably say the mounting style. That’s where the rubber meets the road, after all. For anyone trying to make their own keycaps, ‘the mount itself’ is definitely the correct answer. Try printing your own keycaps, and you’ll learn a lot about tolerances when it comes to getting the mount right.

Conversely, you could use a subtractive process like a wood mill to make keycaps. Sounds easy enough, right? But what about all of us who don’t have access to one? [cbosdonnat], who has no CNC, has blazed a cellulose trail, combining hand-tooled wooden keycaps with 3D-printed mounts to create fully-customized keycaps. It’s a great project with concise how-to, especially when it comes to building the jigs needed to keep the keycaps consistently sized and shaped.

It makes a whole lot of sense to start by hollowing out the bottom instead of shaping the business side first or even cutting out the key shape, since the mount is mechanically vital. Why waste time on the look and feel if the foundation isn’t there yet?

Hardwood is a must for DIY keycaps, because the walls need to be thin enough to both fit over the switch and within the matrix, and be sturdy enough not to break with use. We love the look of the varnish-transferred laser-printed logo, and only wish there was a video so we could hear the clacking.

There are all kinds of ways to put legends on DIY keycaps, like waterslide decals for instance.

Surprisingly Stomp-able Soft Switches

Competition sure brings out the brute in people, doesn’t it? So what do you do when you need a bunch of switches you can let people fist-pound or stomp on repeatedly without them taking damage? You could look to the guitar pedal industry and their tough latching switches, or you could simply build your own smash-resistant buttons as [wannabemadsci] has done.

The main thing about these switches is that they aren’t easily destroyed by shoes or angry fists. That’s because the shiny red push-me part of the button is made by cutting a foam ball in half.

Not easily crush-able Styrofoam, mind you — squishy, coated foam like an indoor football. This is mounted to the top of a sandwich made of hardboard and a couple pieces of easily-compressible foam from craft paintbrushes.

A brass washer is mounted to the middle of both pieces of hardboard, and these have wires soldered to them to read button presses. Then it’s just a matter of hooking it to a microcontroller like any other momentary.

There are all kinds of things you could cut in half for the top, like maybe tennis balls. Or, do what [Sprite_TM] did and use inverted plastic bowls.

Soap Mouse Is A Slippery Interface For Mid-Air Input

We all have those gnarly hacks that we still think about years after we first saw them. For serial tipster [Inne], one of those is [Patrick Baudisch]’s soap mouse, which is a DIY device for mousing in mid-air that uses components from off the shelf and around the house.

How does it work? The guts are encased in plastic shaped like a flattened pill, which slips into a fuzzy sock. By squeezing it a bit, the plastic pill rotates, spinning the outward-facing sensor round and round. Although we briefly reported on the soap mouse way back in 2006, we think it deserves to be in the spotlight today, especially since there’s a complete PDF guide to building one that’s optimized for gaming. If you want a regular pointing device instead, the conversion is described within.

[Patrick] uses a CompUSA (RIP) mouse in the guide, but any sufficiently slim and also short mouse should work as long as it has a decently long focal range, which is necessary for the sensor to see the hull. Plenty of travel mice out there should fit the bill.

The hull itself is made from two small (empty) bottles of hand sanitizer, chosen for their size, shape, and clarity of plastic. The outermost housing is a baby sock with a snap sewn on. [Patrick] says moving the sock against the plastic is difficult, and has tried various methods for lubrication, such as a bit of mineral oil inside some plastic bags.

Be sure to check out the video after the break, which does a great job of explaining everything from the various types of interaction to construction in 5½ minutes.

Since 2006, [Patrick] has held workshops where people have built their own soap mice. Have you built one? Let us know in the comments. And don’t forget about the Digi-Key-sponsored Odd Inputs and Peculiar Peripherals contest, which runs through July 4th. Declare your independence from regular keyboards and mice and win big!

Continue reading “Soap Mouse Is A Slippery Interface For Mid-Air Input”

Cityscape Multi-Level Keyboard Really Stacks Up

Keyboards with wells like the Maltron, the Kinesis Advantage family, and everything dactyl-esque out there are great. Trust us, we know this firsthand. But if you want to build your own curvy girl, how the heck can you implement that shape without 3D printing, clever woodworking, or access to tooling and plastic molding equipment? Well, there is another way. Over on twitter (translated) (Threadreader: Japanese, English), [tsukasa_metam] has achieved the key well effect by stacking up PCBs to create a skyline of vertically-staggered keys.

The boards of Cityscape are all screwed together for mechanical integrity, but those screws are working overtime, providing electrical connections between the layers as well. We particularly like that there is an impetus for this build other than ‘I thought of it, so let’s do it’ — [tsukasa_metam] tends to typo in the double key press sense, hitting Q for instance at the same time when A was the intended target. Between the 3.2 mm of key travel, the 2.8 mm step height, and those flat F10 keycaps, that is no longer an issue.

Instead of the popular low-profile Kailh choc switches, [tsukasa_metam] went with TTC KS32s, a new switch introduced in 2020. Unlike chocs, they’ll take Cherry MX-style keycaps, as long as they’re wearing short skirts. Cityscape isn’t totally open source, but the idea is now out there nonetheless, and we happen to have an Odd Inputs and Peculiar Peripherals contest running now through July 4th.

Do stacked PCBs seem kinda familiar? Hey, it’s easier than winding transformer coils.

Via KBD #79

Toothbrush Goes From Mouth-Whitening To Room-Brightening

Some of the hacks we see make us wonder why they aren’t already a commercial product, and this electric toothbrush turned rechargeable flashlight is one of them. Sure, these things exist, but we haven’t seen one with a dedicated charging stand. They usually just take micro USB or whatever, so it’s on you to remember to plug it in. How great would it be to have a fully-charged flashlight always at the ready, especially one in a position to illuminate the room? Although [wannabemadsci] makes it look easy, this conversion took quite a bit of doing.

Perhaps the most amazing part is that [wannabemadsci] found a halfway decent flashlight at the dollar store. Better than average, this thing has a main light, a side light, and takes 3xAAs instead of a couple of AAAs. The only issue is that the toothbrush batteries don’t quite put out enough voltage for the flashlight’s LED, so [wannabemadsci] used a booster board.

Of course, there’s a lot more to this hack than sawing off the USB connector from the boost converter so it fits. The toothbrush handle had to be modified to accept the flashlight guts, and the threads relocated from the flashlight. Since the battery charge indicator shines through the momentary button on the toothbrush, [wannabemadsci] wanted to reuse it, but it required a small board that converts it to a latching push button. Finally, the flashlight bezel had to be painted white. Paint is such an easy thing to do, and this detail makes all the difference in how professional this looks.

There’s a lot you can do with a functioning electric toothbrush as your base, like brute-forcing the pins of a lock with vibration.

Console Macropad Uses SD Cards For Stylin’ And Profilin’

Macropads are great to have around for hotkey input, but things can get out of hand pretty quickly when you realize just how many shortcuts are in your life. To avoid ending up with another keyboard-sized keyboard, some hackers will use a handful of switches and a lot of layers to turn a few keys into many. And instead of worrying about legends, they use blank keys and leave the labels to be displayed on some kind of screen.

Among them is [QCJ3], who built this nifty little console-style macropad. Uninterested in managing microcontroller memory, [QCJ3] went the tangible route and loaded various profiles onto a micro SD card. Each text file on a given card holds a label, a color for the keyswitch LED, and of course, the keystrokes that make up the macro itself.

There are myriad ways to build a macro pad, from designing with bare chips (if you can get them) to programming a pre-built key matrix.  Grab the files if you like the console look and call it a day, or build a completely new enclosure that fits your hand exactly. Whatever you build, consider entering it in our brand spankin’ new Odd Inputs and Peculiar Peripherals Contest, which runs now through July 4th. If you need more inspiration, just peep the projects under macropad tag, or peruse the much heftier keyboard tag.

Via KBD