All System Prompts For Anthropic’s Claude, Revealed

For as long as AI Large Language Models have been around (well, for as long as modern ones have been accessible online, anyway) people have tried to coax the models into revealing their system prompts. The system prompt is essentially the model’s fundamental directives on what it should do and how it should act. Such healthy curiosity is rarely welcomed, however, and creative efforts at making a model cough up its instructions is frequently met with a figurative glare and stern tapping of the Terms & Conditions sign.

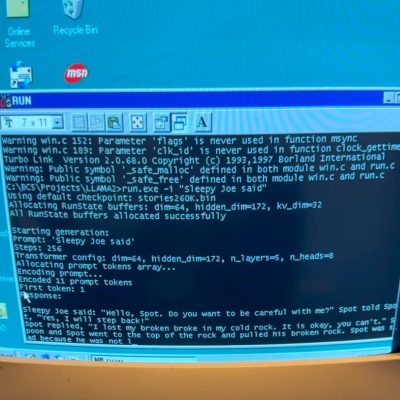
Anthropic have bucked this trend by making system prompts public for the web and mobile interfaces of all three incarnations of Claude. The prompt for Claude Opus (their flagship model) is well over 1500 words long, with different sections specifically for handling text and images. The prompt does things like help ensure Claude communicates in a useful way, taking into account the current date and an awareness of its knowledge cut-off, or the date after which Claude has no knowledge of events. There’s some stylistic stuff in there as well, such as Claude being specifically told to avoid obsequious-sounding filler affirmations, like starting a response with any form of the word “Certainly.”

Continue reading “All System Prompts For Anthropic’s Claude, Revealed”

Remembering John Wheeler: You’ve Definitely Heard Of His Work

Physicist John Archibald Wheeler made groundbreaking contributions to physics, and [Amanda Gefter] has a fantastic writeup about the man. He was undeniably brilliant, and if you haven’t heard of him, you have certainly heard of some of his students, not to mention his work.

Ever heard of wormholes? Black holes? How about the phrase “It from Bit”? Then you’ve heard of his work. All of those terms were coined by Wheeler; a knack for naming things being one of his talents. His students included Richard Feynman and Kip Thorne (if you enjoyed The Martian, you at least indirectly know of Kip Thorne) and more. He never won a Nobel prize, but his contributions were lifelong and varied.

Continue reading “Remembering John Wheeler: You’ve Definitely Heard Of His Work”

Memristors Are Cool, Radiation-resistant Memristors Even Moreso

Space is a challenging environment for semiconductors, but researchers have shown that a specific type of memristor (the hafnium oxide memristor, to be exact) actually reacts quite usefully when exposed to gamma radiation. In fact, it’s even able to leverage this behavior as a way to measure radiation exposure. In essence, it’s able to act as both memory and a sensor.

Being able to resist radiation exposure is highly desirable for space applications. Efficient ways to measure radiation exposure are just as valuable. The hafnium oxide memristor looks like it might be able to do both, but before going into how that works, let’s take a moment for a memristor refresher.

A memristor is essentially two conductive plates between which bridges can be made by applying a voltage to “write” to the device, by which one sets it to a particular resistance. A positive voltage causes bridging to occur between the two ends, lowering the device’s resistance, and a negative voltage reverses the process, increasing the resistance. The exact formulation of a memristor can vary. The memristor was conceived in the 1970s by Leon Chua, and HP Labs created a working one in 2008. An (expensive) 16-pin DIP was first made available in 2015.

A hafnium oxide memristor is a bit different. Normally it would be write-once, meaning a negative voltage does not reset the device, but researchers discovered that exposing it to gamma radiation appears to weaken the bridging, allowing a negative voltage to reset the device as expected. Exposure to radiation also caused a higher voltage to be required to set the memristor; a behavior researchers were able to leverage into using the memristor to measure radiation exposure. Given time, a hafnium oxide memristor exposed to radiation, causing it to require higher-than-normal voltages to be “set”, eventually lost this attribute. After 30 days, the exposed memristors appeared to recover completely from the effects of radiation exposure and no longer required an elevated voltage for writing. This is the behavior the article refers to as “self-healing”.

The research paper has all the details, and it’s interesting to see new things relating to memristors. After all, when it comes to electronic components it’s been quite a long time since we’ve seen something genuinely new.

See The “Pause-and-Attach” Technique For 3D Printing In Action

[3DPrintBunny] is someone who continually explores new techniques and designs in 3D printing, and her latest is one she calls “pause-and-attach”, which she demonstrates by printing a vase design with elements of the design splayed out onto the print bed.

The splayed-out elements get peeled up and attached to the print during a pause.

At a key point, the print is paused and one peels up the extended bits, manually attaching them to sockets on the main body of the print. Then the print resumes and seals everything in. The result is something that appears to defy the usual 3D printer constraints, as you can see here.

Pausing a 3D print to insert hardware (like nuts or magnets) is one thing, but we can’t recall seeing anything quite like this approach. It’s a little bit reminiscent of printing foldable structures to avoid supports in that it prints all of its own self-connecting elements, but at the same time it’s very different.

We’ve seen [3DPrintBunny]’s innovative approaches before with intentional stringing used as a design element and like the rest of her work, it’s both highly visual and definitely it’s own thing. You can see the whole process in a video she posted to social media, embedded below.

Continue reading “See The “Pause-and-Attach” Technique For 3D Printing In Action”

3D Printer Swaps Build Plates To Automate Print Jobs

[Andre Me] has long-standing interest in automating 3D print jobs, and his latest project is automating build plate changes on the Bambu A1 Mini.

Here’s how it works: each build plate gets a sort of “shoe” affixed to it, with which attachments on the printer itself physically interact when loading new plates and removing filled ones.

When a print job is finished, custom G-code causes an attachment on the printer to wedge itself under the build plate and peel it off until it is freed from the magnetic bed, after which the finished plate can be pushed towards the front. A stack of fresh build plates is behind the printer, and the printer slips a new one from the bottom when needed. Again, since the printer’s bed is magnetic, all one has to do is get the new plate to reliably line up and the magnetic attraction does the rest.

Some methods of automating print jobs rely on ejecting the finished parts and others swap the print beds. [Andre]’s is the latter type and we do really like how few moving parts are involved, although the resulting system has the drawback of requiring considerably more table space than just the printer itself. Still, it’s not at all a bad trade-off.

Watch it in action in the two videos embedded below. The first shows a time-lapse of loading and ejecting over 100 build plates in a row, and the second shows the whole system in action printing bowls in different colors. Continue reading “3D Printer Swaps Build Plates To Automate Print Jobs”

Shoot Smooth Video From Your Phone With The Syringe Slider

We love the idea [Btoretsukuru] shared that uses a simple setup called the Syringe Slider to take smoothly-tracked video footage of small scenes like model trains in action. The post is in Japanese, but the video is very much “show, don’t tell” and it’s perfectly clear how it all works. The results look fantastic!

Suited to filming small subjects.

The device consists of a frame that forms a sort of enclosed track in which one’s mobile phone can slide horizontally. The phone butts up against the plunger of an ordinary syringe built into the frame. As the phone is pushed along, it depresses the plunger which puts up enough resistance to turn the phone’s slide into a slow, even, and smooth glide. Want to fine-tune the resistance and therefore the performance? Simply attach different diameter tips to the syringe.

The results speak for themselves, and it’s a fantastically clever bit of work. There are plenty of DIY slider designs (some of which get amazingly complex) but they are rarely small things that can be easily gotten up close and personal with small subjects like mini train terrain.

Continue reading “Shoot Smooth Video From Your Phone With The Syringe Slider”

VR Headset With Custom Face Fitting Gets Even More Custom

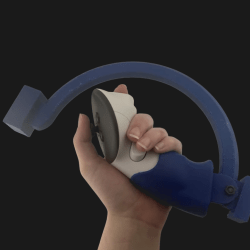
The Bigscreen Beyond is a small and lightweight VR headset that in part achieves its small size and weight by requiring custom fitting based on a facial scan. [Val’s Virtuals] managed to improve fitment even more by redesigning a facial interface and using a 3D scan of one’s own head to fine-tune the result even further. The new designs distribute weight more evenly while also providing an optional flip-up connection.

It may be true that only a minority of people own a Bigscreen Beyond headset, and even fewer of them are willing to DIY their own custom facial interface. But [Val]’s workflow and directions for using Blender to combine a 3D scan of one’s face with his redesigned parts to create a custom-fitted, foam-lined facial interface is good reading, and worth keeping in mind for anyone who designs wearables that could benefit from custom fitting. It’s all spelled out in the project’s documentation — look for the .txt file among the 3D models.

We’ve seen a variety of DIY approaches to VR hardware, from nearly scratch-built headsets to lens experiments, and one thing that’s clear is that better comfort is always an improvement. With newer iPhones able to do 3D scanning and 1:1 scale scanning in general becoming more accessible, we have a feeling we’re going to see more of this DIY approach to ultra-customization.