A block diagram of the Oldland CPU core

The Oldland CPU 32-bit FPGA Core

Field Programmable Gate Arrays (FPGAs) let you program any logic you’d like onto a chip. You write your logic using a hardware description language, then flash it to the FPGA. You can even design your own processor and flash it to the chip.

That’s exactly what [jamieiles] has done with the Oldland CPU. It’s an open source 32 bit CPU core that you can synthesize for use on an FPGA. Not only can you browse through all the Verilog code in the Github repo, but there’s also a bunch of tools for working with this CPU core.

Included with the package is oldland-rtlsim, which lets you simulate the processor on a PC. The oldland-debug tool lets you connect to the processor for programming and debugging over JTAG. Finally, there’s a GNU toolchain port that lets you build C code for the device.

Going one step futher, [jamieiles] built a full SoC around the Oldland core. This has SPI, UART, timers, and more features you’d expect to find in a microcontroller. It can be flashed to the relatively cheap Terasic DE0-Nano board.

[jamieiles] has also ported u-boot to the processor, and the next thing on the list is the Linux kernel. If you’ve ever been interested in how CPUs actually work, this is a neat project to look through. If you want more open source CPU cores, check out OpenCores.

Psimax CS40 Control Panel for Kerbal Space Program

Rocket Controls Fit For A Kerbal

Kerbal Space Program is a space simulation game. You design spacecraft for a fictional race called Kerbals, then blast those brave Kerbals into space. Sometimes they don’t make it home.

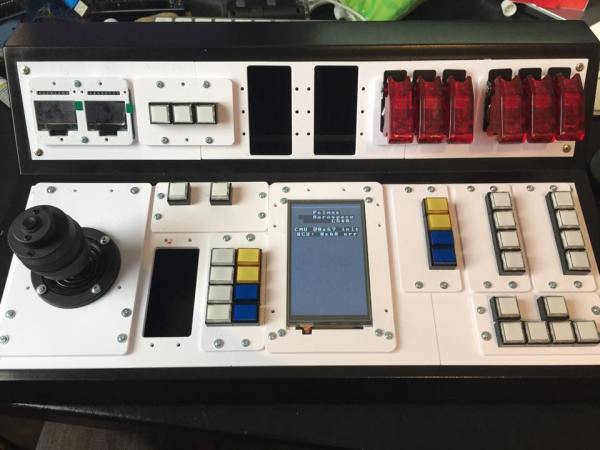
If controlling spacecraft with your WASD keys isn’t immersive enough for you, [marzubus] has created a fully featured KSP control console. It sports a joystick, multiple displays, and an array of buttons and switches for all your flight control needs. The console was built using a modular approach, so different controls can be swapped in and out as needed.

Under the hood, three Arduinos provide the interface between the game and the controls. One Arduino Mega runs HoodLoader2 to provide joystick data over HID. A second Mega uses KSPSerialIO to communicate with the game over a standard COM port interface. Finally, a Due interfaces with the displays, which provide information on the current status of your spacecraft.

All of the parts are housed in an off the shelf enclosure, which has a certain Apollo Mission Control feel to it. All [marzubus] needs now is a white vest with a Kerbal badge on it.

Control board for a Wi-Fi enabled thermostat

Controlling Central Heating Via Wi-Fi

If you’ve ever lived in a building with manually controlled central heating, you’ll probably understand [Martin]’s motivation for this hack. These heating systems often have old fashioned valves to control the radiator. No Nest support, no thermostat, just a knob you turn.

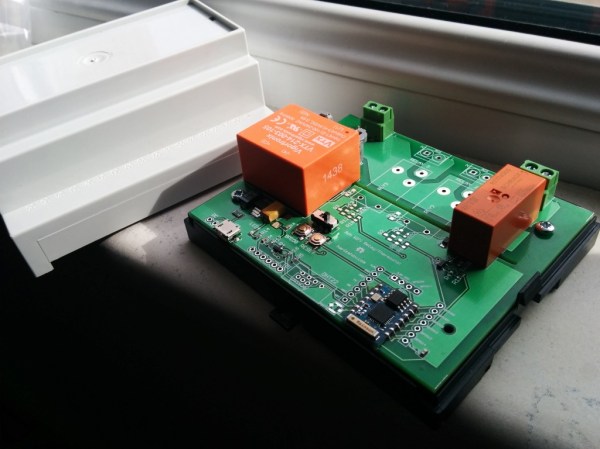
To solve this problem, [Martin] built a Wi-Fi enabled thermostat. This impressive build brings together a custom PCB based on the ESP8266 Wi-Fi microcontroller and a mobile-friendly web UI based on the Open Thermostat Scheduler. The project’s web server is fully self-contained on the ESP8266.

To replace that manual value, [Martin] used a thermoelectric actuator from a Swiss company called HERZ. This is driven by a relay, which is controlled by the ESP8266 microcontroller. Based on the schedule and the measured temperature, the actuator lets fluid flow through the radiator and heat the room.

As a bonus, the device supports NTP for getting the time, MQTT for publishing real-time data, and ThingSpeak for logging and graphing historic data. The source code and design files are available under a Creative Commons license.

Hardware for a ST4 to USB interface

Cheap USB Control For Your Telescope

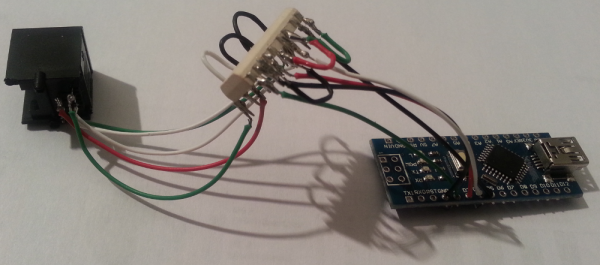
There’s many complex systems for automatically pointing a telescope at an object in the sky, but most of them are too expensive for the amateur astronomer. [Kevin]’s Arduino ST4 interface lets you connect your PC to a reasonably priced motorized telescope mount, without ripping it apart.

The ST4 port is a very basic interface. There’s one pin per direction that the mount can move, and a common pin. This port can be added to just about any motorized mount with some modification to the controller. To connect to an Arduino, a TLP521-4 quad optoisolator is used. This keeps the Arduino and PC fully isolated from the motor circuits. but lets the Arduino take control of the mount.

With the hardware in place, [Kevin] cranked out some software which is available on Google Code. A simple Arduino sketch provides the USB interface, and a custom driver allows the ASCOM Platform to control the mount. Since many astronomy software tools support ASCOM, this allows the mount to be controlled by existing software.

With the interface in place, the mount can be used to find objects (GOTO) and automatically follow them with high accuracy (autoguiding). You can watch the telescope move on its own after the break.

Continue reading “Cheap USB Control For Your Telescope”

A protoboard layout for an ATtiny85 door chime

AES-CMAC On An ATtiny85

[Blancmange] built a custom door chime using an ATtiny85. Unlike most commercial products out there, this one actually tries to be secure, using AES-CMAC for message signing.

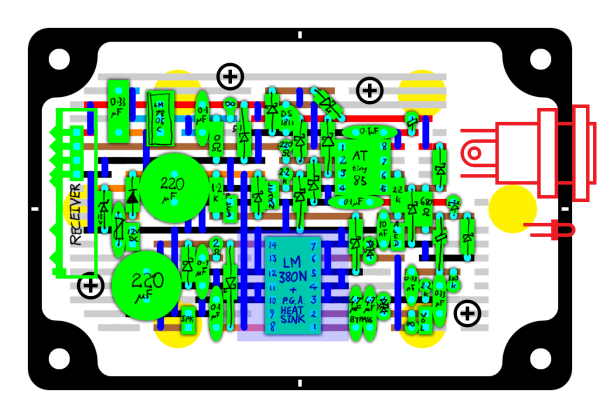
The hardware is pretty simple, and a protoboard layout is shown in the image above. It uses the ATtiny85 for control, with an LM380N audio amplifier, and a low cost 315 MHz receiver.

The more impressive part of the build is the firmware. Using AVR assembly, [Blancmange] managed to fit everything into the 8 Kbytes of flash on the ATtiny85. This includes an implementation of AES-CMAC, an AES cypher based message authentication code. The transmitting device signs the request with a key shared between both devices, and the receiver verifies that the message is from a trusted transmitter.

Fortunately, the assembly code is very well commented. If you’ve ever wanted to take a look into some complex ASM assembly, this is a great project to check out. The source code has been released into the public domain, so the rest of us can implement crypto on this cheap microcontroller with much less effort.

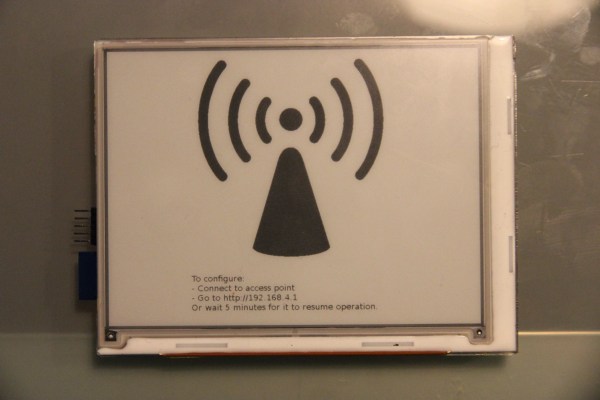
An E-Ink WiFi Connected Display

Wi-Fi Connected E-Ink Display

People implementing the Scrum Methodology for project management often record all their tasks on a big whiteboard. However, it’s useful to have up-to-date graphs to ensure projects are on track. [Sprite_TM] augmented the whiteboard by building an Wi-Fi connected E-Ink Display.

Interfacing with E-Ink displays isn’t easy. A variety of voltages are needed, and the connectors used are tiny. We’ve seen some nice solutions, such as the RePaper display. [Sprite_TM] chose the ED060SC4 display which is available from eBay and has been throughly reverse engineered. A custom breakout board was built up to connect to the tiny FPC pins and generate the required voltages using the LT1945 DC/DC converter.

The next step was adding on Wi-Fi. The ESP12 module was an obvious solution. This module provides Wi-Fi connectivity and a processor capable of controlling the display. The display is powered by a tablet battery, which makes it totally wireless and operates for about 200 days.

A simple laser cut enclosure holds all the bits together, and contains magnets that stick the screen to the whiteboard. On the software side, images are streamed to the ESP12’s processor and loaded directly to the screen, since the ESP12 doesn’t have enough RAM to store an entire screen worth of data. All the firmware can had by cloning a Git repository.

A wood router with automated height adjustment

A Router Table With Height Control

The wood router is a versatile power tool which can be picked up at a low price. Nicer router setups are mounted underneath a table, with the cutting head poking through. This makes it easier and safer to work with the tool.

[Paul] combined his interest in electronics and woodworking by making a router table with automated controls [translation]. The neat part of this build is the automated height control, which ensures accurate cutting depth.

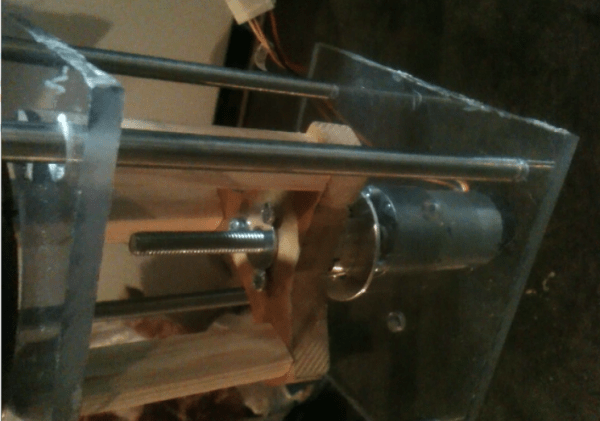
The router is mounted to a threaded rod, which allows it to be moved up and down by a motor. A low cost L298 motor driver provides the power to the motor, which is controlled by an Arduino Uno. A VCNL4020 based sensor board is used to measure distance and accurately set the router height. This tiny proximity sensor looks like a nifty chip, providing distance measurements up to 200 mm and an ambient light sensor in one package.

The routing table has an LCD display and buttons, allowing the user to dial in their desired height. The entire thing was built using recycled bits and well under $100 in new parts.