PeriUSBoost: A USB Battery Charger

PeriUSBoost: A DIY USB Battery Pack

If you travel often, use your mobile devices a lot, or run questionable ROMs on your phone, you likely have an external USB battery pack. These handy devices let you give a phone, tablet, or USB powered air humidifier (yes, those exist) some extra juice.

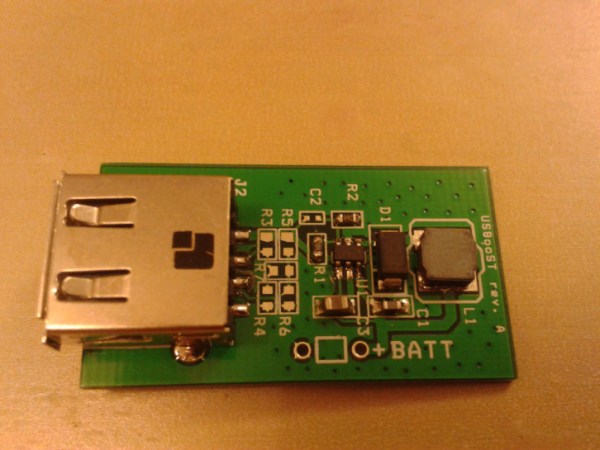
[Pedro]’s PeriUSBoost is a DIY phone charging solution. It’s a switching regulator that can boost battery voltages up to the 5 volt USB standard. This is accomplished using the LTC3426, a DC/DC converter with a built in switching element. The IC is a tiny SOT-23 package, and requires a few external passives work.

One interesting detail of USB charging is the resistor configuration on the USB data lines. These tell the device how much current can be drawn from the charger. For this device, the resistors are chosen to set the charge current to 0.5 A.

While a 0.5 A charge current isn’t exactly fast, it does allow for charging off AA batteries. [Pedro]’s testing resulted in a fully charged phone off of two AA batteries, but they did get a bit toasty while powering the device. It might not be the best device to stick in your pocket, but it gets the job done.

Schematic for a boost converter based on the ATtiny MCU

An ATtiny Boost Converter

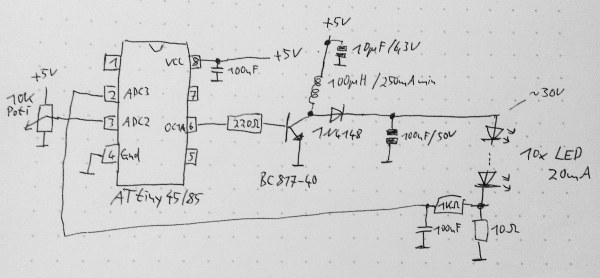
This schematic is all you need to build your own voltage converter. [Lutz] needed a converter that could boost 5 V to 30 V to power a string of LEDs. The solution was to use low cost ATtiny85 and some passive components to implement a boost converter.

This circuit follows the classic boost converter topology, using the ATtiny85 to control the switch. The 10 ohm resistor is fed back into the microcontroller’s ADC input, allowing it to sense the output voltage. By measuring the output voltage and adjusting the duty cycle accordingly, the circuit can regulate to a specified voltage setpoint.

A potentiometer is used to change the brightness of the LEDs. The software reads the potentiometer’s output voltage and adjusts the voltage output of the circuit accordingly. Higher voltages result in brighter LEDs.

Of course, there’s many other ways to implement a boost converter. Most practical designs will use a chip designed for this specific purpose. However, if you’re interested in rolling your own, the source and LTSpice simulation files are available.

Running Debian On A Graphing Calculator

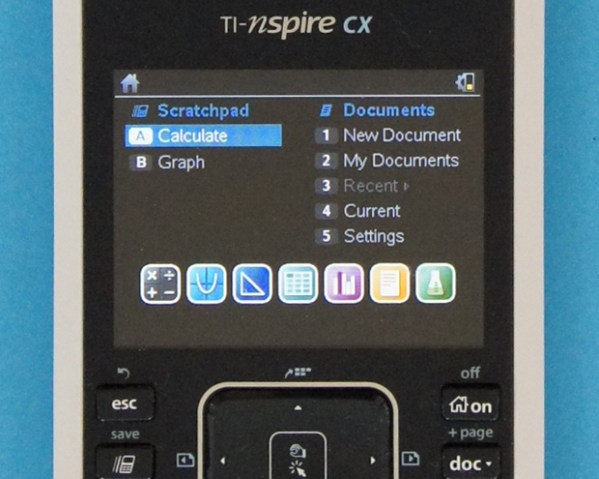
While the ubiquitous TI-83 still runs off an ancient Zilog Z80 processor, the newer TI-Nspire series of graphing calculators uses modern ARM devices. [Ivoah] managed to get Debian Linux running on a TI-Nspire calculator, and has written a guide explaining how it’s done.

The process uses Ndless, a jailbreak which allows code to run at a low level on the device. Ndless also includes a full SDK, emulator, and debugger for developing apps. In this case, Ndless is used to load the Linux kernel.

The root filesystem is built on a PC using debootstrap and the QEMU ARM emulator. This allows you to install whatever packages are needed via apt, before transitioning to the calculator itself.

With the root filesystem on a USB flash drive, Ndless runs the Linux loader, which starts the kernel, mounts the root filesystem, and boots in to a Debian system in about two minutes. As the video after the break demonstrates, this leaves you with a shell on the calculator. We’re not exactly sure what to do with Linux on a graphing calculator, but it is a neat demonstration.

Continue reading “Running Debian On A Graphing Calculator”

The guts of a Z80 MicroTV Clock

A Z80 Micro TV Clock

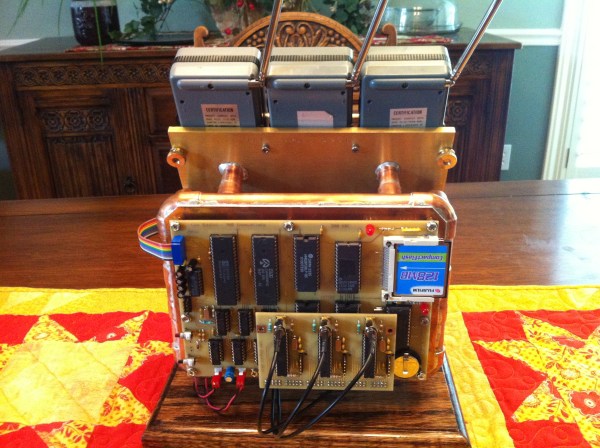
As an adventure in computer history, [Len] built up a clock. The Z80 Micro TV Clock brings together a homebrew computer and three Micro TVs into a rather large timepiece.

The computer powering the clock runs the CP/M operating system. This OS was eventually released as open source software, and a variety of homebrew computer projects have implemented it. This clock is based on an existing breadboard CP/M machine, which includes schematics and software.

With an OS running, [Len] got a text editor and C compiler working. Now custom software could be written for the device. Software was written to interact with a Maxim DS12885 Real Time Clock, which keeps the time, and to output the time to the display controllers.

The Micro TVs in this build are Sony Watchman displays featuring a 2″ CRT. The devices had no video input port, so [Len] ripped them open and started poking around. The NTSC signal was found by probing the board and looking for the right waveform.

To drive the TVs from CP/M, a custom video driver was built. This uses three relatively modern ATmega328P microcontrollers and the arduino-tvout library. All of these components are brought together on a stand made from wood and copper tubing, making it a functional as a desk top clock

Die image of the PCD8544 display controller

Photographing A Display Controller Die

Who doesn’t like integrated circuit porn? After pulling a PCD8544 display controller from an old Nokia phone, [whitequark] disrobed it and took the first public die shot.

As we’ve seen in the past, removing a die from its packaging can be a challenge. It typically involves nasty things like boiling acid. Like many display controllers, the PCD8544 isn’t fully encapsulated in a package. Instead, it is epoxied to a glass substrate.

Removing the glass proved to be difficult. [whitequark] tried a hot plate, a hot air gun, sulphuric acid, and sodium hydroxide with no success. Then the heat was turned up using MAPP gas, which burned the epoxy away.

After some cleaning with isopropanol, the die was ready for its photoshoot. This was done using a standard 30 mm macro lens. Photo processing was done in darktable, an open source photography tool and RAW processor.

[whitequark] plans to take closer photos in the future using more powerful magnification. These high resolution die photos can be useful for a number of things, including finding fake chips and reverse engineering retro hardware.

An External Autofocus For DSLRs

Most modern DSLR cameras support shooting full HD video, which makes them a great cheap option for video production. However, if you’ve ever used a DSLR for video, you’ve probably ran into some limitations, including sluggish autofocus.

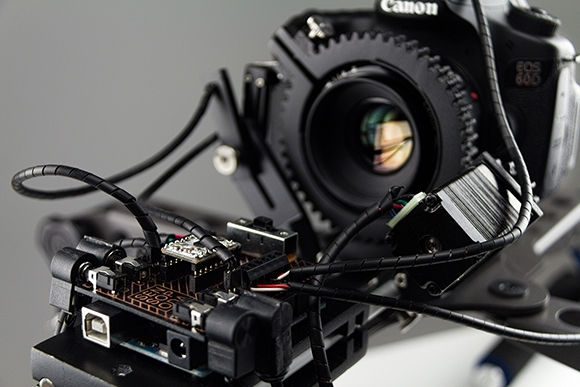
Sensopoda tackles this issue by adding an external autofocus to your DSLR. With the camera in manual focus mode, the device drives the focus ring on the lens. This allows for custom focus control code to be implemented on an external controller.

To focus on an object, the distance needs to be known. Sensopoda uses the HRLV-MaxSonar-EZ ultrasonic sensor for this task. An Arduino runs a control loop that implements a Kalman filter to smooth out the input. This is then used to control a stepper motor which is attached to the focus ring.

The design is interesting because it is rather universal; it can be adapted to run on pretty much any DSLR. The full writeup (PDF) gives all the details on the build.

A breakdown of the various parts of the Game Tin

Game Tin: Handheld Games With No Batteries

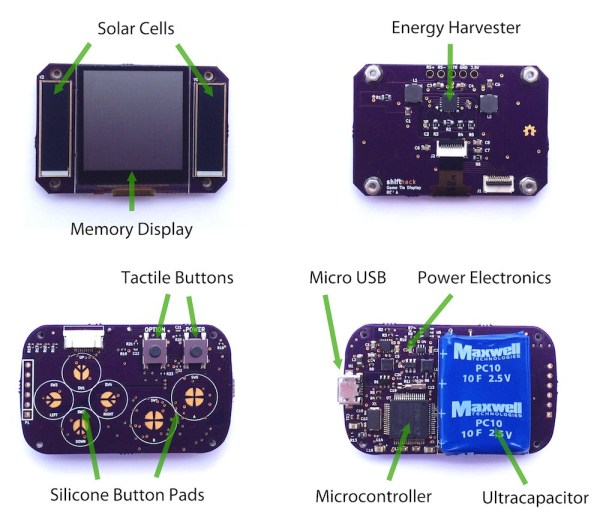
Anyone who grew up with a Game Boy knows how well they sucked through AA batteries. [Nick]’s Game Tin console solves this problem by running of an ultracapacitor charged by solar power.

The console is based on a EFM32 microcontroller: an ARM device designed for low power applications. The 128×128 pixel monochrome memory display provides low-fi graphics while maintaining low power consumption.

There’s two solar cells and a BQ25570 energy harvesting IC to charge the ultracap. This chip takes care of maximum power point tracking to get the most out of the solar cells. If it’s dark out, the device can be charged in about 30 seconds by connecting USB power.

The 10 F Maxwell ultracapacitor can run a game on the device for 1.5 hours without sunlight, and the device runs indefinitely in the sun. Thanks to the memory display, applications that have lower refresh rates will have much lower power consumption.

The Game Tin is open source, and is being developed using KiCad. You can grab all the EDA files from Bitbucket. [Nick] is also gauging interest in the Game Tin, and hopes to release it as a kit.