Barb Makes Mechanical Pokey Finger With Filament Rivets

We were trolling around Hackaday.io, and we stumbled on [Barb]’s video series called (naturally enough) “Barb Makes Things“. The plot of her videos is simple — Barb points a time-lapse camera at her desk and makes stuff. Neat stuff.

Two particularly neat projects caught our attention: a mechanical pointy-finger thing and the useful 3D-printing-filament rivets that she used to make it. (Both of which are embedded below.) The finger is neat because the scissor-like extension mechanism is straight out of Wile E. Coyote’s lab.

how-to-3d-printing-filament-rivets-reymdd8ufiumkv-shot0004_thumbnail

But the real winners are the rivets that hold it together. [Barb] takes a strand of filament, and using something hot like the side of a hot-glue gun, melts and squashes the end into a mushroom rivet-head. Run the filament through your pieces, mushroom the other end, and you’re set. It’s so obvious after seeing the video that we just had to share. (Indeed, a lot of cheap plastic toys are assembled using this technique.) It’s quick, removable, and seems to make a very low-friction pivot, which is something that printed pins-into-holes tends not to. Great idea!

Continue reading “Barb Makes Mechanical Pokey Finger With Filament Rivets”

Zero Parts-Count Temperature Sensor

Quick: What’s the forward voltage drop on a conducting diode? If you answered something like 0.6 to 0.7 V, you get a passing grade, but you’re going to have to read on. If you answered V_F = \frac{T-T_0}{k} where T0 and k are device-specific constants to be determined experimentally, you get a gold Jolly Wrencher.

vsd%2C+n-01[Jakub] earned his Wrencher, and then some. Because not only did he use the above equation to make a temperature sensor, he did so with a diode that you might have even forgotten that you have on hand — the one inside the silicon of a MOSFET — the intrinsic body diode.

[Jakub]’s main project is an Arduino-controlled electronic load that he calls the MightWatt, and a beefy power MOSFET is used as the variable resistance element. When it’s pulling 20 or 30 A, it gets hot. How hot exactly is hard to measure without a temperature sensor, and the best possible temperature sensor would be one that was built into the MOSFET’s die itself.

There’s a bunch of detail in his write-up about how he switches the load in and out to measure the forward drop, and how he calibrates the whole thing. It’s technical, but give it a read, it’s good stuff. This is a great trick to have up your sleeve.

And if you’re in the mood for more stupid diode tricks, we recommend using them as solar cells or just stringing a bunch of them together to make a thermal camera.

Hackaday Prize Entry: Waterspace, A Floating Hackerspace Lab

It’s a boat! It’s a hackerspace! It’s a DIY research platform and an art gallery! It’s Boat Lab!

[Andrew Quitmeyer] lead a project in the Philippines that was nominally charged with making an art and technology space. After a few days brainstorming, four groups formed and came up with projects as wide-ranging as a water-jet video screen and a marine biology lab. What did they have in common? They were all going to take place on a floating raft hackerspace in a beautiful body of water in Manila.

This is a really crazy meta-project, and any of the sub-projects would be worth their own blog post. Even more so is the idea itself — building a floating hackerspace is just cool. The write-up on Hackaday.io linked above is pretty comprehensive, and the “Waterspace” book talks a bit more about the overarching process. Boat Lab is a great entry into the Citizen Science phase of the Hackaday Prize 2016.

But we also love the idea of hackerspaces in non-traditional places. The Cairo Hackerspace is working on a van-based space. And now we’ve seen a boat. What other mobile hackerspace solutions are out there? We’d love to hear!

Continue reading “Hackaday Prize Entry: Waterspace, A Floating Hackerspace Lab”

Pen-Plotter Firmware Written Completely In Ada

[Fabian Chouteau] built a plotter out of CD-ROM parts. Yawn, you say? Besides being a beautiful physical build, this one has a twist. He wrote the software and firmware for the entire project himself, in Ada.

Ada is currently number two on our list of oddball programming languages that should be useful for embedded programming. It’s vaguely Pascal-y, but with some modern object-oriented twists. It was developed for safety-critical, real-time embedded systems (by the US Department of Defense), and is used in things like airplanes, rockets, and the French TGV trains. If that sounds like overkill for your projects, [Fabian]’s project shows that it’s still very tractable.

In his GitHub, he re-implements the GRBL G-code generator and then writes a GUI front-end for it. In his writeup, he mentions that the firmware and its simulator for the front-end use exactly the same code which is quite a nice trick, and guarantees no (firmware) surprises when moving from the modelled device to the real thing.

We looked quickly around for Ada resources and came up with: GNAT, the GNU Ada compiler, and its derivatives: GNAT for ARM (STM32-flavor), ARM-Ada (LPC21xx flavor), AVR-Ada, and MSP430-Ada.

Any of you out there use Ada in embedded work? We’d love to hear your thoughts.

Continue reading “Pen-Plotter Firmware Written Completely In Ada”

HDMI Extender Reverse Engineered

[danman] has been playing around with various HDMI video streaming options, and he’s hit on a great low-cost solution. A $40 “HDMI extender” turns out to actually be an HDMI-to-RTP converter under the hood.

He’d done work previously on a similar extender that turned out to use a quirky method to send the video, which he naturally reversed and made to do his bidding. But non-standard formats are a pain. So when he was given a newer version of the same device, and started peeking into the packets with Wireshark, he was pleasantly surprised to find that the output was just MPEG-encoded video over RTP. No hacking necessary.

Until now, streaming video over an IP network from an arbitrary HDMI output has been tricky, [danman] has been more than a little obsessed with getting it working on the cheap. In addition to the previous version of this extender, he also managed to get a stream out of a rooted Android set-top box. That costs a bit more, but can also record at the same time, should you need to.

None of this solves the HDMI HDCP encryption problem, though. You’re on your own for that one.

(Those of you Wireshark wizards out there will note that we just swiped the headline image from the previous version of the project. There were no good images for this one. Sorry about that.)

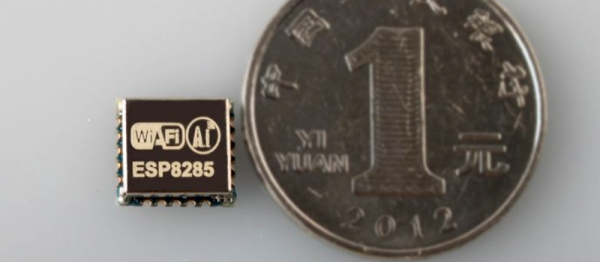
Continuous Delivery For Your ESP8266

There’s nothing to be ashamed of. It’s a problem we all have. You change your code a lot — you can’t help it, you just need to tweak one last little bit. And then you have to go downstairs, fetch your ESP8266 module, plug it in to your computer, flash the new firmware in, and then run back down and re-install your wine-cellar temperature monitor. If only there were a way to continuously update your ESP8266 over the air, pulling new code down from your GitHub repository, automatically running your test suite on it, and then pushing it off to the ESP.

OK, it’s ridiculous overkill, but [squix] strung together a bunch of open-source continuous integration tools and made them work with the ESP8266. A simple PHP script connects the ESP to the rest of the web infrastructure.

[squix] says the word “security” in the same way that gin aficionados whisper “vermouth” over their Martinis. Which is to say, there is none. But for a home solution, or if you want to play around with continuous development, it’s a good start.

And this is a cool project because it makes use of the ESP8266 OTA (over-the-air) programming library to push the code across. And we do hate having to run around the house to update firmware.

So check it out if you want to push code to your ESP8266s without physically going to fetch them, or if you want to integrate your web development with your home deployment.

FPGA-and-Pi Colossus Smashes Your Codes!

If it were sixty years ago, and you were trying to keep a secret, you’d be justifiably glad that [Ben North] hadn’t traveled back in time with his Raspberry-Pi-and-FPGA code-breaking machine.

We’ve seen a lot of Enigma builds here at Hackaday — the World War II era encryption machine captured our readers’ imaginations. But perhaps the more important machines to come out of cryptanalysis during that era were Turing’s electromechanical Bombe, because it cracked Enigma, and the vacuum-tube-based Colossus, because it is one of the first programmable electronic digital computers.

[Ben]’s build combines his explorations into old-school cryptanalysis with a practical learning project for FPGAs. If you’re interested in either of the above, give it a look. You can start out with his Python implementations of Colossus to get your foot in the door, and then move on to his GitHub repository for the FPGA nitty-gritty.

It’s also a cool example of a use for the XuLA2 FPGA board and its companion StickIt board that plug straight into a Raspberry Pi for programming and support. We haven’t seen many projects using these since we first heard about them in 2012. This VirtualBoy hack jumped out at us, however. It looks like a nice platform. Anyone else out there using one?