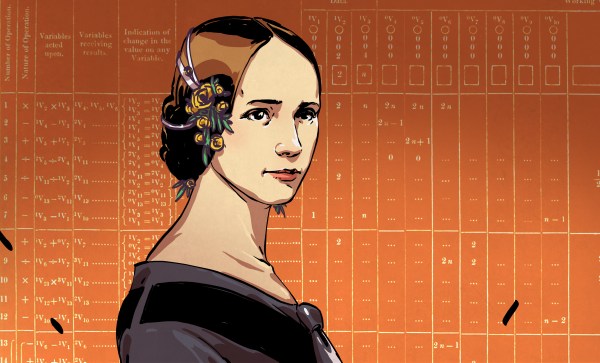
Silicon Bugs In The FTDI FT232R, And A Tidy RF VCO Project

[Scott Harden] wrote in to tell us of some success he’s having using the FT232 chip to speak SPI directly from his laptop to a AD98850 digital signal generator. At least that was his destination. But as so often in life, more than half the fun was getting there, finding some still-unsolved silicon bugs, and (after simply swapping chips for one that works) potting it with hot glue, putting it in a nice box, and putting it up on the shelf.

In principle, the FTDI FT232 series of chips has a bit-bang mode that allows you to control the individual pins from a fairly simple API on your target computer, using their drivers and without installing anything on basically any platform. We wrote this feature up way back in 2009, and [Scott] was asking himself why he doesn’t see more hacks taking advantage of bit-bang mode.

“Square” waves

Then he answered his own question the hard way, by spending hours “debugging” his code until he stumbled on the FTDI errata note (PDF), where they admit that bit-bang mode doesn’t get timings right at all on the FT232R and FT232RL parts. FTDI has made claims that they fixed the bug in subsequent chip revisions, but the community has not been able to confirm it. If you want to use bit-bang mode, which is plenty cool, steer clear of the FT232R chips — the ones found in the ever-popular FTDI cables and many adapter dongles.

The good news here is twofold. First, now you know. Second, bit-bang mode is tremendously useful and it works with other chips from the vendor. Particularly, the FT232H and FT230X chips work just fine, among others. And [Scott] got his command-line controlled digital VCO up and running. All’s well that ends well?

We’ll wrap up with questions for the comment section. Do other manufacturers’ cheap USB-serial chips have an easily accessible bit-bang mode? Are any of you using USB bit-bang anyway? If so, what for?

Reverse-Emulating NES: Nintendception!

This is a stellar hack, folks. [Tom7] pulled off both full-motion video and running a Super Nintendo game on a regular old Nintendo with one very cute trick. And he gives his presentation of how he did it on the Nintendo itself — Nintendo Power(point)! The “whats” and the “hows” are explained over the course of two videos, also embedded below.

In the first, he shows it all off and gives you the overview. It’s as simple as this: Nintendo systems store 8×8 pixel blocks of graphics for games on their ROM cartridges, and the running program pulls these up and displays them. If you’re not constrained to have these blocks stored in ROM, say if you replaced the cartridge with a Raspberry Pi, you could send your own graphics to be displayed.

He demos a video of a familiar red-haired English soul-pop singer by doing just that — every time through the display loop, the “constant” image block is recalculated by the Raspberry Pi to make a video. And then he ups the ante, emulating an SNES on the Pi, playing a game that could never have been played on an NES in emulation, and sending the graphics block by block back to the Nintendo. Sweet!

The second video talks about how he pulled this off in detail. We especially liked his approach to an epic hack: spend at least a day trying to prove that it’s impossible, and when you’ve eliminated all of the serious show-stoppers, you know that there’s a good chance that it’ll work. Then, get to work. We also learned that there were capacitors that looked identical to resistors used in mid-80s Japan.

These are long videos, and the first one ends with some wild speculation about how a similar human-brain augmentation could take a similar approach, replacing our “memories” with computed data on the fly. (Wait, what?!? But a cool idea, nonetheless.) There’s also another theme running through the first video about humor, but frankly we didn’t get the joke. Or maybe we just don’t know what’s funny. Comments?

None of that matters. A SNES game was played in an NES by pushing modified graphics from a “ROM” cartridge in real-time. And that’s awesome!

If you want more Nintendo-in-Nintendo goodness, check out this NES ROM that’s also a zip file that contains its own source code. If you compile the source, you get the zip file, which if you unzip gives you the source to compile. Right?

Continue reading “Reverse-Emulating NES: Nintendception!”

Friday Hack Chat: Logic Noise

If you like your synthesizers glitchy, squawky, or simply quick-and-dirty, you won’t want to miss this week’s Hack Chat with Hackaday’s own [Elliot Williams], because he’ll be brain-dumping everything he knows about making music with 4000-series CMOS logic chips. Break out your breadboards!

Continue reading “Friday Hack Chat: Logic Noise”

Hackaday Belgrade Is On: Join LiveStream And Chat!

Good morning Hackaday universe! Hackaday Belgrade 2018 has just started, and we’re knee-deep in sharing, explaining, and generally celebrating our craft. But just because you’re not here doesn’t mean that you shouldn’t take part.

Come join us!

Hackaday Belgrade 2018 Is Sold Out: We Can’t Wait For Saturday

Greetings from beautiful Belgrade! With the Hackaday crew arriving over the last couple of days, preparations are in full swing, and the excitement is building for Hackaday Belgrade 2018 on Saturday. Here’s all the news you need to know.

If you haven’t gotten tickets yet, you can’t say we didn’t warn you! We’ve sold out. But don’t despair: there’s a waitlist, so get your name in now if you still want to get in.

If you’re looking for something to do in town this weekend, don’t miss [Brian Benchoff]’s Ode to Belgrade and especially some great local info in the comments. From which taxis to take, to finding a hardware store, to touring monuments of brutalist architecture, this post has it all.

And last but not least, the badges are in the final stages of production.  [Voja] and [Mike] are temporarily distracted by watching themselves on N1, the Serbian CNN affiliate, for which they were interviewed this morning about hacker culture, and about building badge hardware and writing the firmware for it. They’ll get back to epoxying speakers and writing code any time now.

In short, Hackaday Belgrade is a sold-out, unstoppable force of nature. We’re so excited to be here and can’t wait to see you all on Saturday!


Ask Hackaday: How Do You DIY A Top-Octave Generator?

One of the great joys of Hackaday are the truly oddball requests that we sometimes get over the tip line. Case in point: [DC Darsen] wrote in with a busted 1970s organ in need of a new top-octave generator, and wondered if we could help. He had found a complicated but promising circuit online, and was wondering if there was anything simpler. I replied “I should be able to get that done with a single Arduino” and proceeded to prove myself entirely wrong in short order.

So we’re passing the buck on to you, dear Hackaday reader. Can you help [DC Darsen] repair his organ with a minimum amount of expenditure and hassle? All we need to do is produce twelve, or maybe thirteen, differently pitched square waves simultaneously.

Continue reading “Ask Hackaday: How Do You DIY A Top-Octave Generator?”

Optocouplers: Defending Your Microcontroller, MIDI, And A Hot Tip For Speed

Deep in the heart of your latest project lies a little silicon brain. Much like the brain inside your own bone-plated noggin, your microcontroller needs protection from the outside world from time to time. When it comes to isolating your microcontroller’s sensitive little pins from high voltages, ground loops, or general noise, nothing beats an optocoupler. And while simple on-off control of a device through an optocoupler can be as simple as hooking up an LED, they are not perfect digital devices.

But first a step back. What is an optocoupler anyway? The prototype is an LED and a light-sensitive transistor stuck together in a lightproof case. But there are many choices for the receiver side: photodiodes, BJT phototransistors, MOSFETs, photo-triacs, photo-Darlingtons, and more.

So while implementation details vary, the crux is that your microcontroller turns on an LED, and it’s the light from that LED that activates the other side of the circuit. The only connection between the LED side and the transistor side is non-electrical — light across a small gap — and that provides the rock-solid, one-way isolation.

Continue reading “Optocouplers: Defending Your Microcontroller, MIDI, And A Hot Tip For Speed”