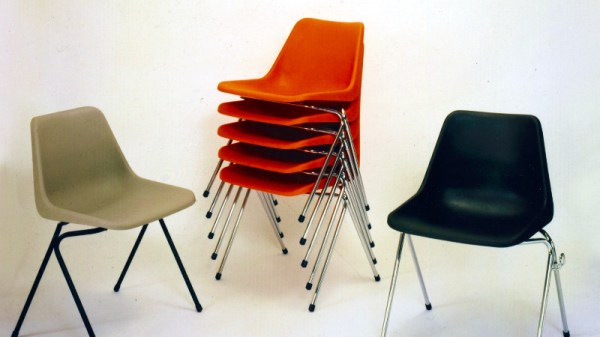
If you move as a hardware hacker through the sometimes surprisingly similar world of artists, craftspeople, designers, blacksmiths, and even architects, there’s one piece of work that you will see time and time again as an object that exerts a curious fascination. It seems that designing and building a chair is a rite of passage, and not just a simple chair, but in many cases an interesting chair.
An American-made Windsor chair from the turn of the 19th century. Los Angeles County Museum of Art [Public domain]Some of the most iconic seating designs that you will be instantly familiar with through countless mass-produced imitations began their lives as one-off design exercises. Yet we rarely see them in our community of hackers and makers, a search turns up only a couple of examples. This is surprising, not least because there is more than meets the eye to this particular piece of furniture. Your simple seat can be a surprisingly complex challenge.
Moving Charis From Artisan to Mass Market
The new materials and mass production techniques of the 19th and 20th centuries have brought high-end design into the hands of the masses, but while wealthy homes in earlier centuries had high-quality bespoke furniture in the style of the day, the traditional furniture of the masses was hand-made in the same way for centuries often to a particular style dependent on the region in which it was produced.
So you’ve rushed off to your favourite dealer in Raspberry Pi goodies and secured your shiny new Raspberry Pi 4. Maybe you’re anxiously waiting for the postie, or perhaps if you’re lucky enough to live near Cambridge you simply strolled into the Pi shop and bought one over the counter. You’ve got the best of the lot, the 4 GB model, and there’s nothing like the feeling of having the newest toy before everyone else does.
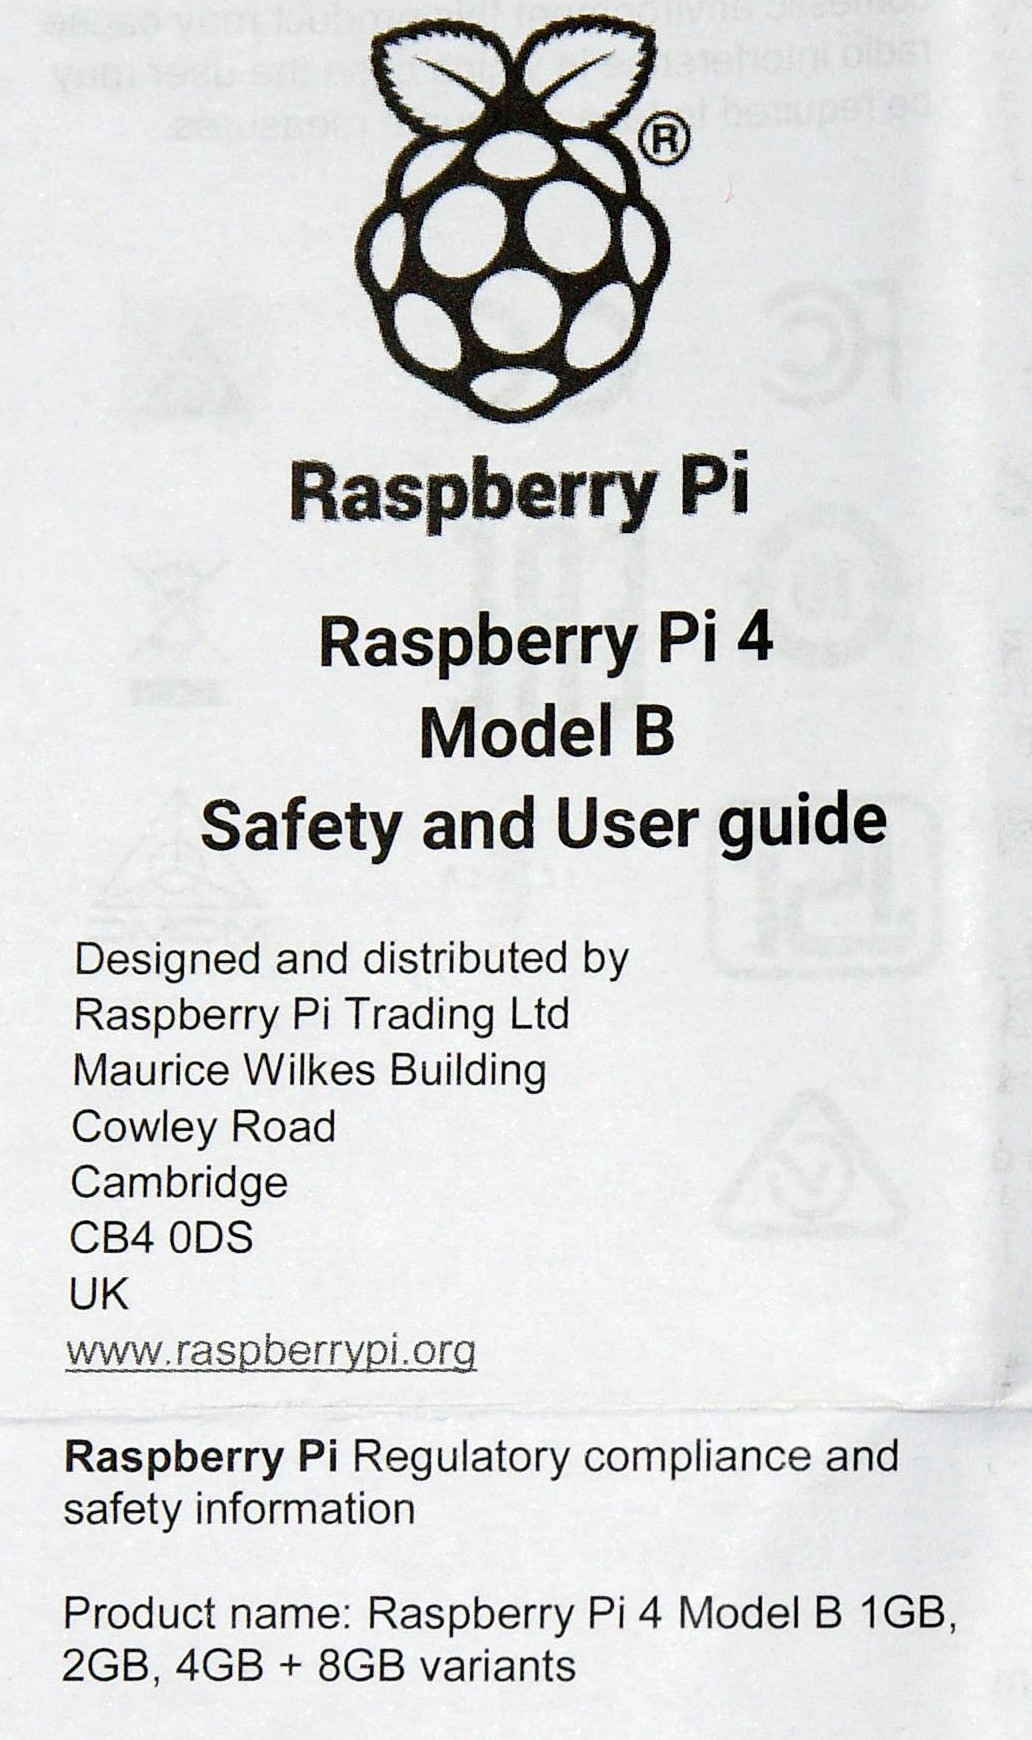
A scan of the Pi 4 user guide, with a tantalising 8GB at the bottom.
You open the box, pull out the Pi, and get busy. The instruction leaflet flutters to the floor, ignored and forgotten. If you’re our tipster [Eric van Zandvoort] though, you read it, notice something unexpected, and send a scan to your friends at Hackaday. Because there at the top, in the regulatory compliance information that nobody reads, is the following text:
Product name: Raspberry Pi 4 Model B 1 GB, 2 GB, 4 GB + 8 GB variants.
It’s not the lack of an Oxford comma that caught his eye, but the tantalising mention of an 8 GB Raspberry Pi 4. Could we one day see an extra model in the range with twice the memory? It would be nice to think so.
There are a couple of inevitable reactions when a new product comes out. First, everyone who has just bought the previous one will be upset, and second there will always be a group of people who say “Ah, don’t buy this one, wait for the super-duper upgrade model!” We’d like to suggest to anyone tempted into the latter group that this news should be no reason not to buy a Raspberry Pi 4 at the moment, because the prospect of an 8 GB variant should come as a shock to nobody.
It makes absolute sense that the Pi people will have equipped their SoC with as much address space as they can get into it, and equally as much sense that they will have fitted the final products with whatever memory chips keep it within their target price point. If you cast your mind back you’ll know that this isn’t the first time this has happened, early boards were shipped with 256 MB of RAM but later upgraded to 512 MB as the economics made it possible. Those with extreme knowledge of Pi trivia will also know that the original Model A was announced with 128 MB and released with 256 MB for the same reason.
There’s another question, would 8 GB make that much difference? The answer depends upon what you are doing with your Pi 4, but it’s worth remembering that this is no high-end workstation but a single-board computer with a stripped-down Linux distro for experimenters. You may be disappointed if you are pushing the limits of computational endeavour, but the majority of users will not be taxing Raspbian on the 4 GB model even if they install Chromium and open up all their favourite bloated social media sites. Perhaps we’ve become conditioned by the excessive demands of Windows on an x86 platform and forgotten just how powerful our computers really are. After all, as the apocryphal Bill Gates quote has it, “640k should be enough for anyone“, right?
We can look forward to an 8 GB Pi 4 then at some point in the future. We’d put our money on next year, since 2020 is a leap year and 2020-02-29 will be the Pi’s 2nd 8th birthday, it wouldn’t stretch the imagination to speculate around that date. But don’t bet on it, save your money for buying a 4 GB Pi 4 right now.
By now you will all have heard so much about the grille on Apple’s new “Cheese grater” Mac Pro that you might think there was nothing more to say. Before we move on though there’s one final piece of work to bring to your attention, and it comes from [Andy Pugh]. He’s replicated the design in Fusion 360, and used it to produce rather an attractive Raspberry Pi case.
It seems that for Fusion 360 users the problem lies in that package’s method of placing spheres which differs from that of some other CAD software. Using the page linked in our previous coverage of the grille he’s taken its geometry information and produced a video detailing every step in recreating it for Fusion 360. This is where following someone who really knows your CAD package pays dividends, because we suspect it would take us days to figure out some of the tricks he shows us.
The result is the Raspberry Pi case, which is for the Pi 3 and others like it. Sadly we couldn’t break our embargo and tell him about the Pi 4 and its different connector layout, but we’re guessing a halfway competent CAD operator could put together a Pi 4 case. Andy’s files can be found on Thingiverse, so you can all make one for yourselves.
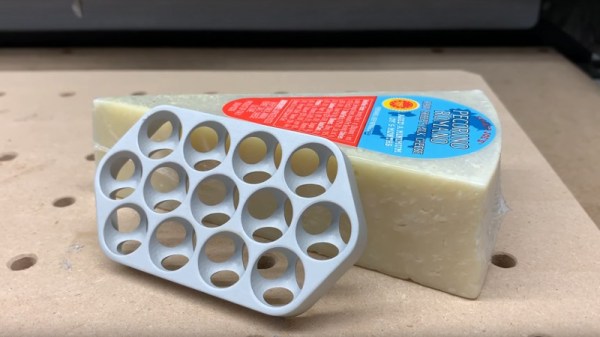
Apple’s newest Mac Pro with its distinctive machined grille continues to excite interest, but until now there has been one question on the lips of nobody. It’s acquired the moniker “Cheese grater”, but can it grate cheese? [Winston Moy] set out to test its effectiveness in the kitchen with a piece of Pecorino Romano, a great cheese.
Of course, the video is not really about cheese grating, but about the machining process to create that distinctive pattern of intersecting spherical holes. He doesn’t have a real Mac Pro because nobody does as yet, so like others his approach was to reverse engineer the manufacturing process. He takes us through the entire thing and the rationale behind his decisions as he makes a 13-hole piece of Mac Pro-like grill from a billet of aluminium. It’s first roughly cut with a pair of decreasing-size end mills, then finished with a ball mill. He’s added an extra cut to round off the sharp edge of the hole that isn’t there on the Mac.
An unexpected problem came when he machined the bottom and the holes began to intersect, it was clear that they were doing so wrongly. Turning the piece over must be done in the correct orientation, one to note for any other would-be cheese-grater manufacturers. Finally the piece is blasted for a satin finish, and then anodised for scratch-resistance.
So, the important question must be answered: does it grate? The answer’s no, the best it can manage is something close to a crumble. He doesn’t seem bothered though, we get the impression he likes eating cheese whatever its form. The whole process is in the video below the break.
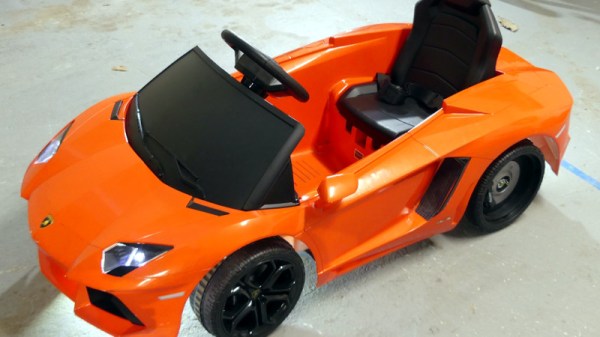
A Lamborghini Aventador Is beyond the budget of all but the most well-heeled fathers, but [CodeMakesItGo] came pretty close with a gift for his young son. It was a Lamborghini Aventador all right, but only the 6V Power Wheels ride-on version. As such it was laclustre even for a youngster in its performance, so he decided to give it a 12V upgrade. This proved to have enough grunt to cause wheelspin on those hard plastic wheels, so a further upgrade was a traction control system featuring a NodeMCU. No other child has such a conveyance!
Veterans of the Power Racing Series or Hacky Racers might have expected to see a Chinese motor controller in the mix, but instead he’s used a set of relays for simple on-off control. The traction control has a pair of 3D-printed sensor wheels that operate upon a corresponding pair of optocouplers to provide feedback to the NodeMCU. A set of different drive options were tried, with finally an H-bridge board being found to be most reliable.
The video below the break shows the hardware, and goes into some detail on the software. The NodeMCU’s WiFi is used to provide some tweakability to the system on the go. The traction control turns out to lower the standing start speed a little, but makes the machine more controllable by its driver. he certainly seems happy with his toy!
By now we should all be used to the astonishing variety of CPUs that have come our way created from discrete logic chips. We’ve seen everything from the familiar Von Neumann architectures to RISC and ever transport-triggered architecture done in 74 TTL derivatives, and fresh designs remain a popular project for many people with an interest in the inner workings of a computer.
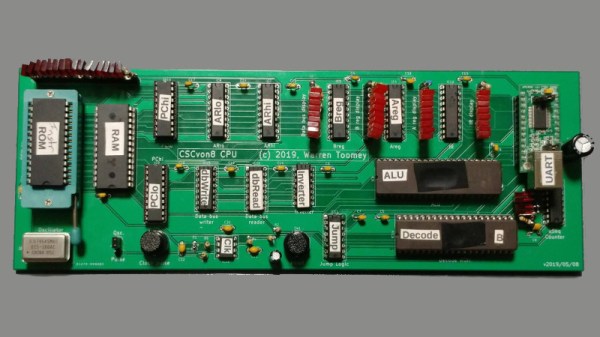
[Warren Toomey]’s CSCvon8 is an interesting machine that implements an 8-bit computer with a 64-bit address space using only 17 chips, and without resorting to any tricks involving microcontrollers. It implements a fairly conventional Von Neumann architecture using TTL with a couple of tricks that use modern chips but could have been done in the same way in decades past. Instruction microcode is stored in an EEPROM, and the ALU is implemented in a very large EPROM that would probably once have been eye-wateringly expensive. This in particular removes many discrete TTL chips from the total count, in the absence of the classic 74181 single-chip part. To make it useful there is 32k each of RAM and EEPROM, and also a UART for serial access. The whole is brought together on a neat PCB, and there is a pile of demo code to get started with. Everything can be found in the project’s GitHub repository.
At the start of this article we mentioned a couple of unconventional TTL CPUs. The transport triggered one we featured in 2017, and the RISC one is the Gigatron which has appeared here more than once.
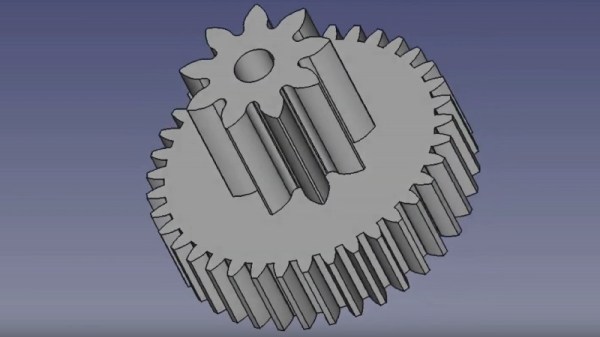
It’s very likely that a majority of readers will have had a gear fail in a piece of equipment, causing it to be unrepairable. This is a problem particularly with plastic gears, which shed teeth faster than a child who has discovered the financial returns of the Tooth Fairy.
[BcastLar] has a shredder with a gear that has, well, shredded. He’s posted a video series over three parts that while ostensibly about fixing his shredder, is in reality a three-part tutorial on how to create custom gears using FreeCAD. While the principles of a gear are readily apparent to most observers their intricacies hide significant complexity which he does a great job of explaining. How to measure the parameters of a given gear, explaining mysteries such as pitch angle or beta, he breaks everything down in easy to understand steps.
His tool of choice is FreeCAD, and while he explains that FreeCAD has the ability to make gears from scratch the tool employed in the videos is the Gear Workbench plugin. He shows how this software removes the complexity of creating a gear, and shows the process on his screen as he creates the custom shredder part.
Finally, the process of 3D printing the gear is explained. You might ask why not machine it, to which he responds that tooling for non-standard gear profiles is prohibitively expensive. We’ve placed all three videos below the break, and we think you might want to make yourself a cup of tea or something and work through them.
![An American-made Windsor chair from the turn of the 19th century. Los Angeles County Museum of Art [Public domain]](https://hackaday.com/wp-content/uploads/2019/05/Windsor_Arm_Chair_LACMA_54.80.jpg)