Polynesian cultures have a remarkable navigational tradition. It stands as a testament to human ingenuity and an intimate understanding of nature. Where Western cultures developed maps and tools to plot courses around the world, the Polynesian tradition is more about using human senses and pattern-finding skills to figure out where one is, and where one might be going.
Today, we’ll delve into the unique techniques of Polynesian navigation, exploring how keen observation of the natural world enabled pioneers to roam far and wide across the breadth of the Pacific.
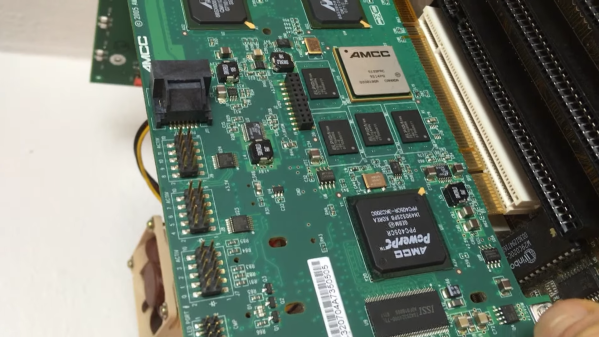
PCI and PCI-X are not directly compatible, and you’d be forgiven for thinking that means you’re out of luck if you need to use a PCI-X card in a machine that only has basic PCI slots. And yet, that needn’t be the case. As [Peter] shows us, you can work around this with a cheap hacky hack. Our favorite kind!
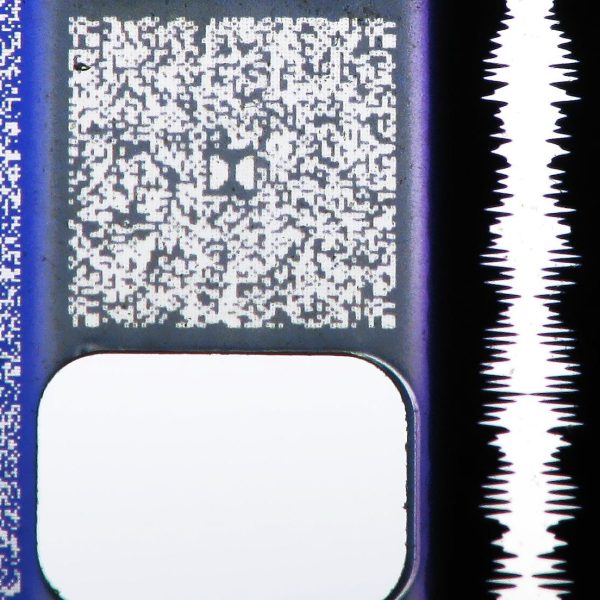
[Peter] had a PCI-X RAID card that he wanted to use on his Socket 7-based computer. The 3ware 9550SX PCI-X card is 3.3 V only, and doesn’t fit in a typical PCI slot. It’s not compatible mechanically or electrically. Enter a PCI-X riser, which gets around the missing notch that would normally not let the card sit in the slot. Other than that, it just took masking off some pins to avoid damage from the 5 V rail. Throughput is good, too, reportedly sitting at roughly 60-70 MB/s.
The hard part is probably finding a PCI-X riser; PCI-Express stuff is far more common. Few of us need to deal with PCI-X anymore, but if you’re working on some ancient industrial hardware or something, this hack might just save your beans from the roast pot one day.
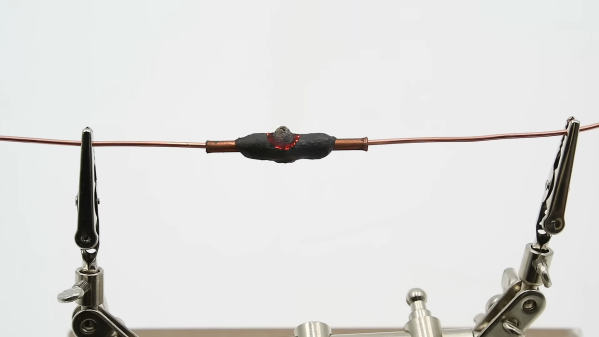
Imagine you’re a commando, doing some big secret mission on the continent in the midst of World War II. You need to hook up some wires to your explosive charges, and time is of the essence. Do you bust out the trusty Weller and see if those petulant Axis chaps will let you plug it in somewhere? No! You use a pyrotechnic self-soldering sleeve, as [Our Own Devices] explains.
Like so many British inventions during the war, the sleeves really are ingenious. They were developed by the Special Operation Executive, an organization charged with sabotage and subversion operations in then-occupied Europe.
The soldering sleeves were designed to make electrical connections between detonators and firing wires for explosives. The sleeves consist of a copper tube through which wires to be joined are fed, with a lump of solder in the middle. The assembly is covered in pyrotechnic material with a safety match-style starter chemical dosed on top. Using the sleeves is simple. First, two stripped wires are fed into either end of the copper tube. The starter the sleeve is then ignited using the box, just like striking a match. The pyrotechnic material then gets red hot, melting the solder and making the connection.
It’s well worth watching the video to see how these field-expedient devices actually work. We’ve explored the use of more-typical solder sleeves before, too. Video after the break.
Every time there’s a plane crash or other aviation safety incident, we often hear talk of the famous “black box”. Of course, anyone these days will tell you that they’re not black, but orange, for visibility’s sake. Plus, there’s often not one black box, but two! There’s a Flight Data Recorder (FDR), charged with recording aircraft telemetry, and a Cockpit Voice Recorder (CVR), designed to record what’s going on in the cabin.
It sounds straightforward enough, but the cockpit voice recorder has actually become the subject of some controversy in recent times. Let’s talk about the basics of these important safety devices, and why they’re the subject of some debate at the present time.
Nanoleaf is well-known as being that company that makes those lovely glowing tiles that you can hang on your wall. The only thing is, they’re not cheap. So if you want a really cool layout, you have to spend a great amount of money. [Projects with Red] was inspired by the basic concept, though, and whipped up their own gem-shaped wall tiles along similar lines.
The devices can work as a big clock if you so desire.
The irregular hexagon shape of each gem has ten connection points to attach the segments together. Physical connections are made using the 3D printed housings of each segment, while connections are simply made with wires and connectors hanging out the back for flexibility.
Each segment features a black printed housing with a solid lid and a translucent acrylic sheet to act as a diffuser. An addressable LED strip is mounted to the lid for illumination, with Dupont connectors for hooking them up to power and data. An ESP32 is used to drive the addressable LED chain, running the WLED.me software for easy control of the lights and animations. The video below also explains how to configure the segments into a giant colorful 7-segment display.
If we told you somebody built a 3D printed go-kart, you’d expect to see a certain sequence of events. A bit of work in CAD, a printer montage, then some assembly. That’s not the case here. [3D Sanago] is an artist that works with 3D printing pens, creating 3D objects entirely by hand. It’s an impressive skill, all the more so when it’s used to build something functional like this gorgeous little go-kart.
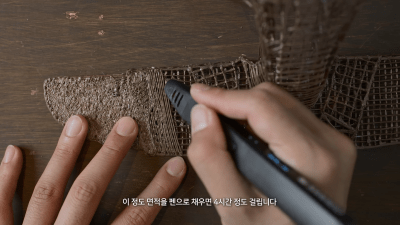
Just filling in the front wing of this build took approximately four hours. Thus, [3D Sanago] used foam boards to cover much of the chassis.The build recreates the kart from the KartRider Rush+ game. The first step was to purchase a basic RC car frame to serve as the basis for the kart. [3D Sanago] then set about building a kart skeleton over the unpainted body of the basic RC car. It starts with a wireframe and individual flat panels that are eventually fused together into 3D trusses using the 3D pen.
The trusses are then mounted to the RC car chassis underneath with some wood plates serving as a supporting structure. [3D Sanago] has been known to surface his creations by tediously filling in the wireframes with the 3D pen, but not so this time. He took the easy way out of affixing sections of foam board to create the outer skin of the kart. He also demonstrates neat techniques like forming over a pen to create long plastic pipes and other tubular features. His acrylic-and-mousepad wheel and tire package is also pretty neat.
It’s as much craft as anything else, but it’s amazing to see what can be done when a human takes on the role of a 3D printer. We’ve featured other great builds from [3D Sanago] before, like this awesome Pokemon-themed humidifier.
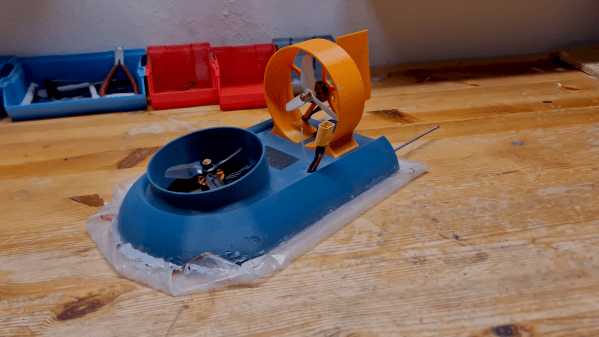
The build started with a design [ValRC] found online. It was simple enough to print and assemble, needing only a pair of a brushless motors, a speed controller, a receiver, and a servo to run the show. The design uses a plastic bag as a skirt, assembled around a 3D printed frame. That proved to be the hardest part of the build, as hot glue didn’t want to play nice with the thin garbage bag.
Even despite the challenges, once assembled, the hovercraft performed well. It readily slid around on a cushion of air, drifting across asphalt with abandon. Upgrades included a better rudder and a skirt made of thicker and more resilient plastic. The final craft looked mesmerizing as it glided over the smooth concrete of a parking garage with ease.