We live in a golden age for MIDI controllers. [rheslip]’s contribution to the milieu is a twisty take on the format, in that it’s covered in an array of knobs. Thus the name—Twisty 2.
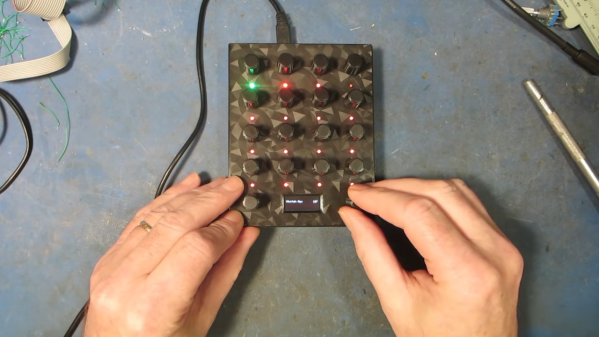
The controller can be built using the Raspberry Pi Pico or Pico 2. It’s set up to read a 4×4 array of clickable encoders, plus two bonus control knobs to make 18 in total, which are read via a 74HC4067 analog mux chip. There’s also an SK6812 RGB LED for each encoder, and an OLED display for showing status information. MIDI output is via USB, or, if you purchased the W variant of the Pi Pico/Pico 2, it can operate wirelessly over Bluetooth MIDI instead. The controller is set up to send MIDI CC messages, program changes, or note on/off messages depending on its configuration. Flipping through different modes is handled with the bottom set of encoders and the OLED display.
Few musicians we’ve ever met have told us they learned how to play the encoders, and yet. The cool thing about building your own MIDI controller is you can tune it to suit whatever method of performance strikes your fancy. If the name of this build alone has you inspired, you could always whip up a MIDI controller out of a Twister mat.
Continue reading “Wireless MIDI Controller Has Lots Of Knobs”


