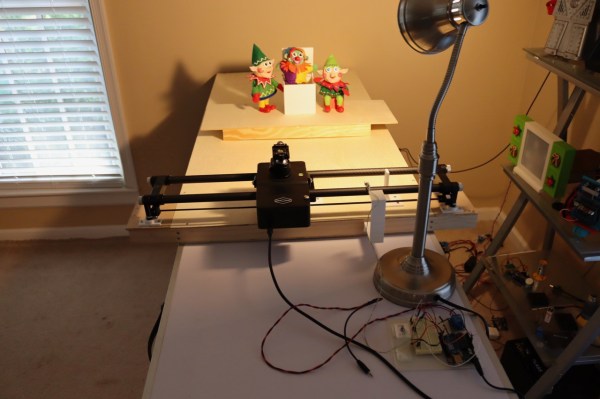
Photo rail setup for stop motion

Stop-Motion Angels In The Light Field

Baseball jokes aside, holograms have been a dream for decades, and with devices finally around that support something like them, we have finally started to wonder how to make content for them. [Mike Rigsby] recently entered his stop-motion holographic setup into our sci-fi contest, and we love the idea.

Rather than a three-dimensional model or a 2d picture with pixels, the Looking Glass light field display supports a series of images as quantized points (hence light field). As you move around an object, images are interpolated between the frames you do know, giving a pretty convincing effect. In a traditional stop motion animation, you need to take anywhere between 12-24 frames to equal about one second of animation. Now that you need to take 48 pictures for one frame, over 1152 pictures for just one second of animation. Two problems quickly appear, how to take photographs accurately from the same position every time and how do you manage the deluge of photos sensibly. [Mike] started with a wooden stage for his actors. A magnet was mounted to the photo rail carriage, and a sensor allowed it to detect that it was in the same spot. An Arduino controls the rail, reads the magnet via a sensor, and controls the camera shutter. The DSLR he’s using can’t do that many frames per second, but that’s a problem for another sci-fi contest.

Holographic-ish displays are finally here, and they’re getting better. But if a display isn’t your speed, perhaps some laser-powered glasses can be the holographic experience you’re looking for?

This project was an entry into the 2022 Sci-Fi Contest. Check out all of the winning entries here.

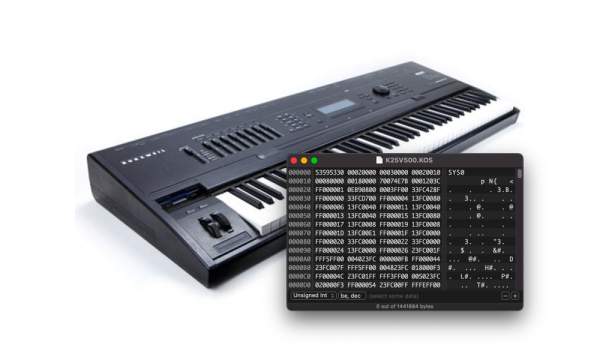
A Kurzweil K2500 piano

Patching The Kurzweil K2500 Synthesizer

Despite being a computer with some extra chips, synthesizers today are still quite expensive. They used to cost far more, but we tend to think of them as instruments instead of computers. And just because it is an instrument doesn’t mean someone like [Peter Sobot] can’t crack it open and patch the OS inside.

The synth in question is a Kurzweil K2500, released in 1996 with a Motorola 68000. Rather than directly start pulling out parts on the kitchen table, [Peter] began by doing some online research. The K2500 operating system is still available online, and a quick pass through Ghidra showed some proper instructions, meaning the file likely wasn’t encrypted.

He found the part of the code that reads in a new firmware file and checks the header and checksum. Certain functions were very high in memory, and a quick consultation of the service manual yielded an answer: it was the volatile RAM. With that tidbit, [Peter] was able to find the function that copied chunks of the new ROM file to RAM and start decoding the file correctly. [Peter] changed a few strings, made sure the checksums were correct, and he was ready to flash. The actual tweaks that [Peter] are made are left up to the reader, but the techniques to get a working decompiled build and a viable ROM image to flash apply to many projects. One benefit is now the K2000 simulates correctly in MAME due to his spelunking. He has his flashing script up on GitHub for the curious.

Ghidra is perfect for this kind of thing. We’ve seen people tweaking their water coolers with it. It opens to door towards tweaking anything to your liking.

Optimized Super Mario 64 Offers Exciting Possibilities

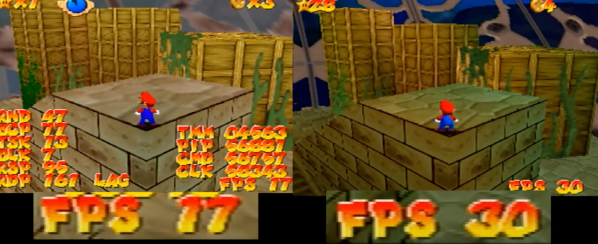
When working on any software project, the developers have to balance releasing on time with optimizations. As long as you are hitting your desired time constraints, why not just ship it earlier? It’s no secret that Super Mario 64, a hotly anticipated launch title for the Nintendo 64 console in 1996, had a lot of optimizations left on the table in order to get it out the door on time. In that spirit, [Kaze Emanuar] has been plumbing the depths of the code, refactoring and tweaking until he had a version with serious performance gains.

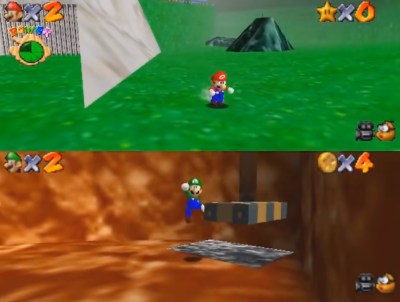
Why would anyone spend time improving the code for an old game that only runs on hardware released over two decades ago? There exists a healthy modding community for the game, and many of the newer levels that people are creating are more ambitious than what the original game could handle. But with the performance improvements that [Kaze] has been working on, your budget for larger and more complex levels suddenly becomes much more significant. In addition, it’s rumored that a multi-player mode was originally planned for the game, but Nintendo had to scrap the feature when it was found that the frame rate while rendering two cameras wasn’t up to snuff. With these optimizations, the game can now handle two players easily.

Luigi has been waiting 26 years for his chance to shine.

[Kaze] has a multi-step plan for improving the performance involving RAM alignment, compiler optimizations, rendering improvements, physics optimizations, and generally reducing “jankiness.” To be fair to the developers at Nintendo, back then they were working with brand new hardware and pushing the boundaries of what home consoles were capable of. Modeling software, toolchains, compilers, and other supporting infrastructure have vastly improved over the last 20+ years. Along the way, we’ve picked up many tricks around rendering that just weren’t as common back then.

The central theme of [Kaze]’s work is optimizing Rambus usage. As the RCP and the CPU have to share it, the goal is to have as little contention as possible. This means laying out items to improve cachability and asking the compiler to generate smaller code rather than faster code (no loop unrolling here). In addition, certain data structures can be put into particular regions of memory that are write-only or read-only to improve resource contention. Logic bugs are fixed and rendering techniques were improved. The initial results are quite impressive, and while he isn’t done, we’re very much looking forward to playing with the final product.

With the Nintendo 64 on its way to becoming a mainline-supported Linux platform, the old console is certainly seeing a lot of love these days.

Continue reading “Optimized Super Mario 64 Offers Exciting Possibilities”

Developing Your Own Digital Film

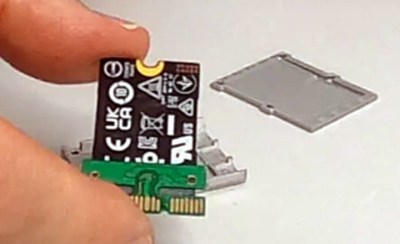
In the olden days, you would have a roll of film that you could take to your local drug store and have them develop it. But a serious photographer would likely develop their own photos to maintain complete creative control. While photo editing software has largely replaced the darkroom of old, the images are still held on physical media, and that means there’s room for improvement and customization. In an article for photofocus, [Joseph Nuzzo] shows how you can make your own CFexpress card — the latest and greatest in the world of digital camera storage tech — for less than $100 USD.

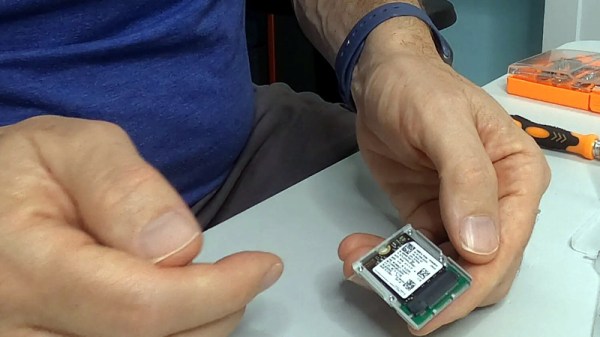
The idea here is pretty simple, as CFexpress uses PCIe with a different connector. Essentially all you have to do is get a M.2 2230 NVMe drive and put it into an adapter. In this case [Joseph] is using a turn-key model from Sintech, but we’ve shown in the past how you can roll your own.

Now you might not give it much thought normally, but NVMe devices get pretty hot. This usually isn’t problem inside a large computer case, where they often have large amounts of air blowing over them. But inside a camera you need to dissipate that heat, so thermal compound is a must. With everything screwed together, you have your own card that’s faster and cheaper than commercial offerings.

It’s no secret that there’s a lot of love for NVMe. It’s easy, fast, and adaptable. Since the M.2 slot format includes SATA and PCIe, there’s a likely chance there is a PCIe bus in many cameras. The PCIe bus on the Pi has been convenient for hacking, and we wonder what sort of hacks are out there for cameras.

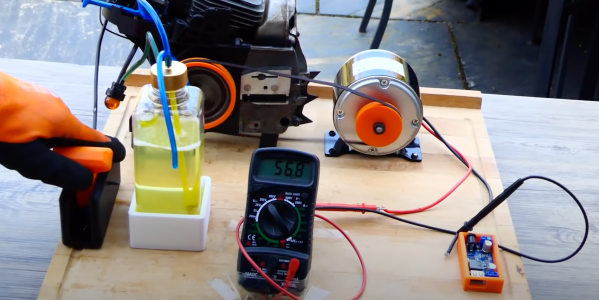
the full charger with gas tank and engine

Charge Your Apple With Apples

When you think of ethanol, you might think of it as a type of alcohol, not alcohol itself. However, in reality, it is the primary ingredient in adult beverages. Which means humans have gotten quite good at making it, as we’ve been doing for a long time. With this in mind, [Sam Barker] decided to make ethanol out of apples to power a small engine to charge his phone.

The steps for making pure ethanol is quite similar to making alcoholic cider. A friend of [Sam’s] had an orchard and a surplus of apples, so [Sam] boiled them down and stored the mush in jugs. He added activated dry yeast to start the fermentation process. A dry lock allowed the CO2 gas that was being created to escape. Over a few weeks, the yeast converted all the sugar into ethanol and gas. In the meantime, [Sam] sourced a chainsaw and adapted the engine to run on ethanol, as ethanol needs to run richer than gasoline. The video below the break tells the story.

Continue reading “Charge Your Apple With Apples”

the water gravity air powered engine running

Gravity-Water-Air Powered Engine

Air engines are a common occurrence here on Hackaday. They’re relatively novel and reasonably easy to 3D print without requiring any fluids or supporting machinery. For example, [Tom Stanton] took a previous air engine design, did away with the air compressor, and instead used gravity and water to create just a few PSI to run the engine.

The basic setup is to have a large jug of water up somewhere high. Flexible tubing runs down to [Tom’s] custom acrylic pressure chamber. A little CNC-ing and some epoxy made a solid chamber, and we’re happy to report that [Tom] did some initial simulation before construction to make sure he wasn’t accidentally building a bomb. Some back of the napkin math showed that he could expect around 0.6 bar (around eight psi) with his setup. His first test showed almost precisely that. Unfortunately, [Tom] ran into some issues despite the early success. His engine would stop as it drew air and the pressure dropped, and the replenishing rate of the pressure was limited by the relatively small inlet hole he had drilled.

To fix this, he printed a larger diaphragm for the engine, so the lower air pressure had more to push against. This allowed the engine to run for a good while before the tank filled up. Additionally, he smoothed and polished everything, so it was as low friction as possible. We know we often state it here, but it is incredible what can be achieved with 3D printed parts these days.

We love seeing the iteration evident in this video. The various engine versions splayed across the table offer a powerful story about [Tom’s] persistence. Powering an engine is a small step to powering your whole home.

Continue reading “Gravity-Water-Air Powered Engine”

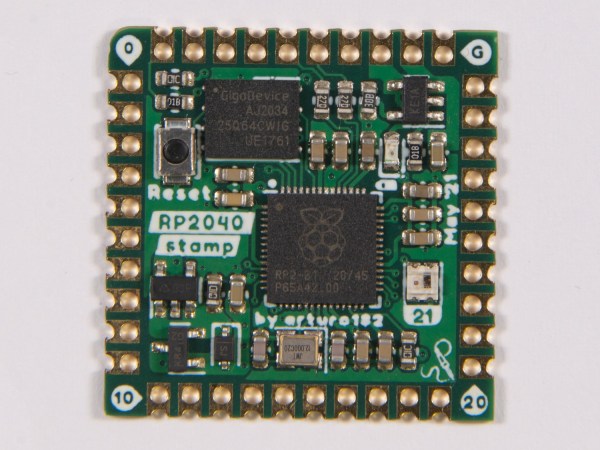
the RP2040 stamp

Putting The RP2040 On A Stamp

In the electronics world, a little one-inch square board with castellated edges allows a lot of circuitry to be easily added in a small surface area. You can grab a prepopulated module, throw it onto your PCB of choice, and save yourself a lot of time routing and soldering. This tiny Raspberry Pi 2040 module from [SolderParty] ticks all those boxes.

With all 30 GPIO broken out, 8MB of onboard flash, and a NeoPixel onboard, you have plenty to play with on top of the already impressive specs of the RPi2040. Gone are the days of in-circuit programmers, and it uses a UF2 bootloader to make it easy B to transfer new images over USB. Rust, MicroPython, Arduino, and the PicoSDK are all development options for code. All the KiCad files, BOM, schematics, and firmware are up on GitHub under a CERN license for your perusal pleasure. They’ve helpfully included footprints as well as a reference carrier board design.

It is a handy little project that might be good to keep in mind or just use as a reference design for your efforts. We have a good overview of the RPi2040 from an STM perspective. If you’re curious about what you could even use this little stamp for, why not driving an HDMI signal?