Building A Resistor Substitution Decade Box

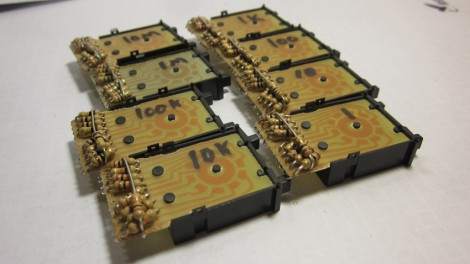
[George] built an incredibly tidy resistor substitution decade box. These devices feature a pair of connections and a way to select the resistance between the two of them. In [George’s] case it’s a pair of banana jacks and these eight thumbwheel switches.

What you see above is the side of each thumbwheel switch. These are panel mount devices which show one digit with an up and down button to change the setting. As you can see, the PCB for each provides connections to which a set of resistors can be mounted. This is the difficult part which he goes to great lengths to explain.

At this point he’s got the resistor groups for each digit soldered in place, the next step is to stack the switches next to each other and connect them electrically. From there it’s off to a project box in which they will be mounted.

This project does a great job of explaining the assembly process. If you’re interested in the theory behind a substitution box check out this other project.

128-inch Silver Screen For Your Viewing Room

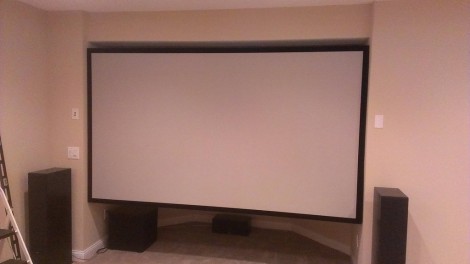
This huge projection screen fills an odd alcove in [Dodge Boy’s] screening room. He built it himself for under $200. The materials, tools, and techniques make this a possibility for anyone who wants their own projection setup.

The frame is made of pine 1×3 dimensional lumber. To keep the fabric from touching the supports in the center of the frame he added quarter-round trim to around the perimeter. From there he painted it black and went for a test-fit. The bad news is that the drywall is neither perfectly flat, nor parallel/square. He ended up taking the trim off and ripping down one side of the frame. That did the trick and he went on to stretch spandex over the whole thing. The frame hangs from a french cleat on either side of the opening. From what we can tell, the surface is just fabric and not painted as we usually see with these setups.

[Dodge Boy’s] utility room shares the back wall of the screening room. That’s where he stores the HTPC which feeds he project, with an RF remote to control it through the wall.

[via Reddit]

IR Remote As PC Input

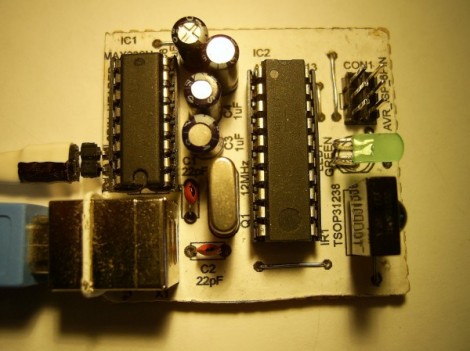
As a learning experience [GeriBoss] put together an IR remote control receiver board for his PC. His want of volume control from across the room was reason enough to undertake the project, and he got to work with a 38 kHz receiver module and Manchester encoding in the process.

The decoder portion of the project is built around an ATtiny2313 chip. The external interrupt pin (INT0) is connected to a TSOP31238. When it decodes a valid remote code it pushes a character to the RS232 chip connecting to the computer’s serial port.

We think this is a wonderful accomplishment for [GeriBoss], but we encourage him to refine the design further. You’ll notice in the image there’s a USB port on the board which is only used to provide regulated power. We know it’s possible to use V-USB with the ATtiny2313 to add USB functionality and this would be a great way to learn about it. We’d also like to mention the resistor and capacitor suggested for filtering the IR receiver module signal. We’ve included the recommended application schematic for that part after the break.

Continue reading “IR Remote As PC Input”

CMOS Logic Clock Tracks 24-hour Time

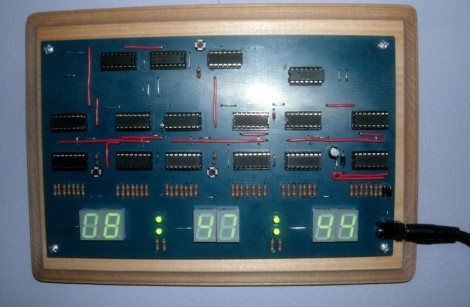
Here’s an IC logic project that displays 24-hour time. Planning was the name of the game for this project. [Mattosx] took the time to layout his design as a PCB in order to avoid the wiring nightmare when build with point-to-point connections.

Much of the complexity is caused by the display itself. Each of the six digits has its own binary-coded decimal chip and array of discrete resistors. Timekeeping is handled by six decade counters, two divider chips, one AND gate chip, and one OR gate chip. He chose a SOIC crystal oscillator chip as the clock signal. We’re more partial to the idea of using mains voltage as the clock signal.

[Mattosx] posted the board artwork if you’d like to etch your own 5″x8″ PCB. Just make sure you read through all of his notes as not all of the chips are oriented in the same direction.

[via Reddit]

A Visually Satisfying Tape Ticker

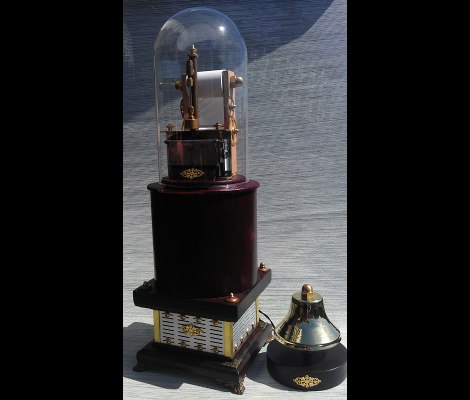
This visually stunning tape ticker prints out [Horatius Steam’s] emails for him. It watches his email address for a secret trigger phrase in the subject line. Sure, thermal receipt printer projects are becoming rather common, but we can’t remember seeing one that took this much time and effort to make it into a showpiece.

The two parts that make this happen are the thermal printer with cutter module and the glass dome which is just large enough to house the business end of it. The driver PCB for the printer is hidden in the base (a paper tube which is painted to took like wood), which positions the outfeed near the bottom of the dome. This had the added benefit of leaving plenty of room for [Horatius] to proudly display the paper roll. Since the receipt printer is designed to work with a Windows machine there was no custom circuitry necessary.

High Voltage ROV Adventures

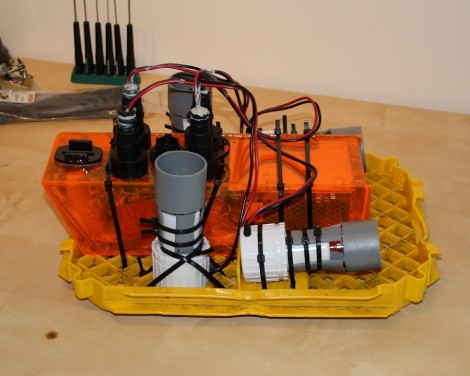
[Eirik] wrote in to share the build log for the third iteration of his underwater ROV. The first two project were completed and tested (you may remember reading about it back in January), but both had issues that caused general failure. Most notably, the introduction of water where he didn’t want it. But this time around he seems to have gotten everything right, successfully taking this little guy down to twenty meters without a leak.

One of the problems he had on version two was supplying electricity from the surface. He needs 12V at up to 10A, and had to use a tether made of 14 AWG to make it happen. That’s a lot of heavy wire to be hauling around and it made the ROV virtually unable to move itself. He wanted to go back to using Cat5e cable but it won’t handle that kind of current. He ended up using an inverter at the surface to up the voltage to 130V, and a switch mode supply on the ROV to get back to 12V. This caused noise on the data lines which he fixed by adding a full-wave rectifer to the inverter’s output.

The dive video after the break shows off the crystal-clear camera shots this thing can capture.

Continue reading “High Voltage ROV Adventures”

Summer Vacation Home For The Indoor Cats

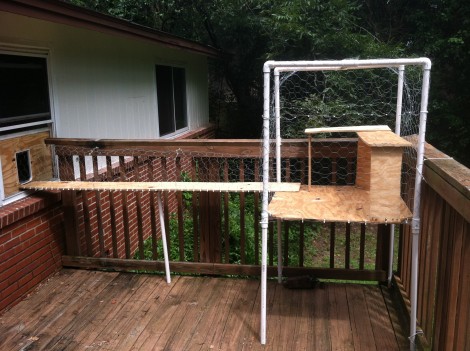
Throw your indoor cat a bone (or a tuna steak as it were) this year by building them a summer vacation spot. Since [Travis Brown] lives on a busy street he worries that his cat would get hit by a car if allowed to roam outside. He and a friend found a suitable alternative with this outdoor cat enclosure.

The centerpiece of the build is a platform that overlooks the back yard. It’s got a couple of different levels which lets the cat see over the deck railing, and provides a bit of shade from the sun during the day. Chicken wire encloses the entire structure to make sure our feline friends don’t go off on their own, but the gang-plank that connects the platform to the house lets them decide when to go outside or come back in. The entrance to the house is an open window covered with plywood and fitted with a cat door. This is a nice touch since the cat door can be locked to keep them in a night.

Between this for summer and the heated bed for winter you’re going to have the most spoiled cat on the block.