DIY Drill Battery Replacement

Replacing Dead Battery Pack Cells Saves You Some Coin

No one will deny that cordless drills can be super convenient. Sure, they need to be charged once in a while but that’s not a big deal. The big deal is when the batteries no longer hold a charge. Buying a new battery pack from the drill OEM is not cheap. If you need several, it’s almost cheaper to buy a new drill/battery combo.

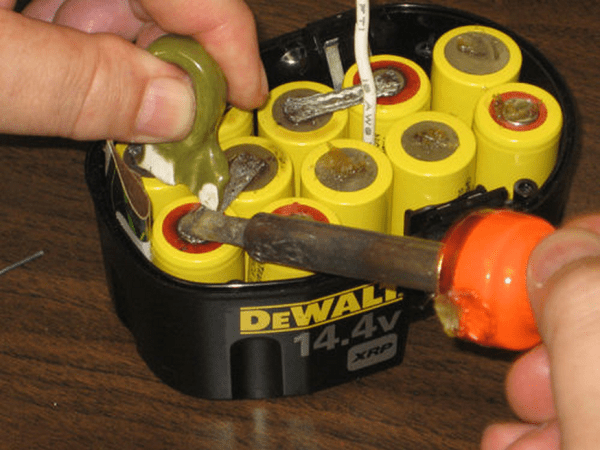
It is not uncommon for only one cell is bad in the battery pack. Getting a replacement cell makes economic sense. And at about $1 per cell, even replacing all of the cells in the pack is way cheaper than the alternatives. [ksickafus] had a battery pack that did not work and not only did he replace all the cells, he wrote a great instructable about it.

The process started by removing the cells from the plastic container. Since they were soldered together they came out in one unit. The cluster of cells was then laid down on a piece of paper and the perimeter of each cell was marked to document the cell orientation. Next, the leads connecting each cell to its neighbor were noted on the same sketch.

The new cells were then laid out on the template to make sure they were in the same orientation as the originals. [ksickafus] uses braided shielding as his new tabs to connect the cells together and learned from experience that flux is necessary for this type of repair. Once everything is soldered up, it’s time to re-assemble the cells in the plastic case and give it a charge. If you do this at home, make sure you keep an eye on it the first time so nothing goes wrong!

If replacing NiCd’s with NiCd’s isn’t cool enough for you, maybe popping some LiPo’s in your drill would be up your alley.

Roll Bender

Vise Reborn As A Roll Bender

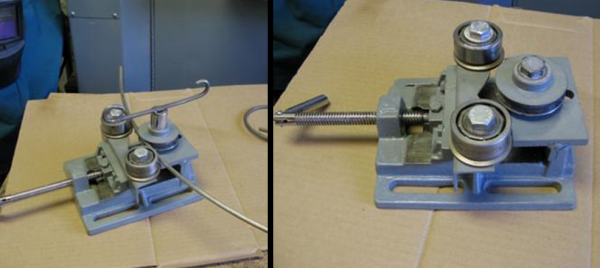
Have you ever tried bending a metal rod into a consistent curve? Maybe you bent it over your knee or broke out a bucket or something. Doing it by hand never really gets the arc perfect. Handyman [Joe] found himself needing to bend a bunch of 1/4″ metal rod into various diameter rings. He didn’t have any tools to bend or roll metal and instead of fretting about it, he put on his ingenuity hat and built a perfect tool for the job.

That perfect tool is called a Roll Bender and it uses 3 rollers to bend metal into an arc of consistent radius. The straight piece of metal is passed by the rollers many times. The distance between the rollers is continually adjusted to reduce the radius of the arc of the metal until it reaches the correct size.

[Joe] started out with an old drill press vise. A piece of plate steel was welded to the  stationary vise jaw to provide a platform for a grooved pulley to be mounted. On the clamping jaw, a piece of angle iron was attached to support two very large bearings. The metal rod is clamped between the two bearings and the grooved pulley. A key made from a socket and some scrap metal as a handle allow the user to rotate the pulley by hand while the distance between the rollers is adjusted by the vise’s crank. Doing this moves the rod back and forth between all 3 rollers to gradually mold the once-straight rod into a full ring.

We’ve always been fond of machines that do the bending for you. Even if they haven’t been invented yet.

DIY Surface Grinder For Making Precision Parts At Home

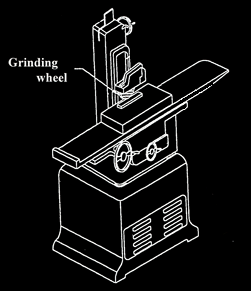
Surface Grinders are machines that can make a surface of a part very flat, very smooth and very parallel to the face of the part that is mounted to the machine. Surface grinders usually have a spinning grinding wheel suspended over a moving bed. The bed moves the part back and forth under the grinding wheel removing an extremely small amount of material at a time, sometimes down to just a ten-thousandth of an inch (o.0001″) in order to make a precision part.

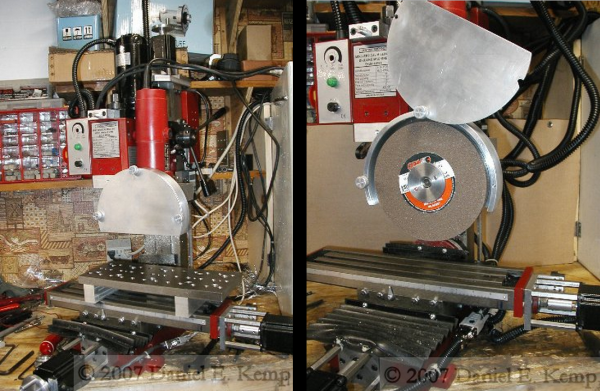
Surface Grinder DIY[Daniel] is a tool guy and wanted a Surface Grinder. He didn’t need a super-accurate commercial grinder so he decided to make one himself. It’s a doozy of a project and is made up of quite a few other tools. [Daniel] already had a mini CNC mill and decided this would be a good platform to begin with. The mill was rigid and already had automated X and Y axes, after all. For the grinder motor, nothing made more economical sense than to use a regular angle grinder, but there were two significant problems. First, no company made wide grinding wheels for an angle grinder. [Daniel] had to modify his spindle to accept an off-the-shelf surface grinding wheel. The second problem is that the new grinding wheel had a max RPM rating of 4400. The angle grinder can reach 10,600 RPM. In order to slow down the angle grinder, a speed control was taken out of an old variable-speed router and integrated with the angle grinder. Problem solved. A mount was then made to attached the angle grinder to the Z axis of the mill.
A magnetic chuck mounted to the mills bed is used to hold down metal work pieces. There is a lever on the chuck that when moved in one direction it creates a magnetic field to hold a ferrous piece of metal firmly to the chuck during machining. When the lever is moved in the other direction, the part is released and can be removed from the Surface Grinder.

To use his new Surface Grinder, [Daniel] creates a CNC g-code file to move his work piece back and forth underneath the grinding wheel. Being able to control the depth of cut and feed rates with his CNC machine removes human error from the grinding process and leaves a consistent finish on the part. Check out the video after the break.

Continue reading “DIY Surface Grinder For Making Precision Parts At Home”

CaseRap - Folding RepRap

New RepRap With Integrated Case, Oddly Called Case-Rap

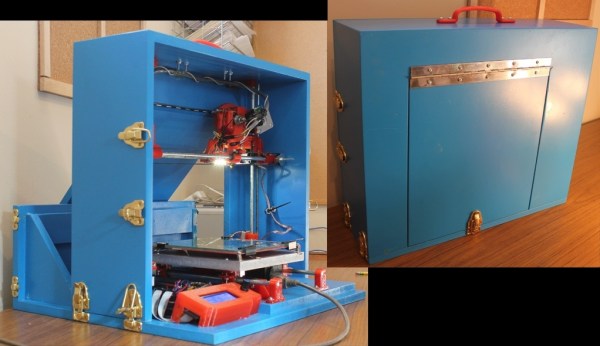
The great thing about RepRaps are that there are so many to choose from! No matter what features or design intent you could want, there is probably a RepRap for that. Even so, there has been a recent addition to the RepRap family. Creator [jlguil] calls it the Case-Rap, and for good reason, the frame of the printer folds up into a suitcase.

The Case-Rap is inspired by the Mendel90 which tries to improve on the original Mendel by replacing the threaded rods for a more rigid sheet material frame with bracing to keep the X, Y and Z axes perpendicular to each other. The Case-Rap goes a little further with the design to have the frame also perform double duty as a travel case.

Check out the video after the break, the printer is actually built in 2 complete separate assemblies. The X and Z axes are mounted in a 4-sided wooded frame. The Y axis and the electronics are mounted on a 2-sided wooden frame. When the frame pieces are latched together in one orientation, they conceal the printer inside a suitcase-sized box. The latch positions were thoughtfully placed so the frame pieces could also be latched together in ‘printer mode’. Setting up and breaking down the printer takes all of 30 seconds.

You may think a super portable printer has to be small… but you’d be wrong. The Case-Rap has a commendable 8x8x8 inch print area. According to [jlguil], the total DIY cost comes in around 350$ CAD, which is not too bad for a 3D printer, and pretty good for one that is unique, portable and capable.

Continue reading “New RepRap With Integrated Case, Oddly Called Case-Rap”

Glowing LED Cubes From The Future

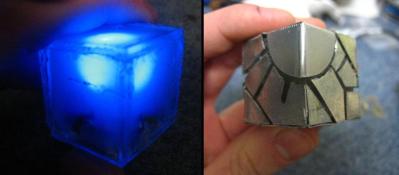
Sometimes people don’t believe you when you tell them something. You may have to go out of your way to convince those skeptics. Well, [AlexTheGreat] was having a hard time convincing people that he was from the future. He thought building some cool looking glowing LED cubes would help his story.

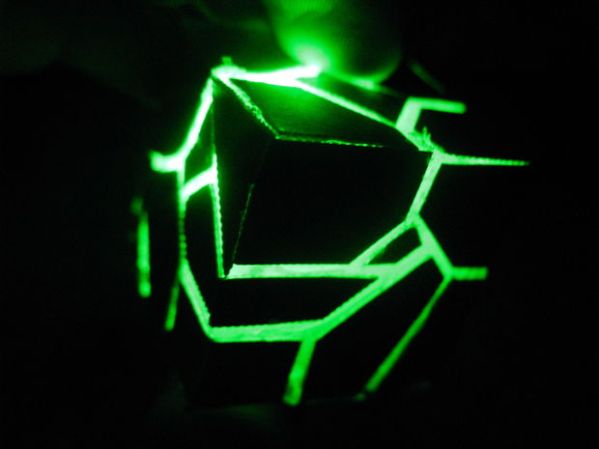
Underneath the fancy exterior covering is a cube made from pieces of clear acrylic sheet that are hot-glued together. There isn’t much inside the cube, just an LED, resistor, button cell battery and an on/off switch. A hole in one of the cube sides allows access to the on/off switch. Once all the components are verified to work, the interior of the cube is filled with hot glue to diffuse the light.

LED Cube from the futureThe exterior is thin sheet metal cut into cool shapes and bent around the plastic cube. Like the rest of the components, these metal covers are held on with hot glue. They do a great job of blocking the LED light ensuring it shines out of the creatively arranged gaps. We’re not sure if these will convince anyone that [AlexTheGreat] is from the future but they are certainly darn cool looking!
 

USB Powered CD Lamp

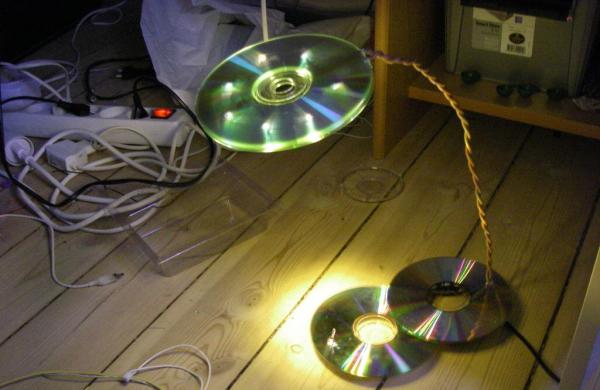
[Artificial Intelligence] has made a desk lamp out of parts he had kicking around in his parts bin. Most recognizable are the 4 CDs that make up the base and the shade. To start this project, [Artificial Intelligence] sketched out a circular pattern on one of the CDs and marked 7 locations where the LEDs will be. Holes were drilled at those marked locations, the LEDs inserted and hot glued into place. Each LED has its own current limiting resistor soldered in a series configuration.

[Artificial Intelligence] mentions the resistor value was determined by a nice LED resistor calculator he found online, ledcalc.com. Then each LED/resistor combo was wired together in a parallel configuration and covered up by another CD to clean up the look and protect the wiring.

The base, like the top, is also made from 2 CDs, but this time there are 5 AA batteries underneath the CDs. These batteries don’t power the lamp, they are only used as a counterweight to prevent the lamp from tipping over. A USB cord runs to the lamp base, goes through an on/off switch and then up a pair of large-gauge solid core wire before connecting to the LED’s in the top of the lamp. The thick solid core wire acts as the only support for the lamp shade and LEDs. Since it is still just wire, the lamp can be bent to shine light in the most convenient position, as any good desk lamp would be capable of.

Motion Light In Dark Stairwell Brightens Trips To The Basement

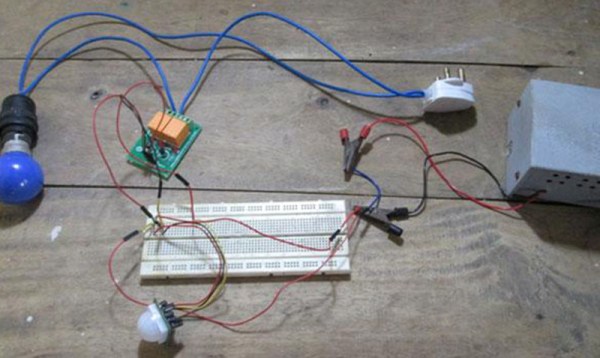
WARNNG: Walking around in the dark could be dangerous to your health! You may bump into something or worse, take a tumble down the stairs. Safety conscious [Ganesh] has come up with a solution for us folks too lazy to manually turn on a light. It’s a simple light controlled by a motion sensor that anyone can put together.

The meat and potatoes of the build is an off-the-shelf motion sensor, the same kind that is used in a home security system. We humans emit infrared energy and that is just what this sensor ‘sees’. The motion sensor is powered by 12 VDC and has a pair of DC output leads that are used to control a relay. [Ganesh] used an standard hobby relay board with built in power spike protection diode and transistor to supply the current required to trip the relay. Closing the relay sends mains power to the AC light bulb. Both the triggering threshold and the ‘on’ time are controlled by potentiometers integrated with the motion sensor.

Check the video out after the break of the device working its magic and lighting the way to [Ganesh’s] basement dungeon…

Continue reading “Motion Light In Dark Stairwell Brightens Trips To The Basement”