An SMD Capacitor Guide

For electronics, your knowledge probably follows a bit of a bell curve over time. When you start out, you know nothing. But you eventually learn a lot. Then you learn enough to be comfortable, and most of us don’t learn as much about new things unless we just happen to need it. Take SMD components. If you are just starting out, you might not know how to find the positive lead of an SMD capacitor. However, if you’ve been doing electronics for a long time, you might not have learned all the nuances of SMD. [Mr SolderFix] has been addressing this with a series of videos covering the basics of different SMD components, and this installment covers capacitors.

If you are dyed-in-the-wool with SMD, you might not get a lot out of the video, but we picked up a few tips, like using a zip tie for applying flux. The video starts with an examination of the different packages and markings. Then it moves on to soldering the components down.

Continue reading “An SMD Capacitor Guide”

Lessons Learned While Building A DIY Pen Plotter

There was a time when plotters were the pinnacle of computer graphics output. While they aren’t as common as they used to be, there are some advantages to having a plotter. [Symon] wanted a plotter and decided to make one from scratch. Truthfully, he wants to build a CNC machine, so the plotter is just a stepping stone. In fact, some of it may be a little much for just a plotter. Other design choices have worked for the plotter, but don’t look like they will work well for the eventual CNC design.

As an example, the plotter uses 2020 extrusions and lead screws. An Arduino with a CNC shield provides the brains. GRBL, of course, runs on the Arduino, so the whole machine runs fine with normal G-code. This post will be especially interesting if you want to build a plotter or something similar. We especially like that it covers the design rationale for each choice made It is great to learn from others successes and, of course, their mistakes.

If you really want just a plotter, you don’t have to spend much. You can even go super minimal if you want.

LittleFS: The Emphasis Is On Little

It used to be that developing for microcontrollers was relatively relaxing. These days, even a cheap micro like the Raspberry Pi Pico has multiple cores, networking (for the W, at least), and file systems. Just like desktop computers. Sort of. I found out about the “sort of” part a few weeks ago when I decided to embark on a little historical project. I wanted a file system with a large file that emulates a disk drive. The Pico supports LittleFS, and I figured that would be the easy thing to do. Turns out the Little in LittleFS might be more literal than you think. On the plus side, I did manage to get things working, but it took a… well — dare I say hack? — to make it all work.

History

I’m an unabashed fan of the RCA 1802 CPU, which is, of course, distinctly retro. The problem is, I keep losing my old computers to moves, natural disasters, and whatnot. I’ve had several machines over the years, but they seem to be a favorite target of Murphy’s law for me. I do currently have a small piece of hardware called an Elf Membership Card (by [Lee Hart]), but it lacks fancy features like disk drives, and while it could be expanded, there’s something charming about its current small size. So that led me to repurpose a 6502 emulator for the KIM-1 to act like an 1802 instead. This is even less capable than the membership card, so it was sort of a toy. But I always thought I should upgrade the Arduino inside the emulator to a processor with more memory, and that’s what I did.

I started out with a Blackpill STM32F board and called the project 1802Black. The code is a little messy since it started out as [Oscar’s] KimUNO code, and then my updates layered with new updates. Also, for now, I shut off the hardware parts so it won’t use the KimUNO hardware — you only need a Blackpill (or a Pico, see below) and nothing else, although I may reenable the hardware integration later.

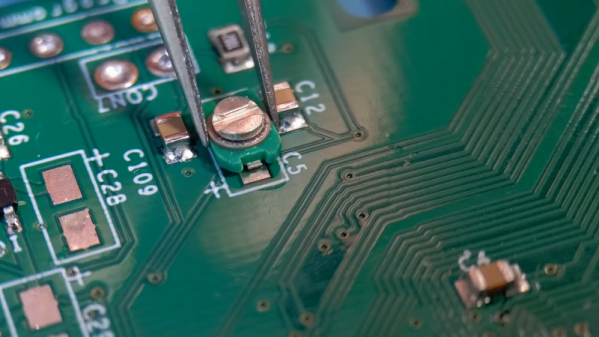
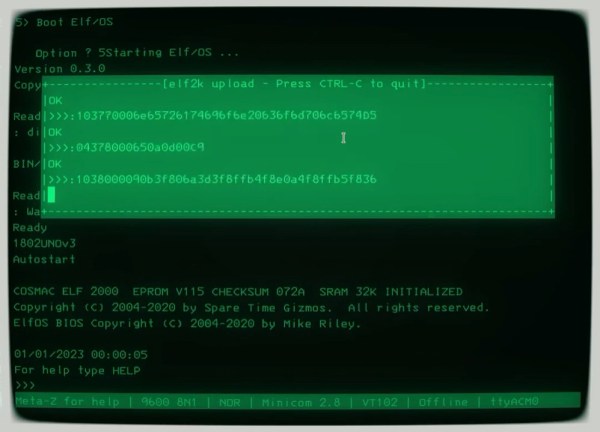
It wasn’t that hard to get it running with just more memory. Still, I wanted to run [Mike Riley’s] Elf/OS operating system and I also had a pair of Raspberry Pi Picos mocking me for not using them in a project yet. The chip has excellent Arduino board support. But what sealed the deal was noticing that you can partition the Pico’s flash drive to use some of it for your program and the rest for a file system. You can get other RP2040 dev boards with 16 MB of flash, which would let me have a nearly 15 MB “hard drive,” which would have been huge in the 1802’s day. Sounds simple. If it were, though, we wouldn’t be talking.

Continue reading “LittleFS: The Emphasis Is On Little”

Roll Your Own Servo

Usually, when you want a servo motor, you simply buy one already made. But if you need something unusual, you can turn any DC motor into a custom servo you can control just like [Dejan] did. You can watch a video of the process below.

The custom servo can tune the endpoints, the center point, and the sensitivity. It also can be set to handle continuous rotation. A 12-bit encoder tells the microcontroller where the motor is and the output drivers can handle over 3 A of motor current. The microprocessor is a tried-and-true ATmega328. [Dejan] wanted to make the board as small as possible, and we think 40 mm square isn’t bad at all. There is also a 3D printed gearbox and housing. Overall, a very well-done project.

The motor control uses a PID algorithm. Potentiometers set the end range and sensitivity. A push button allows resetting the center position. DIP switches control the mode. The video shows a computer and an RC controller setting the position of the motors.

We have, of course, seen many variations on this idea. We’ve also seen servos rebuilt for better performance.

Continue reading “Roll Your Own Servo”

Passive Components Get Better

When you want to talk about cool new components, you are probably thinking about chips or, these days, even modules. Passive components like resistors, capacitors, and inductors are a solved problem, right? [Darshill Patel] begs to differ. There is still innovation happening in the passive market, and he highlights some of the recent advances.

There are thick-film resistors that don’t need lead, for example. There are also supercapacitor modules with very low ESR. For inductors, at least one manufacturer is moving away from traditional wire loops and using flat wire windings instead. These have a larger cross-section, which reduces unwanted resistance. In addition, it offers more cooling area for heat dissipation.

Of course, passive components have never been as simple as people think. Picking a capacitor’s value is only half the battle. You also need to consider the material to optimize how it works in your design. Wirewound resistors are also inductors unless you get special non-inductive ones that use special wiring techniques to cancel much of the parasitic inductance.

It shows that you can never stop learning about even the simplest components. We are still waiting to figure out what we want to do with a memristor. While tiny surface mount components are good for some assembly reasons, they also have helped reduce unwanted component effects.

$13 Scope And Logic Analyzer Hits 18 Msps

We aren’t sure what’s coolest about [Richard Testardi’s] Flea-Scope. It costs about $13 plus the cost of making the PCB. It operates at 18 million samples per second. It also doesn’t need any software — you connect to it with your browser! It works as an oscilloscope, a logic analyzer, and a waveform generator. Not bad. The board is basically a little life support around a PIC32MK and the software required to run it.

Of course, for $13, you need to temper your expectations. One analog input reads from -6 to 6V (hint: use a 10X probe). The goal was for the instrument to be accurate within 2%.  There are also nine digital inputs sampled simultaneously with the analog sampling. The signal generator portion can output a 4 MHz square wave or a 40 kHz arbitrary waveform.

Continue reading “$13 Scope And Logic Analyzer Hits 18 Msps”

Tech In Plain Sight: Microwave Ovens

Our homes are full of technological marvels, and, as a Hackaday reader, we are betting you know the basic ideas behind a microwave oven even if you haven’t torn one apart for transformers and magnetrons. So we aren’t going to explain how the magnetron rotates water molecules to produce uniform dielectric heating. However, when we see our microwave, we think about two things: 1) this thing is one of the most dangerous things in our house and 2) what makes that little turntable flip a different direction every time you run the thing?

First, a Little History

Westinghouse Powercaster which could, among other things, toast bread in six seconds

People think that Raytheon engineer Percy Spenser, the chief of their power tube division, noticed that while working with a magnetron he found his candy bar had melted. This is, apparently, true, but Spenser wasn’t the first to notice. He was, however, the first to investigate it and legend holds that he popped popcorn and blew up an egg on a colleague’s face (this sounds like an urban legend about “egg on your face” to us). The Raytheon patent goes back to 1945.

However, cooking with radio energy was not a new idea. In 1933, Westinghouse demonstrated cooking foods with a 10 kW 60 MHz transmitter (jump to page 394). According to reports, the device could toast bread in six seconds.  The same equipment could beam power and — reportedly — exposing yourself to the field caused “artificial fever” and an experience like having a cocktail, including a hangover on overindulgence. In fact, doctors would develop radiothermy to heat parts of the body locally, but we don’t suggest spending an hour in the device.

Continue reading “Tech In Plain Sight: Microwave Ovens”