3D Printer Bed Probing Using A Tact Switch And Coin Cell

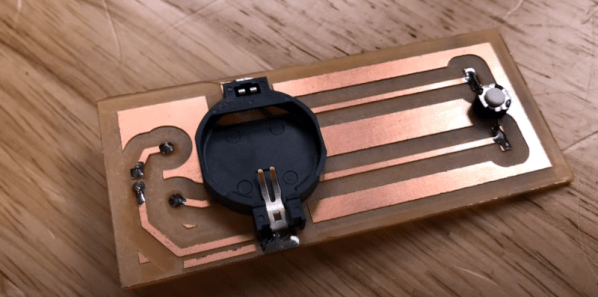
Inspired by his CNC’s leveling system, [Chuck] built a small PCB to help level his 3D printer and he shares the details in the video you can see below. The idea is simple, the nozzle pushes down on the PCB which has a tact switch underneath. When the switch closes, an LED lights.

In practice, you measure the height of the board and use that for your Z offset, and you are done. Our only concern would be how repeatable the switch is. Granted, most people use a piece of paper and that’s probably not totally repeatable or accurate either. Proper feeler gauges are the “right” way to do it, but we know only a few people who do that.

If you ever look into the repeatability of various Z probes like the proximity sensors or the little pins that drop out of a 3D Touch probe, they aren’t that repeatable. Some people use microswitches, too, which is pretty similar to this approach and is apparently good enough.

The board is available, but it is simple enough that you could create it — or an equivalent — with just about any method you use for your PCBs. [Chuck’s] prototype board was milled. We are always surprised more people don’t use the nozzle itself to sense the bed. Some people go to a lot more trouble than just electrical contact even for CNC.

Continue reading “3D Printer Bed Probing Using A Tact Switch And Coin Cell”

SuperSlicer Reviewed: Another 3DP Slicer?

When you think of slicers for FDM 3D printing — especially free slicers — you probably think of Cura, Slic3r, or PrusaSlicer. There are fans of MatterControl and many people pay for Simplify3D. However, there are quite a few other slicers out there including the one [TeachingTech] has switched to: SuperSlicer. You can see his video review, below.

Of course, just as PrusaSlicer is a fork of Slic3r, SuperSlicer is a fork of the Prusa software. According to the project’s home page, the slicer does everything Prusa does but adds custom calibration tests, ironing, better thin wall support, and several other features related to infill and top surfaces. The software runs on Windows, Linux, or Mac.

Continue reading “SuperSlicer Reviewed: Another 3DP Slicer?”

Tackle The Monkey: Raspberry Pi Gets Round Screen

You could argue that the project to add a round screen to a Raspberry Pi from [YamS1] isn’t strictly necessary. After all, you could use a square display with a mask around it, giving up some screen real estate for aesthetics. However, you’d still have a square shape around the screen and there’s something eye-catching about a small round screen for a watch, an indicator, or — as in this project — a talking head.

The inspiration for the project was a quote from a Google quote about teaching a monkey to recite Shakespeare. A 3D printed monkey with a video head would be hard to do well with a rectangular screen, you have to admit. Possible with a little artistry, we are sure, but the round head effect is hard to beat. Honestly, it looks more like an ape to us, but we aren’t primate experts and we think most people would get the idea.

Continue reading “Tackle The Monkey: Raspberry Pi Gets Round Screen”

ESP32-Cam Makes A Dandy Motion Detector

Halloween is right around the corner and just about every Halloween project needs some kind of motion sensor. Historically, we’ve used IR and ultrasonic sensors but [Makers Mashup] decided to use an ESP32-Cam as a motion sensor in his latest animatronic creation. You can see a video of the device and how it works below.

The project is a skull that follows you around with a few degrees of motion on a stepper motor. There’s a 3D-printed enclosure to make the hardware assembly easy. The base software was borrowed from [Eloquent Arduino].

Continue reading “ESP32-Cam Makes A Dandy Motion Detector”

Chip Tester Knows If Your Old Chips Are Working

[Noel’s Retro Lab] has looked at retro chip testers before, but in a recent video you can see below he’s looking at the Chip Tester Pro, a preassembled chip tester for vintage chips, especially those used in Commodore computers. The device looks good on the surface with a form factor like a calculator or cell phone, an LCD display, and a 48 pin ZIF socket.

The user interface is pretty simple. A rotary encoder and a big red button are about it. However, there are also some headers where you have to use jumpers to wire signals to the chip. The firmware gives you specific directions, but it is reminiscent of programming old punchcard machines with jumper wires. Luckily, it looks like you only route the power to the device so you don’t have many wires to connect (usually two or three).

Continue reading “Chip Tester Knows If Your Old Chips Are Working”

Vacuum Forming With 3D Printed Buck Tutorial

[Matterhackers] has a nice video tutorial on using vacuum forming to create plastic items. Sure, you have a 3D printer, but vacuum forming has some advantages if you are making thin and flexible items quickly. But don’t feel bad. The master item in the process is from a 3D printer. Like a mold, the forming won’t produce a duplicate of the master, called a buck. Rather, the buck provides something like a die that the plastic wraps around.

While obvious vacuum-formed items include such things as take-out food containers and plastic blister packaging for retail items, you can also make more substantial items. Apparently, all theStar Wars movies in the original trilogy used vacuum forming to create stormtrooper armor.

Continue reading “Vacuum Forming With 3D Printed Buck Tutorial”

Mystery HP Gear Teardown

What’s round, has what looks like a vacuum tube in the center, and was made in the 1950s by HP? We don’t know either, but [The Signal Path] restored one and shows us this mystery instrument in a recent video that you can see below. We aren’t going to spoil the surprise over what the device is, but we will share that he does reveal what it is very early in the video, so there’s not much of a tease.

We will, however, give you a few hints. Looking at it, you can guess that it is meant for high voltage use and, in fact, it is rated for up to 25 kV. We’ll also drop the hint that it is made for use with AC, not DC. The shape of the plug at the end of the wire is also a clue, we think.

There isn’t much inside the unusual round case (another clue, by the way), but there are some vintage parts we haven’t seen in quite awhile. One last clue: Why is there a metal rod and ball sticking out of one side of the device?

Honestly, the insides are a bit underwhelming so unlike some teardown videos we’ve seen, the real star of this video is the unusual device more so than its inner workings. If you have a hankering for a more sophisticated HP exploration, check out the HP3458A repair we covered earlier. Or go old school and peek inside an HP 150A.

Continue reading “Mystery HP Gear Teardown”