Christmas Lithophanes Make Neat Decorations

Lithophanes are neat little artistic creations that use variations in the thickness of a material to reveal an image when lit from behind. 3D printing is a great way to make lithophanes, and they can make for beautiful Christmas decorations, too!

It’s easy to make lithophane decorations for your Christmas tree with the help of the ItsLitho tool. The online application takes any image you upload, and can generate lithophane geometry that you can 3D print at home. Print your custom bell or bauble, add the printed hooks, and then the final decoration can be backlit to reveal its image by inserting an LED from a string of Christmas lights.

The result is a beautiful, glowing decoration that displays a detailed image when lit up. All you need is a few images and a 3D printer to produce decorations as unique gifts for your family and friends.

We’ve seen the technique put to other uses too, such as in this convincing lamp designed after our very own Moon. Video after the break.

Continue reading “Christmas Lithophanes Make Neat Decorations”

RC Sub Built With A Water Bottle

Submarines are one of the harder modes of transport to build in radio-controlled form. Doing so involves tangling with sealing electronics from water ingress and finding a way to control the thing underwater. It’s a challenge, but one relished by [Project Air] in his latest build.

The body of the sub was built from a drink bottle, serving as a stout container upon which could be mounted all the necessary hardware. Filling the bottle with water allowed buoyancy to be adjusted to a neutral level. Twin brushless motors were used for drive, while servos were waterproofed using a combination of rubber gaskets, olive oil, and sealing spray.

Control was via a floating 2.4 GHz receiver, as high-frequency radio signals don’t penetrate water very far. The floating box also carries an FPV transmitter to allow the sub to be piloted via video feed. Rather than using a ballast system, the sub instead dynamically dives by thrusting itself beneath the water’s surface.

Unfortunately, water sloshing around in the partially-filled drink bottle meant controlling the sub in pitch was virtually impossible. To fix this, [Project Air] filled the bottle completely, and then used some plugged syringes on the outside of the body to adjust buoyancy. The long heavy tether was also replaced with a much shorter one, and the sub became much more fun to drive around under water.

The build was actually built for a friendly contest with [DIY Perks], a fellow Youtuber whose efforts we covered recently. It also bears noting that better results can be had by using lower-frequency radio gear. Video after the break.

Continue reading “RC Sub Built With A Water Bottle”

Christmas Tree PCB Just The Trick For Festive Glee

The festive season is often as good a reason as any to get out the tools and whip up a fun little project. [Simon] wanted a little tchotchke to give out for the holidays, so they whipped up a Christmas tree PCB that’s actually Arduino-compatible.

O’ Christmas Tree, on PCB…

It’s a forward-looking project, complete with USB-C connector, future-proofing it for some time until yet another connector standard comes along. When plugged in, like many similar projects, it blinks some APA102 LEDs in a festive way. The PCB joins in on the fun, with white silkscreen baubles augmented by golden ones created by gaps in the soldermask.

An ATTiny167 is the brains of the operation, using the Micronucleus bootloader in a similar configuration to the DigiSpark Pro development board. It relies on a bit-banged low-speed USB interface for programming, but the functionality is largely transparent to the end user. It can readily be programmed from within the Arduino IDE.

It’s not an advanced project by any means, but is a cute giveaway piece which can make a good impression in much the same way as a fancy PCB business card. It could also serve as an easy tool for introducing new makers to working with addressable LEDs. Meanwhile, if you’ve been cooking up your own holiday projects in the lab, don’t hesitate to drop us a line!

Heavy-Duty Starter Motor Powers An Awesome Drift Trike

Starter motors aren’t typically a great choice for motorized projects, as they’re designed to give engines a big strong kick for a few seconds. Driving them continuously can often quickly overheat them and burn them out. However, [Austin Blake] demonstrates that by choosing parts carefully, you can indeed have some fun with a starter motor-powered ride.

[Austin] decided to equip his drift trike with a 42MT-equivalent starter motor typically used in heavy construction machinery. The motor was first stripped of its solenoid mechanism, which is used to disengage the starter from an engine after it has started. The housing was then machined down to make the motor smaller, and a mount designed to hold the starter on the drift trike’s frame.

A 36V battery pack was whipped up using some cells [Austin] had lying around, and fitted with a BMS for safe charging. The 12V starter can draw up to 1650 amps when cranking an engine, though the battery pack can only safely deliver 120 amps continuously. A Kelly controller for brushed DC motors was used, set up with a current limit to protect the battery from excessive current draw.

The hefty motor weighs around 50 pounds, and is by no way the lightest or most efficient drive solution out there. However, [Austin] reports that it has held up just fine in 20 minutes of near-continuous testing, despite being overvolted well beyond its design specification. The fact it’s operating at a tenth of its rated current may also have something to do with its longevity. It also bears noting that many YouTube EVs die shortly after they’re posted. Your mileage may vary.

For a more modern solution, you might consider converting an alternator into a brushless electric motor. Video after the break.

Continue reading “Heavy-Duty Starter Motor Powers An Awesome Drift Trike”

DIY Glasses Aim To Improve Color Vision

Typically, to improve one’s eyesight, we look to tools like corrective lenses or laser eye surgery to improve optical performance. However, [Casey Connor 2] came across another method, that uses light exposure to improve color vision, and set about trying to achieve the same results at home. 

A recent study published in Nature showed that a single exposure to 670 nm light for 3 minutes lead to an improvement in color perception lasting up to a week. The causative method is that cones in the eye get worse at producing ATP as we age, and with less of this crucial molecule supplying energy to cells in the eye, our colour perception declines. Exposure to 670 nm light seems to cause mitochondria in the eye to produce more ATP in a rather complicated physical interaction.

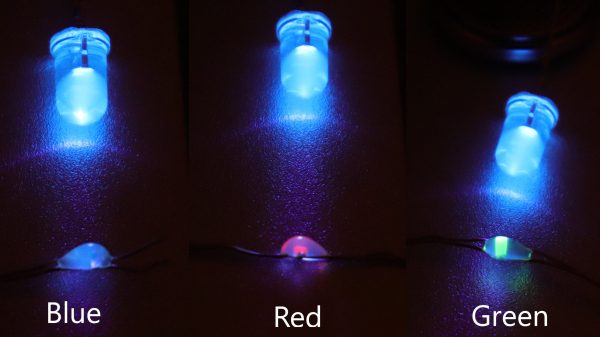
For [Casey’s] build, LEDs were used to produce the required 670 nm red light, installed into ping pong balls that were glued onto a pair of sunglasses. After calculating the right exposure level and blasting light into the eyes regularly each morning, [Casey] plans on running a chromaticity test in the evenings with a custom Python script to measure color perception.

[Casey] shows a proper understanding of the scientific process, and has accounted for the cheap monitor and equipment used in the testing. The expectation is that it should be possible to show a relative positive or negative drift, even if the results may not be directly comparable to industry-grade measures.

We’re eager to see the results of [Casey]’s testing, and might even be tempted to replicate the experiment if it proves successful. We’ve explored some ocular topics in the past too, like the technology that goes into eyeglasses. Video after the break.

Continue reading “DIY Glasses Aim To Improve Color Vision”

Google’s T-Rex Game Ported To The ESP32

Most Chrome users will have come across a neat little Easter egg when their Internet connection has gone down – a game known as “T-Rex” where a dinosaur must be jumped over cactii. Whether or not this is accurate in terms of the evolutionary timeline, it’s a bit of fun, and Volos Projects educator [Danko Bertović] decided to port the game to the ESP32.

The game runs on the LILYGO TTGO T-Display development board, which pairs the powerful microcontroller with a 1.14-inch color LCD. His clone goes as far as authentically replicating the “No Internet” page from within Google Chrome, before kicking into the game at the press of a tactile button.

The game is built using a sprite-based engine, which enables gameplay with a minimum of flickering on the screen. Transparency is included to stop the sprites from occluding other screen elements unnecessarily. [Danko] hasn’t yet released a full tutorial on using sprites on the ESP32, but code is available for your own digestion.

It’s not the first time we’ve seen [Danko]’s ESP32 games, as he’s developed a few over the years. Others have gone so far as coding 8-bit emulators for the platform. Video after the break.

Continue reading “Google’s T-Rex Game Ported To The ESP32”

Active Pickguard Makes For A Great Guitar Mod

Much discussion goes on in the guitar world about the best hardware to use. Whether its pickups, how they’re positioned, or even the specific breed of wood on the fretboard, it’s all up for debate. [Eli Hughes] put much of that to one side, however, with his innovative “Active Pickguard” project.

The project reimagines the electronics of an electric guitar from the ground up. Instead of typical electromagnetic pickups, six individual piezo pickups are built into the bridge – one for each individual string. The outputs of these pickups is conditioned and then read by the analog-to-digital converter of a Freescale Kinetis K40. The DSP-capable chip can then be used to apply all manner of effects. [Eli] demonstrates the guitar providing an uncanny imitation of an acoustic guitar, before demonstrating jazz and overdrive tones as well.

The Kinetis chip also features touch-sensitive inputs, which [Eli] put to good use. All the hardware is built into a pickguard-shaped PCB, complete with touch controls for things like volume, tone, and choosing different DSP patches.

Unlike a regular guitar, this one needs a power supply, which it gets via a CAT 6 cable, in place of the usual 1/4″ guitar cable. The CAT 6 also carries audio out to a converter box which allows the audio to be output to a regular guitar amplifier.

It’s a neat build, and one that shows just how modern technology can reimagine a simple 20th-century instrument. DSP really is magic, after all. Video after the break.

Continue reading “Active Pickguard Makes For A Great Guitar Mod”