Scanning Medium Format Film On A 35mm Scanner

Scanning film is great for archival purposes as well as sharing said photos digitally. However, if you’re scanning 120 film, aka medium format, it can be expensive to get the requisite hardware. 35mm scanners are comparatively more common, so [Christian Chapman] decided to modify one to suit medium film instead.

The hack is for the Plustek 8100, and requires modifying the scanner in two ways. Firstly, the driver has to be scanned to sweep a longer range to take into account the bigger film. Secondly, a part of the film carriage has to be replaced so it doesn’t show up in the scanners field of view.

The former is achieved by using the sane-genesys scanner software backend, which can be easily modified to adjust the scan length values appropriately. The latter is achieved via 3D printing replacement components that fit without blocking the requisite area.

It’s a tidy hack and one that allows [Christian] to both scan medium format film as well as overscan 35mm film to capture details from the sprocket hole area. We’ve seen fully custom film scanner builds before, too. If you’ve built your own scanner, be sure to drop us a line!

How To Modify Your Car Stereo For Bluetooth Or Aux-In

If you’re an automotive enthusiast of taste, you can’t stand the idea of fitting a janky aftermarket stereo into your nice, clean ride. Flashy, modern head units can spoil the look of a car’s interior, particularly if the car is a retro, classic, or vintage ride.

Thus, we’re going to look at how to modify your existing stock car stereo to accept an auxiliary cable input or even a Bluetooth module. This way, you can pump in the latest tunes from your smartphone without a fuss, while still maintaining an all-original look on the dash.

Fundamentals

A simple Bluetooth module designed for wiring into car audio systems. There are two wires for 12 V power from the vehicle, and the audio signal is sent out over the RCA plugs. The RCA plugs can be cut off and the module hard wired inside your stereo if you have room. Cutting off the plastic case can help too.

Depending on your choice of audio player, you may prefer a 3.5 mm aux jack, or you might want to go with Bluetooth audio if your smartphone no longer has a headphone port. Whichever way you go, the process of modifying the stereo is largely the same. To achieve your goal, you need to find a way of injecting the audio signal into the head unit’s amplifier stage, while making sure no other audio sources are getting sent there as well.

Whether that audio source is a 3.5 mm jack or a Bluetooth module doesn’t matter. The only difference is, in the latter case, you’ll want to buy a Bluetooth module and hardwire it in to the auxiliary input you create, while also splicing the module into the stereo’s power supply. In the case of a simple headphone jack input, you simply need to wire up an aux cord or 3.5 mm jack somewhere you can get to it, and call it done.

This guide won’t cover every stereo under the sun, of course. Edge cases exist and depending on the minute specifics of how your original car radio works, these exact methods may or may not work for you. However, this guide is intended to get you thinking conceptually about how such mods are done, so that you can investigate the hardware in front of you and make your own decisions about how to integrate an external audio input that suits your usage case. Continue reading “How To Modify Your Car Stereo For Bluetooth Or Aux-In”

Emulating The IBM PC On An ESP32

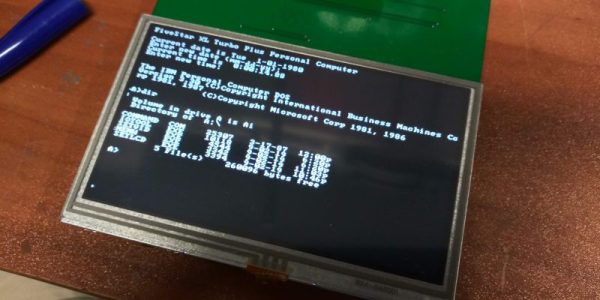
The IBM PC spawned the basic architecture that grew into the dominant Wintel platform we know today. Once heavy, cumbersome and power thirsty, it’s a machine that you can now emulate on a single board with a cheap commodity microcontroller. That’s thanks to work from [Fabrizio Di Vittorio], who has shared a how-to on Youtube. 

The full playlist is quite something to watch, showing off a huge number of old-school PC applications and games running on the platform. There’s QBASIC, FreeDOS, Windows 3.0, and yes, of course, Flight Simulator. The latter game was actually considered somewhat of a de facto standard for PC compatibility in the 1980s, so the fact that the ESP32 can run it with [Fabrizio’s] code suggests he’s done well.

It’s amazingly complete, with the ESP32 handling everything from audio and video to sound output and keyboard and mouse inputs. It’s a testament to the capability of modern microcontrollers that this is such a simple feat in 2021.

We’ve seen the ESP32 emulate 8-bit gaming systems before, too. If you remember [Fabrizio’s] name, it’s probably from his excellent FabGL library. Videos after the break. Continue reading “Emulating The IBM PC On An ESP32”

Rooting The Atari VCS 800

The Atari VCS 800 is a modern product, a hybrid of a PC and a games console. Fundamentally, its a bunch of modern chips in a box running Linux that will let you browse the web or emulate some old games. Now, thanks to [ArcadeHustle], you can have persistent root access to the VCS 800 at your leisure.

The trick is simple, and begins by interrupting the systemd startup scripts on boot. One can then merge files into the /etc directory to achieve root access, either by the tty terminal or over TCP. It’s all wrapped up in the script available at the Github link above.

You can actually run a variety of OSs on the hardware, as it’s powered by an AMD Ryzen R1606G CPU and runs straightforward PC architecture. However, if you want to customize the existing OS to do your bidding, this hack is the way to go.

Hacking to get root access is key if you want to get anywhere with a system. We’ve seen it done on thin clients as well as car infotainment systems to give the owner full control over the hardware they own. If you’ve got your own root exploit you’d like to share, do drop us a line, won’t you?


Black And White TV Was Hiding A Special Input Board

[John Floren] found a nice old black & white TV in a thrift store, and as so many of us would, he decided to take it home. He was surprised upon getting it there that it had, in addition to the VHF and UHF antenna inputs, a mysterious extra connector on the back. Naturally, he set about investigating.

On the rear was an obviously hacked-in F-type connector, paired with a toggle switch, both unlabelled. Running the output of an RF modulator to the connector didn’t net an image on the screen, even though the same method worked when hooked up to the antenna inputs. Undeterred, [John] dug deeper.

Inside, a little PCB bearing the mark “TVM.04” was inside, bearing a handful of components. The device turned out to be a Pickes and Trout TVM-04 adapter, designed in the 1970s for hooking a computer up to a television for use as a monitor. The adapter board allows the Hitachi TV to accept a composite video input. [John] was able to test the TV with a NES clone outputting composite video and voila, it worked! [John] then went further, adding an audio input and installing standard RCA jacks to make it easier to use the input with more modern electronics.

It’s a great example of how simply opening up some electronics and poking around can teach you something. Hacking on old-school TVs is a popular pastime around these parts, it seems. If you’ve been working on your own retro display hack, be sure to let us know.

Building An Electronic Tester For Measuring Arrow Stiffness

When shooting archery, if you want to be accurate, you need arrows of uniform specification and quality. One important part of this is making sure each arrow has a spine of similar stiffness. Traditionally, this is checked in a very analog way by using weights and measuring deflection of the arrow spine, but it can be done electronically too with this tester from [dvd8n].

The principle of operation is simple. The arrow is held up by two supports, 28 inches apart. The user then presses down in the center of the arrow, deflecting it by a 1/2 inch where itreaches a stop , and load cells at either end of the tester measure the force required to deflect the arrow by the set amount.

It allows arrows to be electronically measured in a fashion that is compatible with existing standards for measurement. The Arduino hardware which measures the load cells can also easily run conversion maths to display the arrow’s measured stiffness in whatever common spine measurement standard is desired. The system can also weigh the arrows, a useful thing to know for the home fletcher.

It’s a tidy build and one that should prove useful when [dvd8n] is building out their next quiver. We’ve seen other capable DIY archery hacks before, too. If you’ve got your own, drop us a line!


Little Quadruped Uses Many Servos

Walking robots were once the purview of major corporations spending huge dollars on research programs. Now, they’re something you can experiment with at home. [Technovation] has been doing just that with his micro quadruped build.

The build runs twelve servos – three per leg – to enable for a great range of movement for each limb. The servos are all controlled by an Arduino Uno fitted with an Arduino Sensor Shield. Everything is fitted together with a 3D printed chassis and limb segments that bolt directly on to the servo output shafts. This is a common way of building quick, easy, lightweight assemblies with servos, and it works great here. Inverse kinematics is used to calculate the required motions of each joint, and the robot can take steps from 1 to 4cm long in a variety of gaits.

We’d love to see a few sensors and a battery pack added on to allow the ‘bot to explore further in an untethered fashion. [Technovation] has left some provision to mount extra hardware, so we look forward to seeing what comes next.

We’ve seen bigger quadrupeds do great things, too. Video after the break.

Continue reading “Little Quadruped Uses Many Servos”