Noctua Releases 3D Models, But Please Don’t Try To Dupe The Products

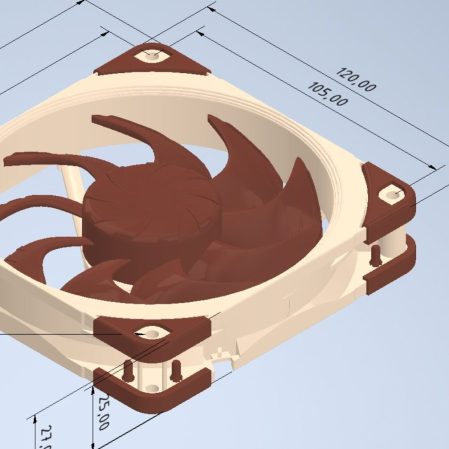
Noctua wants to make life easier for fans of its…fans. To that end, the company has released a bevy of 3D models across its various product lines, all available to download for free.

If you’re not familiar with the company, Noctua specializes in high-quality cooling systems for the PC market. Its hope is that by freely providing 3D models of its components, it will aid aftermarket companies and DIYers that wish to integrate Noctua fans into their gear. In the company’s own words, these files are made available for “mechanical design, rendering, or animations.” They will let people check things like mountings and fitment without having to have the parts on hand, or to create demo visuals featuring the company’s products.

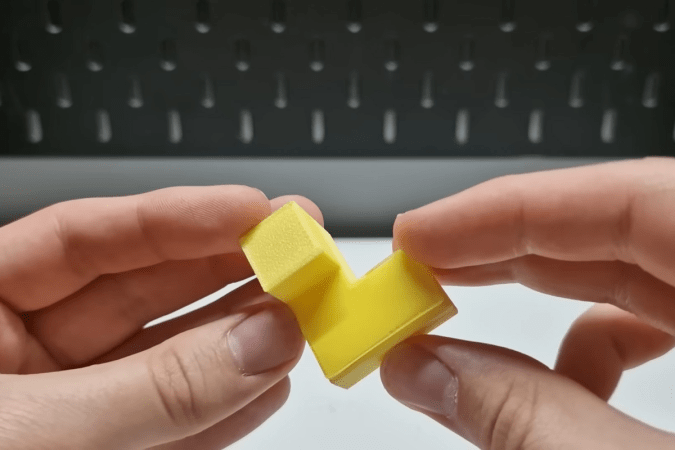
Don’t get too excited, though, because Noctua has already thought ahead. The company has specifically noted these parts aren’t intended for 3D printing, and critical components like fan blades have modified geometry so as to not compromise the companies IP. You could try and print these models, but they won’t perform like the real thing, and Noctua notes they shouldn’t be used for simulation purposes either. They’re intentionally not accurate to what the company actually sells in that regard.

That isn’t to say Noctua is totally against 3D printing. They have lots of parts available on Printables that they’d love you to try—everything from fan grilles to ducts to anti-vibration pads. Most are useful accessories—the kind of little bits of plastic that make using the products easier—that don’t threaten Noctua’s core product line in the marketplace.

If you’re whipping up a custom PC case and you want to kit it out with Noctua goodies, these models might help you refine your design. It’s funny how it’s such an opposite tactic to that taken by Honda, in terms of embracing the free exchange of 3D models on the open Internet. It’s a move that will surely be appreciated as a great convenience, and we’d love to see more companies follow this fine example.

Thanks to [irox] for the tip!

Compact VGA Output Board For The Pi Pico

Many microcontrollers can spit out simple analog video signals if that’s something you desire. However, it normally requires a bit of supporting hardware and, of course, the right connectors to work with your other video equipment. [Arnov Sharma] took that into account when whipping up this neat VGA board for the Raspberry Pi Pico.

VGA output in this case is achieved via judicious use of the Pi Pico’s PIO subsystem, which is perfect for clocking out the signals for red, green, and blue along with HSYNC and VSYNC as needed. The Pico slots right into [Arnov’s] custom PCB, which makes it a cinch to hook everything up. Supporting hardware is minimal, requiring just a few resistors between the Pico and the DE-15 VGA connector. There’s also a nice LM317 regulator on board to supply power to everything. [Arnov] also whipped up a modified version of the VGA library from [Pancrea85], which allows the Pico to output VGA in a way that’s more accepted by more recent TFT displays as well as older CRTs. The system is demoed with a few basic Hello, World programs, as well as a neat recreation of Conway’s Game of Life.

If you want to get a Pi Pico hooked up to a big screen quickly, whipping up a board like this is a great way to go. If you’re wanting something more advanced, though, you could always explore DVI and HDMI on the same platform. Video after the break.

Continue reading “Compact VGA Output Board For The Pi Pico” →

Payphone Tag Is Australia’s New National Sport

Australia’s payphones are an iconic part of the national landscape, even if they’re not as important as they once used to be. However, they’re having a resurgence of late, in part thanks to a new national pastime—the sport of Payphone Tag!

Created by [Alex Allchin], the game is simple. To play, you first sign up on the website and get your emoji and 5-digit PIN. You then go out and find a payphone, dial the Payphone Tag number, and enter your PIN when prompted. This lets you “capture” the phone, raising your score in the game. If a phone is already captured, no matter—just head out there, dial the number, and key in your own PIN to steal it. You can also push your score even higher by capturing three payphones in a triangle on the map to get bonus points.

It’s a fun geospatial game that’s also free to play, because Telstra made payphone calls free back in 2022. It might cost you a bit to get out to some phones, but there are plenty you can reach with the aid of free public transport at the moment, anyway. Protip—at the time of writing, there are a ton of easy captures to be had on Kangaroo Island. It might just cost you a pretty penny to get out there. Have at it!

We’d love to see some stats from Telstra as to whether this is making a dent in overall payphone usage rates. In any case, there were 800 players in the last 7 days and a full 36,640 captures so far, so a lot is happening out there. We fully expect to see this concept spread to other nations in turn, though it might be less attractive in places where you still need to dig out a coin to make a call.

We’ve featured a few payphone hacks over the years. If you’re doing something rad with these telecommunication devices of yesteryear, we’d love to hear about it on the tipsline.

New Slicer Enables Horizontal Overhangs Without Support

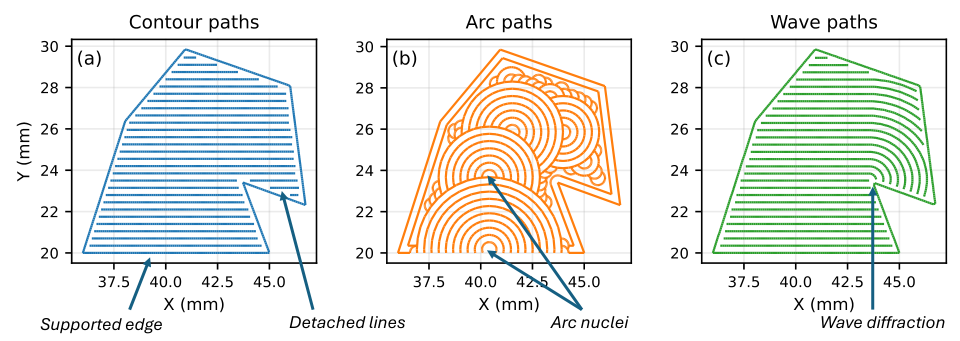
There’s a rule of thumb when it comes to FDM printing that overhangs are really only possible to an angle of around 45 degrees or so. If you try to squirt out plastic with nothing supporting it, it just goes everywhere. However, a new slicer hopes to enable printing up to 90-degree overhangs with some creative techniques.

The software that enables this is called WaveOverhangs, and currently exists as a fork of OrcaSlicer. The idea is straightforward enough — using unique toolpathing to create rings of deposited material that fasten to those laid down before them in the same layer. Thus as the printer lays down a layer into bare space, the deposited plastic is, ideally, able to fix on to the supported edge. As the next ring is laid down, it grabs on to the cooled ring laid down before it, and so on. The idea is inspired by wave propagation, hence the name. You can see a demonstration of the software in the video below by [Cocoanix 3D Printing].

It’s still a very new technique. The slicer has a whole bunch of knobs to turn and two different algorithms. Get the settings just right and you can print horizontal overhangs successfully. There aren’t exactly presets yet, this is something to explore with trial and error. If you test it out, don’t forget to upload your results to the Community Gallery so the developers can see what works and what doesn’t.

We’ve explored how smart slicers can do amazing things before, too, particularly when it comes to things like bridging.

Continue reading “New Slicer Enables Horizontal Overhangs Without Support” →

Sega Master System Controllers, Now With USB C

USB wasn’t even a gleam in an engineer’s eye when the Sega Master System hit the market in 1985. Today, we’re up to USB 4 or something, and the USB C connector is becoming a defacto standard for just about everything except desktop computers. [Retrostalgia] is embracing this by mating the control pad from Sega’s first international console with the connector of today.

Naturally, the Sega Master System did not use the Universal Serial Bus to talk to its controllers, so some conversion was in order. That’s achieved with the use of a RP2040 microcontroller, which reads the D-pad and action buttons via its GPIO pins. It then acts as a HID device when plugged into a computer or other USB host, showing up as a simple game controller. This is a particularly easy hack as the Master System controller is so simple, there’s no need to decipher any protocols or anything like that. It’s just about wiring up a few simple buttons. Beyond that, it’s just a matter of hot-gluing the RP2040 into the Master System controller housing, and making some room for the USB C port to sneak out the top. We’d have loved to seen a little extra hackery on this one, perhaps adding some rumble to a controller that was never, ever supposed to have it.

If you want to adapt authentic old controllers to work with modern computers and emulators, this project is a great place to start. It doesn’t get much simpler than the Master System, after all. You can always work your way up to more advanced feats later, like working with the beloved Wavebird. Video after the break.

Continue reading “Sega Master System Controllers, Now With USB C” →

3D Print This Retro Desktop Case

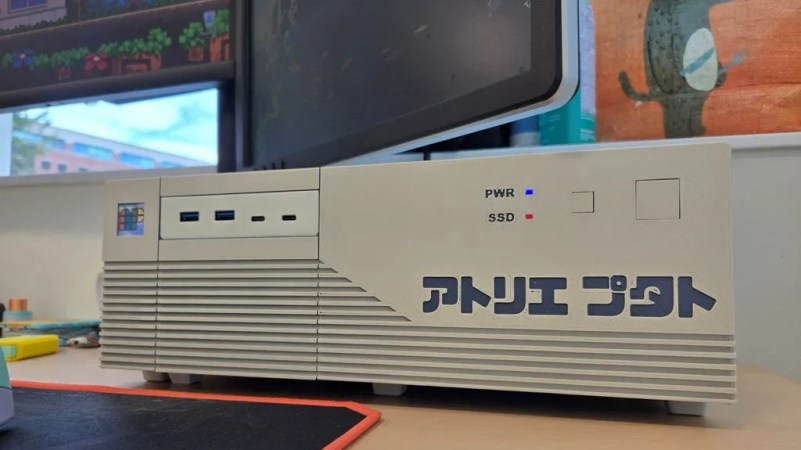
Once upon a time, not every computer lived in a vertical “tower” case. Many decades back a horizontal arrangement was a popular choice, sometimes just referred to as the “desktop” style. [PuTaTuo] is helping to bring it back, with this amazing 3D printed case design.

The case is designed to suit mini-ITX motherboards, while supporting standard ATX-size power supplies. The printed components are all designed to measure less than 220 mm in any dimension to ensure they can easily be produced on smaller printers. The case has a 3.5″ drive bay cutout up front, which you can use for the front panel I/O or a floppy drive if you’re super-retro like that. The front panel is otherwise relatively simple, with buttons for power and reset as well as power and SSD status LEDs.

Assembly is via M3 hardware and heat set inserts. If you’d like to print your own, you can grab the files from Thingiverse or Printables depending on your taste.

We’ve featured some great 3D printed cases over the years, like this colorful build that focuses on ease of access and servicing. The cool thing about designing your own case is you can optimize it to suit your own desires, and customize it to look as cool as you need it to be.

Continue reading “3D Print This Retro Desktop Case” →

A Smart Thermostat For 120V Fan Coil Systems

Many HVAC systems in North America operate off 24V systems, which can be readily upgraded with off-the-shelf  smart thermostats quite easily. However, there are many people living in buildings with 120-volt fan coil units who aren’t so lucky. [mackswan] is one such individual, who set about building a smart thermostat to work in these situations.

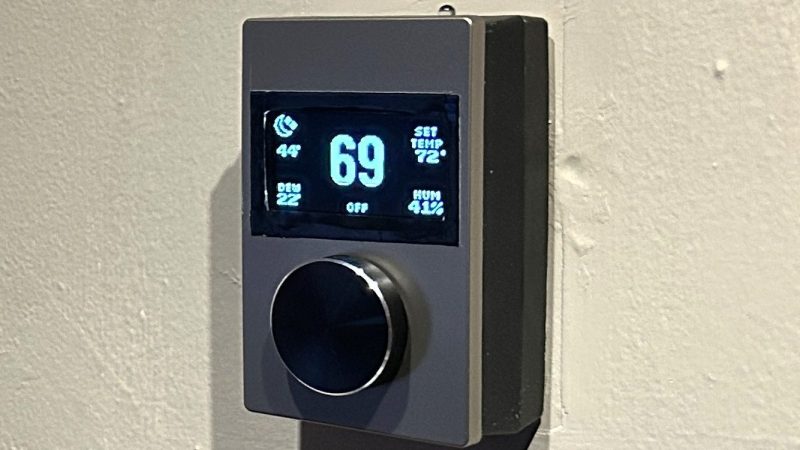
The build is based around an ESP32 running ESPHome firmware. It rocks a 2.42″ OLED screen with automatic brightness adjustment for showing temperature and control parameters. There’s a rotary encoder on the front with an integrated button for control, with [mackswan] building the physical device to look as clean and neat as possible. The device uses a relay to switch the fan coil system on and off to heat or cool as needed, with an SHTC3 temperature and humidity sensor used to monitor current conditions in the home.

If you’re in an apartment building or live in a condo with this kind of setup, [mackswan’s] build might be just what you’re after to improve your HVAC control. We’ve featured plenty of other DIY thermostat hacks over the years, too. Meanwhile, if you’re finding creative ways to better heat and cool your living space, we’d love to hear about it on the tipsline!