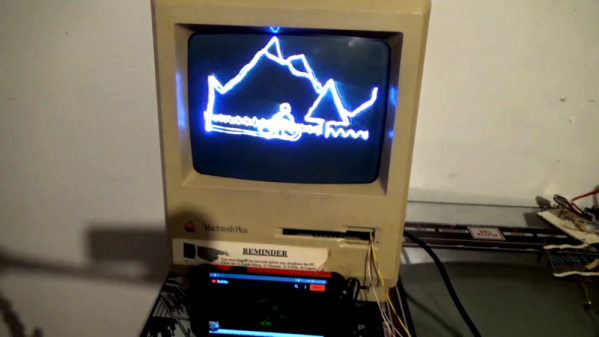
Mac Plus Becomes A Vector Display

The vintage Macintosh all-in-one computers were a design icon, as well as being highly useful machines in the 80s and 90s. In the decades since, they’ve been used for everything from web servers to aquariums, but that’s not all. [Arcade Jason] decided to grab an old Macintosh Plus and turn it into a vector display.
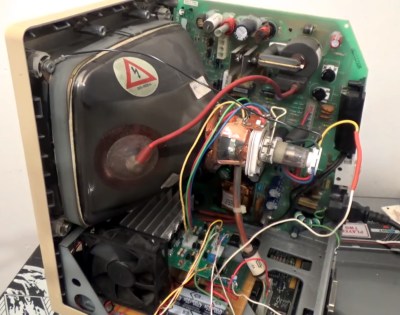
The hack starts with the opening of a Macintosh, which naturally requires a long screwdriver with the right tip. Setting the stage for things to come, this is achieved by soldering together a couple of existing tools to get the reach he needs. [Jason] then proceeds to install a brightness control for the main electron gun, as well as deflection drivers and a spot killing circuit. Everything is done with the intention of the hack being reversible, as [Jason] didn’t wish to sacrifice a good Macintosh Plus just for the sake of having some fun.

For those unfamiliar with vector cathode-ray displays and the manner in which they are driven, [Arcade Jason] does a great job explaining the basics. A set of magnetic coils is used to alter the trajectory of an electron fired at the screen. If you aim those electrons in ordered lines from left-to-right, top-to-bottom you’ve created a raster display. If you instead guide the electrons to follow the shapes you want to appear on the screen you’ve created a vector display.

We can’t help but feel this would be a hilarious way to troll at a demoscene meetup. We’ve seen [Jason]’s vector work before, too — like this impressive color Asteroids hack.
Building A Mag Lev Optical Table

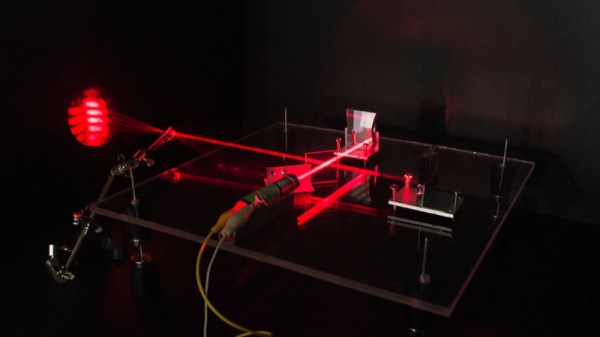
When you’re talking about optics, things are often happening on a nanometer scale. This means that even the slightest amount of vibration can spoil delicate work. [The Thought Emporium] is working on a long-scale project to produce chocolate holograms, and needed a stable surface to set up some optical components. Thus, he decided to build a magnetically levitated laser table.

The build starts with a series of eight machined delrin bushings, each mounting a strong neodymium ring magnet. Four are placed on the base, with a thin steel rod protruding upwards. The other four bushings are then placed such that the poles of the magnets are opposite one another, causing them to levitate. An acrylic plate is then lowered on top, being supported by the levitating magnets.

It’s a very simple way to create a magnetically levitated table, and in a basic interferometry test, appears to do a decent job of isolating the table from vibrations. We also wonder if there’s scope for further improvement through the use of some kind of eddy current damper. It should make an excellent platform for further experiments, and we look forward to seeing some chocolate holograms in the near future.

It turns out that [The Thought Emporium] was inspired by an earlier chocolate optics project. Video after the break.

Continue reading “Building A Mag Lev Optical Table” →

A Laser Cut Gingerbread Cathedral

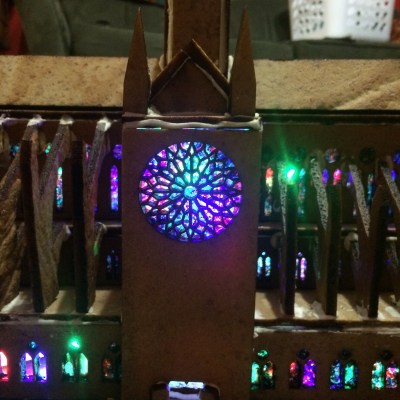
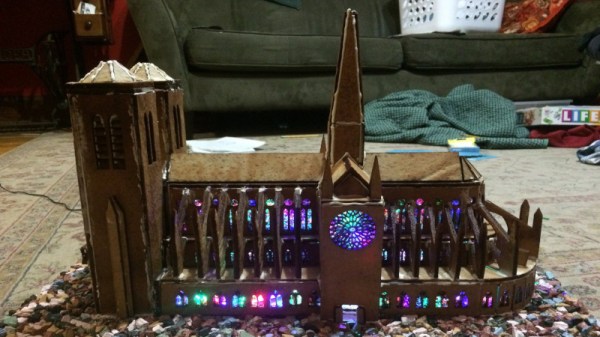
One of the more disappointing news stories of 2019 was the fire at the Notre Dame cathedral. Widely considered a building of great historical importance and architectural merit, it was heavily damaged and will take significant time and resources to repair. Fundamentally though, if you’re reading this, that’s probably someone else’s job. Instead, why not just build your own Notre Dame out of gingerbread at home? [Scott Hasse] did just that.

The stained glass windows are the real party piece of the build.

The project began by using an existing papercraft model. This had to be heavily modified to account for the thickness of gingerbread and the fact that it can’t easily be folded around corners. The modified geometry was then lasercut at the Sector 67 hackerspace, as they’re experienced with the material.

With parts cut out, royal frosting was used as a mortar to help stick parts together during assembly. Significant development time was also spent in perfecting the stained glass windows, made from colored sugar. After much experimentation, a process involving melting the sugar on silicone sheets proved to be most successful. To complete the look, a series of RGB LEDs were also installed during the construction process.

The final results are nothing short of stunning. The build is instantly recognisable as the famous French cathedral, and the back-lit stained glass is absolutely breathtaking. We wouldn’t want to be going up against [Scott]’s family at the county fair baking contest, that’s for sure!

Continue reading “A Laser Cut Gingerbread Cathedral” →

Thrust Vectoring With Compliant Mechanisms Is Hard

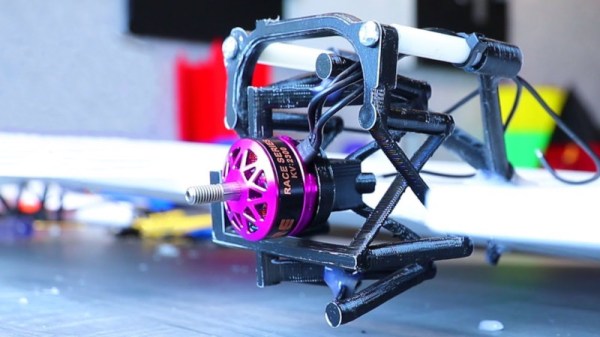
Thrust vectoring is one way to control aerial vehicles. It’s become more popular as technology advances, finding applications on fifth-generation fighter aircraft, as well as long being used in space programmes the world over.[RCLifeOn] decided to try and bring the technology to a prop-powered RC aircraft, in an unconventional way.

After attending a lecture on compliant mechanisms and their potential use in space vehicles for thrust vectoring control, [RCLifeOn] decided to try applying the concept himself. His test mechanism is a fixed-wing with a single-piece motor mount that has enough flex in the right places to allow the motor (and propeller) to be moved in two axes, achieving thrust vectoring control.

After printing a compliant motor mount in a variety of materials, one was selected for having the right balance of strength and flexibility. The vectoring mechanism was fitted to a basic flying wing RC aircraft, and taken to the field for testing. Unfortunately, success was not the order of the day. While the mechanism was able to flex successfully and vector the motor in bench testing, it was unable to hold up to the stresses of powered flight. The compliant mechanism failed and the plane nosedived to the ground.

[RCLifeOn] suspects that the basic concept is a difficult proposition to engineer properly, as adding strength would tend to add weight which would make flight more difficult. Regardless, we’d love to see further development of the idea. It’s not the first time we’ve seen his 3D-printed flight experiments, either. Video after the break.

Continue reading “Thrust Vectoring With Compliant Mechanisms Is Hard” →

Cycloid Drawing Machine Uses Sneaky Stepper Hack

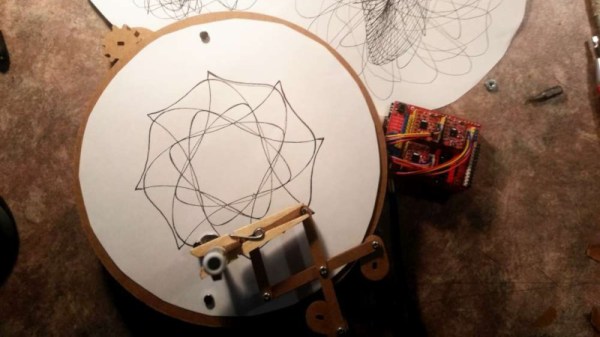
Stepper motors are great for projects that require accurate control of motion. 3D printers, CNC machines and plotters are often built using these useful devices. [InventorArtist] built a stepper-based cycloid drawing machine, and made use of a nifty little hack along the way.

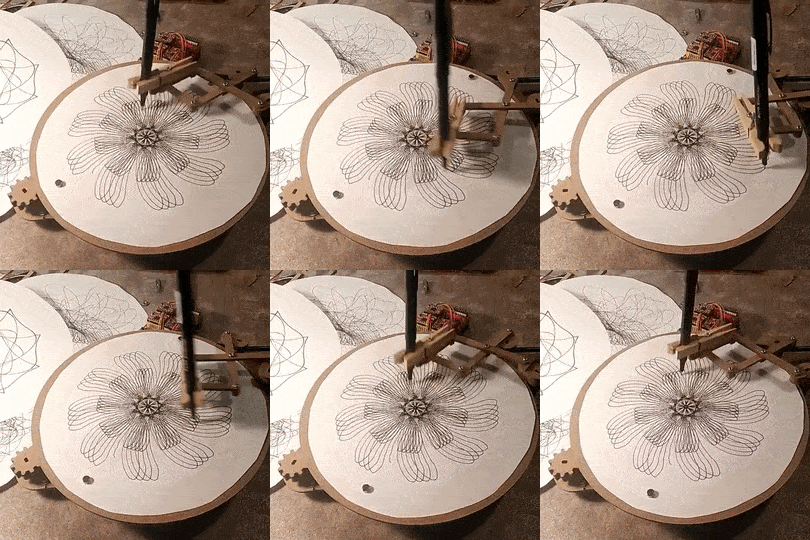
The machine uses a rotating turntable to spin a piece of drawing paper. A pen is then placed in a pantograph mechanism, controlled by another two stepper motors. The build uses the common 28BYJ-48 motor, which are a unipolar, 5-wire design. A common hack is to open these motors up and cut a trace in order to convert them to bipolar operation, netting more torque at the expense of being more complex to drive. [InventorArtist] worked in collaboration with [Doug Commons], who had the idea of instead simply drilling a hole through the case of the motor to cut the trace. This saves opening the motor, and makes the conversion a snap.

[InventorArtist] was able to create a machine capable of beautiful spirograph drawings, and develop a useful hack along the way. Reports are that a jig is in development to make the process foolproof for those keen to mod their own motors. We expect to see parts up on Thingiverse any day now. We’ve also covered the basic version of this hack before.

[Thanks to Darcy Whyte for the tip!]

Surfing Diorama Makes For A Neat Desk Toy

In 1994, Weezer famously said that “you take your car to work, I’ll take my board”. Obviously, for the office-bound, surfing is simply out of the question during the working day.  That doesn’t mean you can’t have a little fun with a desk toy inspired by the waves.

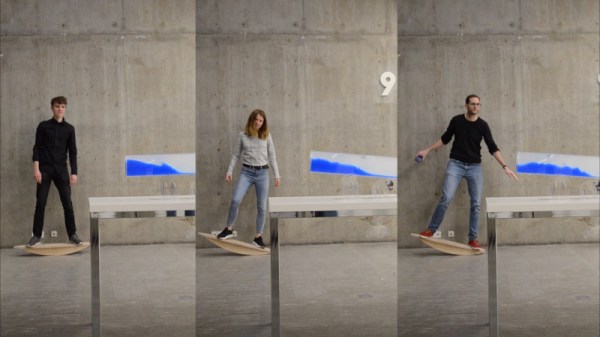
The crux of the build is a watery diorama, which interacts with a faux-surfboard. The diorama consists of a tank constructed out of plexiglas, sealed together to be watertight. It’s then filled with blue-dyed water, and topped off with baby oil. The tank is then mounted on a cam controlled by a servo, which rocks the tank back and forth to create waves. This is controlled by the motion of the rider on the plywood surfboard, which can be rocked to and fro on the floor thanks to its curved bottom. An Arduino built into the board monitors a three-axis accelerometer, and sends this information to the Arduino controlling the tank.

By riding the board, the user can shake the tank. Get the motion just right, and smooth rolling waves are your reward. Jerk around with no real rhythm, and you’ll just get messy surf. We reckon it would be even better with a little surfer floating in the tank, too. It’s a fun build, and one that might help stave off the negative health effects of sitting at a desk all day. You might prefer a more shocking desk toy, however. Video after the break.

Continue reading “Surfing Diorama Makes For A Neat Desk Toy” →

A Robotic Whiteboard Cleaner Keeps The Board Ready To Go

Wiping a whiteboard can be a tedious chore. Nobody wants to stick around after a long meeting to clean up, and sensitive information is often left broadcast out in the open. Never fear, though – this robot is here to help.

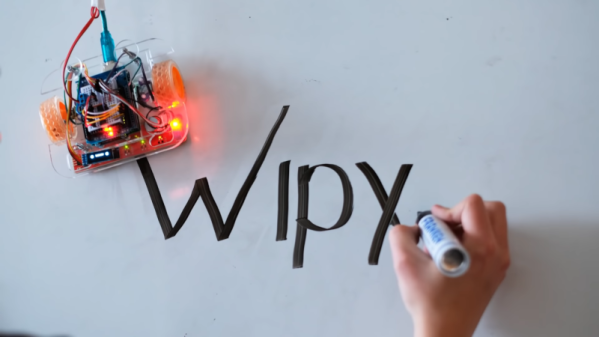
Wipy, as the little device is known, is a robotic cleaner that scoots around to keep whiteboards clear and ready for work. With brains courtesy of an Arduino Uno, it uses an IR line-following sensor to target areas to wipe, rather then wasting time wiping areas that are already clean. It’s also fitted with a time-of-flight sensor for ranging, allowing it to avoid obstacles, or busy humans that are writing on the board.

If Wipy lacks anything, it’s probably discretion. Despite its cute emoji-like face, it’s not really capable of tact, or knowing when it’s not needed. It’s recommended to keep Wipy powered down until you’re completely finished, lest it barge in and start wiping off important calculations before you’re done.

Fundamentally, it’s a fun build, and a great way to learn how to use a variety of sensors. If you’ve done something similar, be sure to let us know on the tips line. Else, consider automating the writing side of things, too. Tongue-in-cheek infomercial after the break.

Continue reading “A Robotic Whiteboard Cleaner Keeps The Board Ready To Go” →