Make Your Own Old School LED Displays

We live in an era in which all manner of displays are cheap and readily available. A few dollars spent online can net you a two-line alphanumeric LCD, a graphical OLED screen, or all manner of other options. Years ago however, people made do with little monolithic LED devices. [sjm4306] wanted to recreate something similar, and got down to work (Youtube link, embedded below).

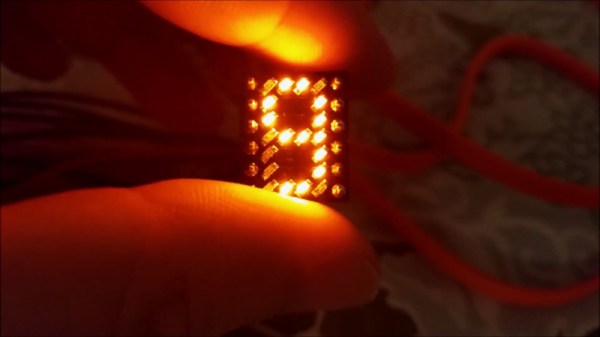
The resulting device uses 0603 sized SMD LEDs, soldered onto a tiny PCB. 20 LEDs are used per digit, which can display numbers 0-9 and letters A-F. The LEDs are laid out in a pattern similar to Hewlett-Packard designs from years past. This layout gives the numerals a more pleasant appearance compared to a more-classic 7-segment design. Several tricks are used to make the devices as compact as possible, such as putting vias in the LED pads. This is normally a poor design technique, but it helps save valuable space.

[sjm4306] has developed a breadboard model, and a more advanced version that has a pad on the rear to mount a PIC16F88 microcontroller directly. We look forward to seeing these modules developed further, and can imagine they’d prove useful in a variety of projects.

For reference, check out these Soviet-era 7-segment displays. Video after the break.

Continue reading “Make Your Own Old School LED Displays” →

Sonic Screwdriver Shuts Off Mains

In the world of Doctor Who, the sonic screwdriver is a versatile tool with a wide range of capabilities. [Hartley] wanted some of that action for himself, and built a device of his own.

Unable to recreate the broad swathe of features from the show, he settled on something easier. The device is fitted with an ATTiny85, and a 433MHz transmitter. It’s programmed to switch wirelessly controlled mains sockets on and off. This lets him control appliances in his house with a flick of a screwdriver. Power is supplied by the classic AA battery, with a boost converter stepping it up to 5V to run the electronics.

It’s all wrapped up in a 3D printed case, that was carefully designed to fit all the parts inside. A paper mockup of the PCB layout was also used in the design phase. [Hartley] took full advantage of CAD software, to ensure everything fit correctly first time.

It’s a fun project, as sonic screwdrivers often are. Video after the break.

Continue reading “Sonic Screwdriver Shuts Off Mains” →

SerialPlot Does Exactly What You Think It Does

The serial port remains a hacker staple, being one of the easiest ways to move a little bit of data from one machine to another. All manner of projects use the interface, and often, sensors are connected and their data read over such connections. In these cases, it can be useful to plot said data, and SerialPlot is a tool that can do just that.

SerialPlot is capable of reading data over several serial ports at once, and plotting it for your viewing pleasure. It’s capable of interpreting data in a variety of integer and float formats, and plotting multiple channels in a synchronised manner. It’s also capable of sending basic commands out over the serial port, which can be used to trigger or control attached equipment.

Overall, it’s a useful utility for anyone with an array of sensor’s connected over the most classic of interfaces. Of course, if you’re having trouble keeping track of all your serial ports, there’s a utility to help with that, too.

Drag And Drop Files On Select Arduino Boards

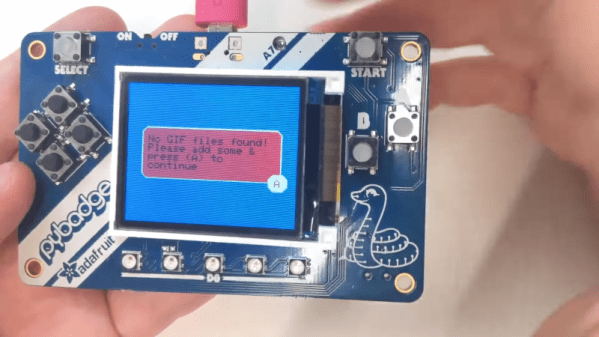
Historically, getting files on to a microcontroller device was a fraught process. You might have found yourself placing image data manually into arrays in code, or perhaps repeatedly swapping SD cards in and out. For select Arduino boards, that’s no longer a problem – thanks to the new TinyUSB library from Adafruit (Youtube link, embedded below).

The library is available on Github, and is compatible with SAMD21 and SAMD51 boards, as well as Nordic’s NRF52840. It allows the Arduino board to appear as a USB drive, and files can simply be dragged and dropped into place. The library can set up to use SPI flash, SD cards, or even internal chip memory as the storage medium.

Potential applications include images, audio files, fonts, or even configuration files. Future plans include porting the TinyUSB library to the ESP32-S2 as well. Being able to drag a settings file straight on to a board could make getting WiFi boards online much less of a hassle.

We’ve seen other nifty USB libraries before, VUSB is a great option if you need USB on your AVR microcontroller. Video after the break.

Continue reading “Drag And Drop Files On Select Arduino Boards” →

Turbo Subaru Gets DIY Gauges

For the average motorist, the speedometer and the fuel indicator are the primary gauges of interest. Owners of performance or modified cars tend to like having more information on the way the car is running. [JustinN1] is firmly in that camp, and built some WiFi-enabled gauges for his Subaru WRX STi.

The gauges run on the ESP32 platform, chosen for its WiFi hardware and its ease of use with the Arduino platform. This makes programming a snap, and interfacing to a smartphone easy. OLED displays were chosen for their good visibility in both day and night conditions, which is important for automotive applications.

[JustinN1] developed both a boost/vacuum gauge and an oil pressure gauge, both useful for keeping an eye on what the engine is doing. Measuring boost is as simple as using an off-the-shelf analog air pressure sensor. The oil pressure sensor is a resistive part, and must is hooked up through a resistor divider to create an analog voltage for the ESP32 to read.

Code is on Github, and there’s even a version that displays a grinning face when you get into higher boost levels. There are also a series of housings to suit various mounting choices, to help give the gauges a more finished look. We’ve seen other gauge builds too, like this gear indicator for a Suzuki motorcycle. Video after the break.

Continue reading “Turbo Subaru Gets DIY Gauges” →

Etching Aluminium Coins, Just For Fun

[MakeFailRepeat] was heading to MakerCentral in Birmingham, an event to which many makers were bringing coins to swap and trade. Wanting to get in on the action, he decided to etch some coins of his very own.

Etching aluminium is a simple process, readily accessible to the average maker. [MakeFailRepeat] started with an aluminium bar, and applied sticky-backed vinyl to the surface. This was then lasercut with the coin artwork, and the pieces removed to leave a negative space design for etching. With the resist layer in place, the aluminium was placed in a bath of salt water, and attached to the positive electrode of a DC supply or battery. With the negative electrode attached to a bolt, the aluminium is left to etch, with care taken to avoid over-etching. As a final finishing step, the coins were then placed in a cobbled-together rock tumbler, using scrap 3D printer filament as media.

The coins are a little rough around the edges, but we think they’re great for a first attempt. There’s plenty of different ways to etch; toner transfer is a particularly popular method. Video after the break.

Continue reading “Etching Aluminium Coins, Just For Fun” →

Tiny Wooden Laptop Packs Raspberry Pi

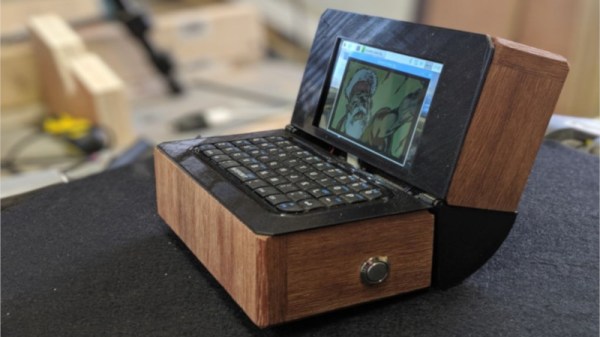
Building a handheld Raspberry Pi rig is practically a hacker rite of passage these days. Off-the-shelf parts keep getting better, and we’re now starting to see affordable compact LCD screens with decent resolution become common. [MakeFailRepeat] got his hands on a HyperPixel screen, and decided to whip up a neat project with it.

The result is a charming little laptop, packing a 4″ screen with 800×480 resolution. Input is via multi-touch, as well as an integrated keyboard. The frame of the laptop is wooden, with a 3D printer supplying parts for the hinge mechanism. To round out the aesthetics, the top of the device was given a decorative copper inlay. Power management is via a UPS hat, which allows the device to switch seamlessly between battery and mains power.

A project like this is a great way to learn a wide range of valuable skills. It involves woodworking and 3D design, as well as the basic configuration of a single board computer. They come in all shapes and sizes, like this tiny RetroPie handheld, or this slick laptop build. Video after the break.

Continue reading “Tiny Wooden Laptop Packs Raspberry Pi” →