Repairing And Upgrading A HP 16533A Scope Card

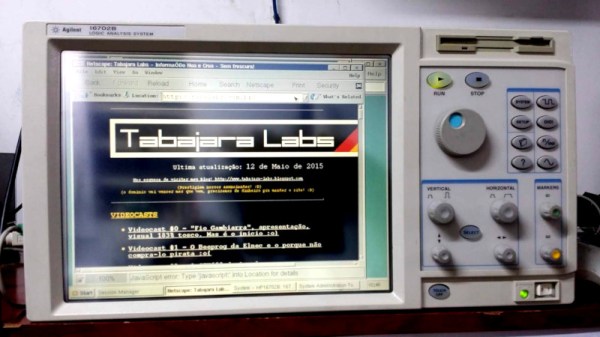
In the world of oscilloscopes, as in the rest of the test equipment world, there’s always some trickery afoot. Companies will often offer different models to the market at different price points, in an effort to gain the widest possible customer base while also making the most profit. Cheaper, less capable models are often largely identical to more expensive hardware, save for some software or a couple jumpers that disable functionality. [Alexandre] found just this when working to repair his HP 16533A scope card.

Work began when [Alexandre] received his HP 16533A in the mail after a long wait, only to find the trigger functionality was inoperable. This is crucial on a digital scope, so this simply wouldn’t do. After some research online, a post was found discussing which signals to probe to troubleshoot the issue. It noted that corrosion is a common problem on these units, and that occasionally, a certain resistor goes open circuit and causes problems. Initial measurement showed there was still resistance there, but reading closer, [Alexandre] noted this fateful line:

You might not be able to measure it accurately in circuit. 

Removing the 100K resistor from the board, the part was indeed open circuit. After replacement with a new component, the trigger circuit was again fully operational. With the scope still open, it was then a simple job to execute a further resistor swap which gives the 16533A the functionality and range of the higher-spec 16534A model.

It’s very common for oscilloscopes and other test hardware to be configured this way from the factory. Rigol scopes are particularly popular with hackers for this very reason.

[Thanks to jafinch78 for the tip!]
Big, Slow Rotary Machine Has Multiple Uses

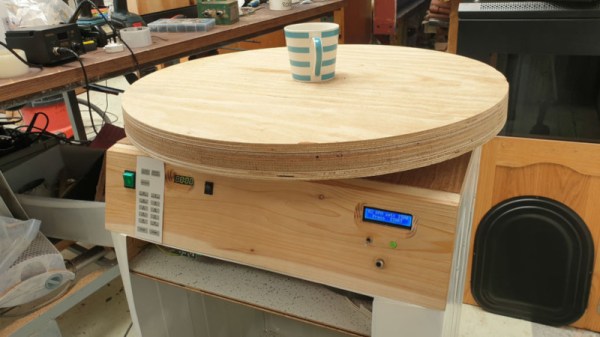
A good majority of power tools in the average workshop are all about speed. Drills, grinders, and  sanders all whizz along at thousands of revolutions per minute. Sometimes though, you need to do things slowly. For that, [bongodrummer]’s big rotary machine build might be just up your alley.

The core of the build is an old washing machine, which supplies both the machine frame and its powerful universal motor. While this can be hooked directly to a power source and allowed to spin away, it’s far more useful with some speed control in place. For this, an Arduino is hooked up to a triac circuit with feedback, allowing the speed to be set just so for whatever operation you have in mind. A set of speed-reducing pulleys helps further for getting down into the double-digit RPM while maintaining smooth rotation. There’s even a timer for extended operation, with parts salvaged from an old microwave.

The machine is built with a large rotating platter on top. By placing a clean white screen on top, the platter is great for taking 360 degree photos of objects automatically. This could be of great use in a photogrammetry setup. Alternatively, by fitting a bowl and plough assembly, the machine can be used to mull green sand for casting purposes.

It’s a versatile build that could be used for anything that needs rotation in the vicinity of 50 rpm. You could even play vinyl records on it if you were so inclined. Of course, if you’ve built a record player out of an old washing machine, we’d certainly like to know about it.

Stator Library Makes Your Arduino Code Easier To Read

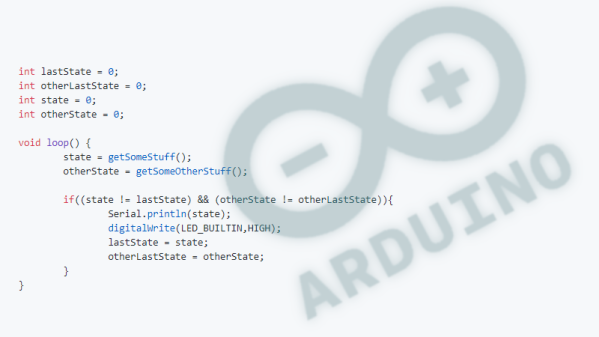
The readability of your code can make the difference between your project being a joy to work on, or an absolute headache. This goes double when collaborating with others. Having easily parsed code reduces your cognitive load and makes solving problems easier. To try and help with this, [PTS93] developed the Stator library to make certain common tasks simpler to read.

The aim of the library is to get rid of piles of state tracking variables and endless if/else statements – hence the name. It’s designed primarily for the Arduino IDE but doesn’t have any dependencies on the API, so can be used in other C++ environments. It comes with a variety of neat tools for common jobs, such as reading an analog sensor with hysteresis around a trigger point, as well as easy ways to track state changes across multiple variables. By using basic English terms instead of condition checks and mathematical operators, it can make things more readable and easier to follow.

The power of the Arduino platform has always been in its easy to use libraries that make everything easier, from interfacing LCDs to working with Amazon Dash buttons.

Building A Raspberry Pi Rover: My Big Fat Linux Weekend

Linux! Such a wonderful, rich, capable operating system has blessed us, and all for the low, low cost of absolutely free. It’s under the hood of countless servers, computers, phones, and embedded devices, and is the go-to solution for when you want to get the job done right. Why, then, does it curse me so?

Prologue

The penguin giveth, and the penguin taketh away.

My experience with the almighty penguin stretches back to the late 90s. Facebook hadn’t been invented yet, so most weekends were spent installing whatever came on the front of the latest computer mags. I wish I was kidding, but I’m really not.

Way back when, us kids would load the latest Red Hat or Fedora distribution onto our hand-me-down Pentium IIs, trying not to accidentally wipe our hard drive in the process. Limited to dial-up internet and very few help resources, it was pretty common that you’d spend hours watching progress bars tick over, only to wind up with no working mouse, or an X server that simply refused to start for man or God. Did I mention we did all this for fun?

Trying To Get Some Work Done

Of course, after growing up, real life and real responsibilities take over. Now, if I’m using Linux, it’s because I’ve got a job to do, not just because there’s nothing good to watch on Cartoon Network this weekend. I consider myself to be a fairly intermediate user. I’ve compiled a few things successfully, understood how to work with a variety of package managers, and once, just once, even managed to connect to a wireless network from the command line. There’s not a whole lot that phases me in this realm anymore.

For the past few years, I’ve been slowly working on a little rover by the name of TKIRV, powered by a Raspberry Pi. It was overdue for a camera upgrade, as I’d been using an old Microsoft webcam for far too long. I ordered a nice 1080p Raspberry Pi camera, and naturally the parts marinated in their boxes for a good couple of years. Finally, after much procrastination, I was eager to get my wheely boi back out on the road.

This was but the beginning my weekend slaying embedded Linux dragons.

Continue reading “Building A Raspberry Pi Rover: My Big Fat Linux Weekend” →

An Easy Camera Slider Build

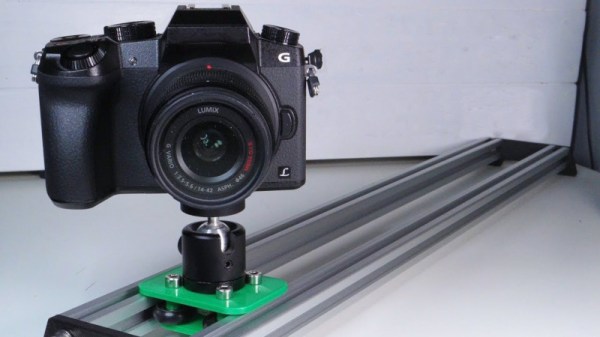
As smartphone cameras improve with each new generation, making quality video content is getting easier all the time. This means it takes a little more to stand out, so it pays to get creative with your cinematography. A slider is a great way to get some different shots, and you can build one pretty cheaply too (Youtube link, embedded below).

For smooth motion, [Nikodem Bartnik] used aluminium extrusion for the rails, along with some roller bearing wheels designed to suit. The wheels are built into a 3D printed carriage, which is also fitted with a spherical clamping camera mount. It’s all wrapped up with some socket head cap screws and 3D printed brackets to tie it all together.

Dimensional accuracy is key to the smooth operation of a slider, so you’ll want to have your printer set up well if you’re going to attempt this one. [Nikodem] demonstrates the slider is capable of taking the weight of an mid-range SLR with a tastefully sized lens, but if you’re going for something telephoto, you might want to go for something bigger. You could also consider a motorized rig instead. Video after the break.

Continue reading “An Easy Camera Slider Build” →

Edge Lit Pendant, Is, Well… Lit

Acrylic is a great material. It’s not cheap, but it comes in a wide variety of colours and styles and can be used to make some very attractive projects. [Geek Mom Projects] is a big fan, and whipped up some fun pendants for a high school Maker Faire.

[Geek Mom] has long been a fan of edge-lighting, as it’s a great way to make beautiful glowy projects out of acrylic. In this case a fluorescent acrylic is used with white LEDs to generate an eerie green glow, though it’s also noted that the project can be done with clear acrylic and color-shifting LEDs instead for an equally cool look. If you’re filming a low-budget sci-fi film, this could be just what you need.

The pendants made a great project for young makers to learn about LEDs, electronics, and technologies such as lasercutting that were used to produce the parts. With copper tape used instead of soldering and a CR2032 battery used to eliminate the need for a current limiting resistor, it’s a very accessible project that most teens were able to complete without assistance.

It’s not the first time we’ve seen edge-lit pendants, either. Alternatively, if you need your acrylic bent, there’s a tool for that, too.

Arduino Leonardo Gets A Lockable Bootloader

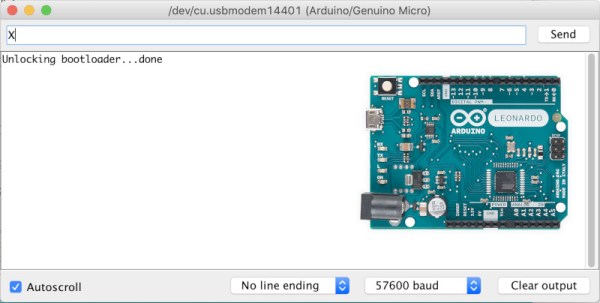
Security is something that’s far too often overlooked in embedded devices. One of the main risks is that if the device doesn’t verify the authenticity of incoming firmware updates. [Walter Schreppers] was working on a USB password storage device, so security was paramount. Thus, it was necessary to develop a secure bootloader.

[Walter]’s device was based upon the Arduino Leonardo. Starting with the Caterina bootloader, modifications were made to enable the device to be locked and unlocked for programming. This can be done in a variety of ways, depending on how things are setup. Unlocking can be by using a secret serial string, an onboard jumper, and [Walter] even suspects a SHA1 challenge/response could be used if you were so inclined.

It’s never too soon to start thinking about security in your projects. After all, we must stave off the cyberpunk future in which leather-clad youths flick all your lights on and off before burning your house down in the night by overclocking the water heater. Naturally, we’ve got a primer to get you going in the right direction. Happy hacking!