The Obscure Electronics Tools You Didn’t Know You Needed

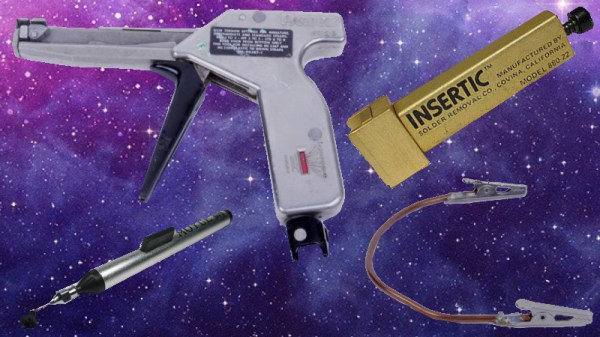
The right tool for the job can turn a total headache into a 30-second operation. This is all the more important when you’re trying to streamline an assembly process, and the reason why you’ll find so many strange and wonderful purpose-built tools on any production line. With a nod to that old adage, [EvilMadScientist] have collected the tools you didn’t know you needed – until now.

If you’re wiring big through-hole boards all day, you’ve probably bemoaned the uneven bends on all your resistors. How did the big companies get it right way back when? They used a tool to set the distance of the resistor legs just right. What about DIP ICs? It’s a total pain trying to take them fresh out of the tube and get them to seat in a socket, but there’s a tool to do that too. It’s actually a two-part series, and while we’re sure you’ve all seen a solder sucker before, the fresh take on helping hands is pretty ingenious.

Overall, it’s a combination of little things that, with a bit of cash or a day’s work, you can have in your own lab and once you’ve got them, you won’t ever want to go back. Be sure to tell us about your favourite obscure tools in the comments.

Now that you’ve got your tools to hand, why not wrap them all up in a handy workstation?
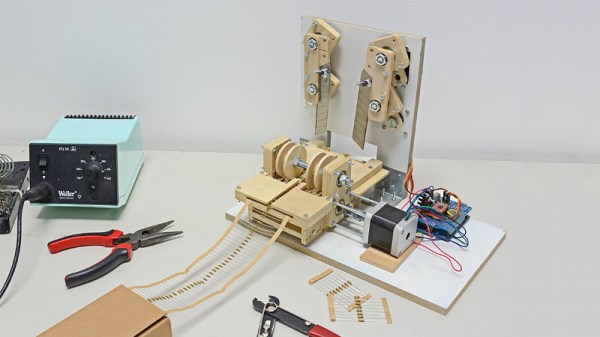
A Resistor Cutting Robot You Can Build

If you’re populating kits, it can get tiring and time consuming. Like all good repetitive processes, it should be automated. As far as cutting resistors goes, this is one way to do it, thanks to [Pablo].

The build is actually cribbed from earlier work by a gang called [oomlout]. Parts for these cutters are made with either lasercut or CNC milled sheet stock. A stepper motor is used to transport the resistor tape, and the cutting blades are moved by standard hobby servos. The use of servos for the blades allows the action to be controlled precisely without having to go to the effort of implementing extra limit switches and circuitry.

Control is by an Arduino Uno, with an A4988 driver controlling the stepper. Servo control is achieved with the Uno’s onboard peripherals. There’s a video below of the machine in operation, which shows it to be a simple and efficient tool for the job.

This build turns an otherwise maddeningly basic chore into a set-and-forget operation. We’ve seen other work in this area before from the [oomlout] team, too. Video after the break.

Continue reading “A Resistor Cutting Robot You Can Build” →

Drill Bit Gauge Is Interdenominational Black Magic

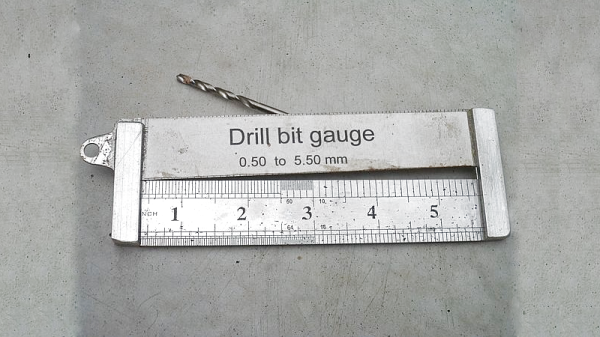
Oh, sure – when you buy a new set of drill bits from the store, they come in a handy holder that demarcates all the different sizes neatly. But after a few years when they’ve ended up scattered in the bottom of your toolbox for a while, it becomes useful to have some sort of gauge to measure them. [Caspar] has the solution, and all you need is an old steel rule.

The trick is to get a ruler with gradations for inches and tenths of inches. After cutting the ruler off just after the 6″ point, the two halves are glued together with some steel offcuts and epoxy. By assembling the two halves in a V shape with a 1 mm drill bit at the 1″ position, and a 5 mm drill bit at the 5″ marker, a linear slope is created that can be used to measure any drill bits and rod of the appropriate size inserted between the two.

It’s a handy tool to have around the shop when you’ve amassed a collection of bits over the years, and need to drill your holes accurately. Additionally, it’s more versatile than the usual method of inserting bits in appropriately sized holes, and can be more accurate.

Now that you’ve organised your drill bits, perhaps you’d like to sharpen them?

Parts Bin Spooky Eye Build

Halloween is a great holiday for hacks, bringing out the creativity in even the most curmudgeonly wielder of a soldering iron. [tdragger] was looking to have some good old fashioned Halloween fun, and got to thinking – putting together this great Spooky Eyes build in their attic window.

The effect itself is simple – just two glowing orange LEDs spaced the right distance apart, placed in the highest window in the house. As every young child knows, the attic is almost the spookiest room in the house, second only to the basement.

Various effects were programmed in to the Arduino running the show, like breathing and blinking effects, to give that frightful character. For maintenance and programming purposes, [tdragger] wanted to have the Arduino remotely mounted, and searched for a solution. Rather than leaning on a wireless setup or something modern and off-the-shelf, instead some old RJ11 telephone extension cables were pressed into service. These allowed the eyes to be placed in the window, allowing the Arduino to be placed in a more accessible location.

It’s a basic project, but one that has a good fun factor. Sometimes it’s good to use what you’ve got to hand, so that the buzz of enjoyment isn’t dampened by the long wait for shipping. For something bigger, check out this giant staring eyeball.

Making Fancy Dice PCBs At Home

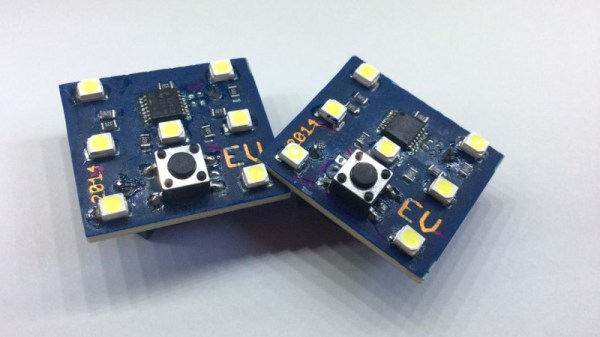
These days, it’s easy to get high-quality custom PCBs made and shipped to your door for under $50. It’s something that was unfathomable only a decade ago, but now it’s commonplace. However, it doesn’t mean that the techniques of home PCB production are now completely obsolete. Maybe you live somewhere a little off the beaten track (Australia, even!) and need to iterate quickly on a project, or perhaps you’d like to tinker with the chemical processes involved. For your learning pleasure, [Emiliano] decided to share some tips on making SMD-ready PCBs with the TinyDice project.

The actual project is to create a small electronic dice, and [Emiliano] touches on the various necessary considerations such as how to decrease power consumption, and how to source good quality, organic random numbers from your local microcontroller. Though its far from an exhaustive discussion on either topic, it shows an understanding of the deeper factors at play here.

However, the real meat of the write-up is the PCB production process. The guide goes through several stages of etching to not only prepare the PCB but also to add solder mask and produce a solder paste stencil as well using an aluminum can. This gives the boards that colored finish we’re all used to and lets the boards be reflowed for easy SMD assembly.

It’s a tidy guide as to how to approach producing your own boards to be used with SMD components, and it’s complete with clear photos and instructions throughout. If you want to take your designs up another notch, why not consider putting your components inside the circuit board?

A Pin Pusher To Make Life Easier

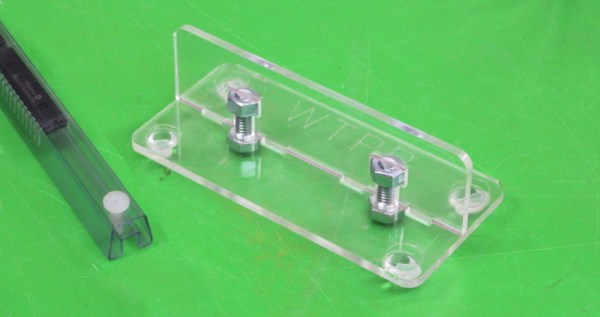
Picture the scene: you’ve whipped up an amazing new gadget, your crowdfunding campaign has gone well, and you’ve got a couple hundred orders to fill. Having not quite hit the big time, you’re preparing to tackle the production largely yourself. Parts begin to flood in, and you’ve got tube after tube of ICs ready to populate your shiny new PCBs? After the third time, you’re sick and tired of fighting with those irksome little pins. Enter [Stuart] with the answer.

It’s a simple tool, attractively presented. Two pieces of laser cut acrylic are assembled in a perpendicular fashion, creating a vertical surface which can be used to press pins out of IC tubes. [Stuart]’s example has rubber feet, though we could easily see this built into a work surface as well.

The build highlights two universal truths. One, that laser cutters are capable of producing elegant, visually attractive items almost effortlessly, something we can’t say about the garden variety 3D printer. Secondly, all it takes is a few little jigs and tools to make any production process much easier. This is something that’s easy to see in the many factories all over the world – special single-purpose devices that make a weird, tricky task almost effortless.

In DIY production lines, testing is important too – so why not check out this home-spun test jig?