Haptic Displays Bring Sports To The Vision Impaired

When it comes to the majority of sports broadcasting, it’s all about the visual. The commentators call the plays, of course, but everything you’re being shown at home is on a screen. Similarly, if you’re in the stadium, it’s all about getting the best possible view from the best seats in the house.

Ultimately, the action can be a little harder to follow for the vision impaired. However, one company is working hard to make sports more accessible to everyone. Enter OneCourt, and their haptic sports display technology.

Continue reading “Haptic Displays Bring Sports To The Vision Impaired”

Using Four Rolls Of Film To Make One Big Photo

Typically, if you’re shooting 35 mm film, you’re using it in an old point-and-shoot or maybe a nice SLR. You might even make some sizeable prints if you take a particularly good shot. But you can get altogether weirder with 35 mm if you like, as [Socialmocracy] demonstrates with his “extreme sprocket hole photography” project (via Petapixel).

The concept is simple enough. [Socialmocracy] wanted to expose four entire rolls of 35 mm film all at the same time in one single shot. To be absolutely clear, we’re not talking about exposing a frame on each of four rolls at once. We’re talking about a single exposure covering the entire length of all four films, stacked one on top of the other.

To achieve this, an old-school Cirkut No.6 Outfit camera was pressed into service. It’s a large format camera, originally intended for shooting panoramas. As the camera rotated around under the drive of a clockwork motor, it would spool out more film to capture an image.

[Socialmocracy] outfitted the 100-year-old camera with a custom 3D-printed spool that could handle four rolls of film at once, rather than its usual wide single sheet of large format film. This let the camera shoot its characteristic panoramas, albeit spread out over multiple rolls of film, covering the sprocket holes and all. Hence the name—”extreme sprocket hole photography.”

It’s a neat build, and one that lets [Socialmocracy] use more readily available film to shoot fun panoramas with this old rig. We’ve featured some other great film camera hacks over the years, too, like this self-pack Polaroid-style film. Video after the break.

Continue reading “Using Four Rolls Of Film To Make One Big Photo”

SteamVR Controller Controlling Addressable LEDs

[Chris] had an idea. When playing VR games like BeatSaber, he realized that spectators without headsets weren’t very included in the action. He wanted to create some environmental lighting that would make everyone feel more a part of the action. He’s taken the first steps towards that goal, interfacing SteamVR controllers with addressable LEDs.

Armed with Python, OpenVR, and some help from ChatGPT, [Chris] got to work. He was soon able to create a mapping utility that let him create a virtual representation of where his WLED-controlled LED strips were installed in the real world. Once everything was mapped out, he was able to set things up so that pointing the controller to a given location would light the corresponding LED strips. Wave at the windows, the strips on that wall light up. Wave towards the other wall, the same thing happens.

Right now, the project is just a proof of concept. [Chris] has enabled basic interactivity with the controllers and lights, he just hasn’t fully built it out or gamified it yet. The big question is obvious, though—can you use this setup while actually playing a game?

“I just found the OpenVR function/object that allows it to act as an overlay, meaning it can function while other games are working,” [Chris] told me. “My longer term goals would be trying to interface more with a game directly such as BeatSaber, and the light in the room would correspond with the game environment.”

We can’t wait to see where this goes next. We fully expect flashy LED room setups to become the norm at VR cafes hosting BeatSaber competitions in future. We’ve featured plenty of other coverage of VR lately, too.

Continue reading “SteamVR Controller Controlling Addressable LEDs”

Building A Nerf-like Rocket Launcher With Airburst Capability

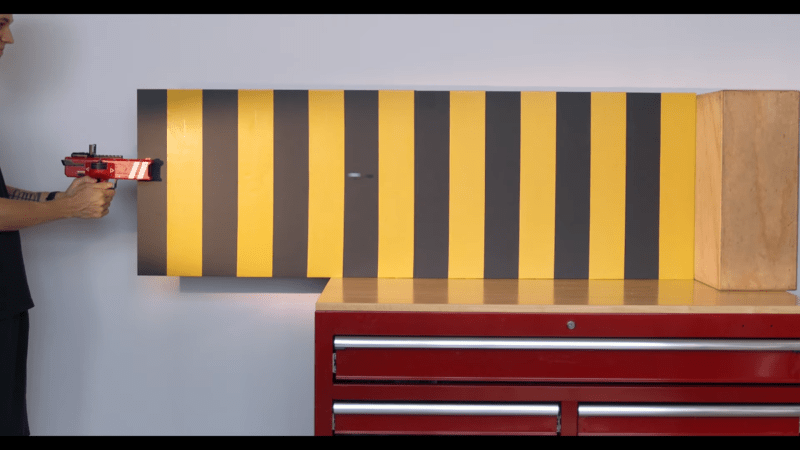
Nerf blasters typically fire small foam darts or little foam balls. [Michael Pick] wanted to build something altogether more devastating. To that end, he created a rocket launcher with an advanced air burst capability, intended to take out enemies behind cover.

Unlike Nerf’s own rocket launchers, this build doesn’t just launch a bigger foam dart. Instead, it launches an advanced smart projectile that releases lots of smaller foam submunitions at a set distance after firing.

The rocket launcher itself is assembled out of off-the-shelf pipe and 3D printed components.  An Arduino Uno runs the show, hooked up to a Bluetooth module and a laser rangefinder. The rangefinder determines the distance to the target, and the Bluetooth module then communicates this to the rocket projectile itself so it knows when to release its foamy payload after launch. Releasing the submunitions is achieved with a small microservo in the projectile which opens a pair of doors in flight, scattering foam on anyone below. The rockets are actually fired via strong elastic bands, with an electronic servo-controlled firing mechanism.

We’ve featured some great Nerf builds over the years, like this rocket-blasting robot.

Continue reading “Building A Nerf-like Rocket Launcher With Airburst Capability”

Building An Interferometer With LEGO

LEGO! It’s a fun toy that is popular around the world. What you may not realize is that it’s also made to incredibly high standards. As it turns out, the humble building blocks are good enough to build a interferometer if you’re so inclined to want one. [Kyra Cole] shows us how it’s done.

The build in question is a Michelson interferometer; [Kyra] was inspired to build it based on earlier work by the myphotonics project. She was able to assemble holders for mirrors and a laser, as well as a mount for a beamsplitter, and then put it all together on a LEGO baseboard. While some non-LEGO rubber bands were used in some areas, ultimately, adjustment was performed with LEGO Technic gears.

Not only was the LEGO interferometer able to generate a proper interference pattern, [Kyra] then went one step further. A Raspberry Pi was rigged up with a camera and some code to analyze the interference patterns automatically. [Kyra] notes that using genuine bricks was key to her success. Their high level of dimensional accuracy made it much easier to achieve her end goal. Sloppily-built knock-off bricks may have made the build much more frustrating to complete.

We don’t feature a ton of interferometer hacks around these parts. However, if you’re a big physics head, you might enjoy our 2021 article on the LIGO observatory. If you’re cooking up your own physics experiments at home, don’t hesitate to drop us a line!

Thanks to [Peter Quinn] for the tip!

Cheap Fiber Optic Wand Toy Becomes Tiny Weird Display

If you’ve ever seen those cheap LED fiber optic wands at the dollar store, you’ve probably just thought of them as a simple novelty. However, as [Ancient] shows us, you can turn them into a surprisingly nifty little display if you’re so inclined.

The build starts by removing the fiber optic bundle from the wand. One end is left as a round bundle. At the other end, the strands are then fed into plastic frames to separate them out individually. After plenty of tedious sorting, the fibers are glued in place in a larger rectangular 3D-printed frame, which holds the fibers in place over a matrix of LEDs. The individual LEDs of the matrix light individual fibers, which carry the light to the round end of the bundle. The result is a tiny little round display driven by a much larger one at the other end.

[Ancient] had hoped to use the set up for a volumetric display build, but found it too fragile to be fit for purpose. Still, it’s interesting to look at nonetheless, and a good demonstration of how fiber optics work in practice. As this display shows, you can have two glass fibers carrying completely different wavelengths of light right next to each other without issue.

We’ve featured some other great fiber optic hacks over the years, like this guide on making your own fiber couplings. Video after the break.

Continue reading “Cheap Fiber Optic Wand Toy Becomes Tiny Weird Display”

Low-Resolution Fluid Simulation On An ESP32

Fluid simulations are a key tool in fields from aerospace to motorsports and even civil engineering. They can be three-dimensional and complicated and often run on supercomputer clusters bigger than your house. However, you can also do simple two-dimensional fluid simulations on very simple hardware, as [mircemk] demonstrates.

This build is almost like a simple toy that displays particles rolling around and tumbling as you turn it one way or the other. Behind the scenes, an ESP32 is running the show, simulating a group of particles responding to gravity in a fluid-like manner. The microcontroller is  hooked up with an 3-axis gyroscope and accelerometer, which it uses to track motion and influence the motion of the particles in turn. The results of the simple fluid simulation are displayed on a screen made up of a 16 x 16 matrix of WS2812B addressable RGB LEDs, which add enough color to make the build suitably mesmerizing.

There’s something compelling about turning the display and watching the particles tumble and flow, particularly when they’re all set to different colors. [mircemk] also gave the build the ability to operate in several different modes, running “sand,” “liquid” and “gas” simulations and with dynamic coloring to boot.

We’ve seen some great videos from [mircemk] before, too, like this sensitive metal detector rig. Continue reading “Low-Resolution Fluid Simulation On An ESP32”