Gonzo Film Making With The Raspberry Pi

Gonzo journalism has been a hip thing since the 1970s or so, a way of covering a story in a compelling format with more subjectivity and less objectivity. The style has since been applied to all sorts of media, including film—and indeed, the makers of the Gonzo Pi.

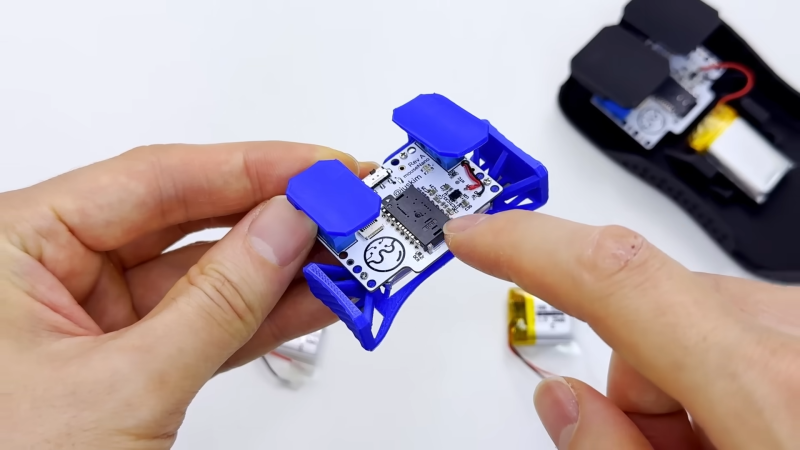
The Gonzo Pi is a camera with an open source design, yes, but it’s also a lot more than that. It’s intended to be an entire platform for film-making, all in the one housing. Camera-wise, the design combines a Raspberry Pi with the requisite first-party High Quality Camera, and warps it up in a 3D printed housing. You can build it up with a viewfinder and whatever old-school C-mount or 8 mm film lenses you can lay your hands on.

Beyond that, there’s an editing platform baked in to the device. It’s not unlike the tools in so many social media apps these days. The idea of the Gonzo Pi is that rather than shooting a whole ton of footage and takes and poring over them in great detail later, instead, you run and gun with the device and edit as you go. You can shoot retakes as you need, and even dub in more audio as necessary as you compose your film on the hoof. It’s intended to change the way you make films by virtue of its unique compositional paradigm.

We’ve featured some neat homebrew cameras before, to be sure, but none that quite put the edit suite right in the box.

Continue reading “Gonzo Film Making With The Raspberry Pi”

Convert A Cheap Tube Preamp Into A Headphone Amp With Jenny

Big-name tube amplifiers often don’t come cheap. Being the preserve of dedicated audiophiles, those delicate hi-fis put their glass components on show to tell you just how pricy they really ought to be. If you just want to dip your toe in the tube world, though, there’s a cheaper and more accessible way to get started. [Jenny List] shows us the way with her neat headphone amp build.

The build starts with an off-the-shelf preamp kit based around two common 6J1 tubes. These Chinese pentode valves come cheap and you can usually get yours hands on this kit for $10 or so. You can use the kit as-is if you just want a pre-amp, but it’s not suitable for headphone use out of the box due to its high-impedance output. That’s where [Jenny] steps in.

You can turn these kits into a pleasing headphone amp with the addition of a few choice components. As per the schematic on Github, a cheap transformer and a handful of passives will get it in the “good enough” range to work. The transformer isn’t perfect, and bass response is a compromise, but it’s a place to start your tinkering journey. Future work from [Jenny] will demonstrate using a MOSFET follower to achieve much the same result.

We’ve seen a great number of headphone amplifiers over the years, including one particularly attractive resin-encased example. Video after the break.

Continue reading “Convert A Cheap Tube Preamp Into A Headphone Amp With Jenny”

What Game Should Replace Doom As The Meme Port Of Choice?

DOOM. The first-person shooter was an instant hit upon its mrelease at the end of 1993. It was soon ported off the PC platform to a number of consoles with varying success. Fast forward a few years, and it became a meme. People were porting Doom to everything from thermostats to car stereos and even inside Microsoft Word itself.

The problem is that porting Doom has kind of jumped the shark at this point. Just about every modern microcontroller or piece of consumer electronics these days has enough grunt to run a simple faux-3D game engine from 1993. It’s been done very much to death at this point. The time has come for a new meme port!

Good Game

Doom became a popular meme port for multiple reasons. For one, it’s just complex and resource-intensive enough to present a challenge, without being so demanding as to make ports impractical or impossible. It’s also been open-source for decades, and the engine has been hacked to death. It’s probably one of the best understood game engines out there at this point. On top of that, everybody plays Doom at some point, and it was one of the biggest games of the 90s. Put all that together, and you’ve got the perfect meme port.

However, you can always have too much of a good thing. Just as The Simpsons got old after season 10 and Wonderwall is the worst song you could play at a party, Doom ports have been overdone. But what other options are there? Continue reading “What Game Should Replace Doom As The Meme Port Of Choice?”

Too Smooth: Football And The “KnuckleBall” Problem

Picture a football (soccer ball) in your head and you probably see the cartoon ideal—a roughly spherical shape made with polygonal patches that are sewn together, usually in a familiar pattern of black and white. A great many balls were made along these lines for a great many decades.

Eventually, though, technology moved on. Footballs got rounder, smoother, and more colorful. This was seen as a good thing, with each new international competition bringing shiny new designs with ever-greater performance. That was, until things went too far, and the new balls changed the game. Thus was borne the “knuckleball” phenomenon.

Continue reading “Too Smooth: Football And The “KnuckleBall” Problem”

Pocket Device Tracks Planets And The ISS

Ever been at a party and landed in a heated argument about exactly where the International Space Station (ISS) is passing over at that very instant? Me neither, but it’s probably happened to someone. Assuming you were in that situation, and lacked access to your smartphone or any other form of internet connected device, you might like the pocket-sized Screen Tracker from [mars91].

The concept is simple. It’s a keychain-sized item that combines an ESP32, a Neopixel LED, and a small LCD screen on a compact PCB with a couple of buttons. It’s programmed to communicate over the ESP32’s WiFi connection to query a small custom website running on AWS. That website processes orbit data for the ISS and the positions of the planets, so they can be displayed on the LCD screen above a map of the Earth. We’re not sure what font it uses, but it looks pretty cool—like something out of a 90s sci-fi movie.

It’s a great little curio, and these sort of projects can have great educational value to boot. Creating something like this will teach you about basic orbits, as well as how to work with screens and APIs and getting embedded devices online. It may sound trivial when you’ve done it before, but you can learn all kinds of skills pursuing builds like these.

Continue reading “Pocket Device Tracks Planets And The ISS”

Building A One Wheel With Tracks

One-wheels use motion-tracking hardware and fine motor control to let you balance on a single wheel. That’s neat and all, but [Michael Rechtin] had another idea in mind—what if a one-wheel used a track instead?

The idea behind the track was to make the one-wheel more capable on surfaces where wheels simply can’t compete. The tracked drivetrain was largely 3D printed, including some massive gears that are supplemented by a big old 150 mm ball bearing which sits around the drive motor itself. If you love planetary gear trains with a 4:1 reduction, this project is for you. Carbon-fiber reinforced filament was used for many of the parts to give them some additional strength. Control is a little different than a traditional one-wheel, since the flat-bottomed track means lean controls won’t work. Instead, a wireless hand throttle was constructed to enable the rider to command the direction of travel.

It’s not easy to ride, but the one-track does actually work. It’s capable of crawling its way around on grass and snow quite well. There were some issues with the printed tracks and rollers, particularly when turning, but tweaks to round out the track profile helped solve that issue to a degree. There’s a reason we often use wheels instead of tracks, but somehow tracks are still just cool.

Continue reading “Building A One Wheel With Tracks”

3D Print Yourself A Split Flap Display

Split flap displays! They’re mechanical, clickety-clackity, and largely commercially irrelevant in our screen-obsessed age. That doesn’t mean you can’t have a ball making one of your own, though! [Morgan Manly] did just that, with tidy results.

An ESP32 C3 SuperMini serves as the boss of the operation, running the whole display. The display is designed to be modular, so you can daisy chain multiple characters together to spell longer words. Each module has 37 characters, so it can display the alphabet, numerals 0 to 9, and a blank. Each module contains a 28BYJ-48 stepper motor for controlling the flaps, and a ULN2003 driver board to run it and a PCF8575 IO expander to handle communciation. An A3144 hall effect sensor is also used for positional feedback to ensure the display always shows the right character. The flap mechanism itself is relatively straightforward—a drum with all 37 flaps is until the correct character is reached, with the blank flaps hosting a magnet to trigger the aforementioned hall effect sensor. The flaps themselves are 3D-printed, with filament changes used to color the characters against the background.

If you’ve ever dreamed of building a flap-display clock or ticker, you needn’t dream of finding the perfect vintage example. You can just build your own! The added bonus is that you can make it as big or as small as you like. We’ve seen some interesting variations on the split flap concept recently, too. If you’re cooking up your own kooky electromechanical displays, don’t hesitate to let us know!