A light bulb might seem like an unlikely platform for gaming, but we’re living in the future now, so anything is possible. And with enough know-how, it turns out that an RGB light bulb can indeed be modified to run Doom.
[Ed note: The project pages and video got pulled right when this went to press. Nicola received a takedown notice. We’ll let you know more when we do. The main link has been updated to the Wayback Machine.]
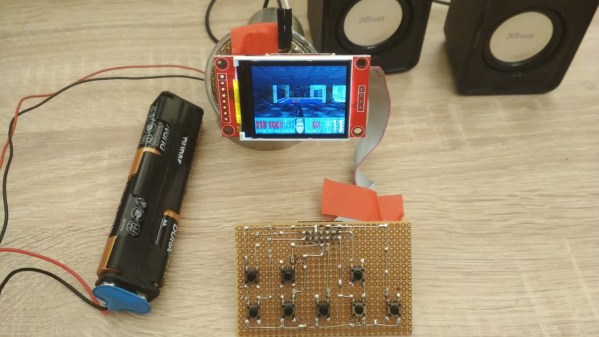
That’s not to say that the Ikea TRÅDFRI light bulb is the only thing [Nicola Wrachien] needed to accomplish the hack. But the bulb, specifically this addressable GU10 RGB LEB bulb, donated the most critical component, a Silicon Labs MGM210L wireless microcontroller, with enough processing power to run vanilla Doom. Added to the microcontroller was a TFT display, a controller made from a handful of buttons and a shift register, and a few odds and ends to stitch it all together. Some more memory was needed, though, so [Nicola] used an 8 MB QSPI flash memory and a couple of neat tricks to reduce latency and improve bandwidth. There are a lot of neat tricks with this one, but the coolest thing might just be that the whole footprint of the build isn’t that much bigger than the original bulb. Check out the surprisingly smooth gameplay in the video below.
This is a nice addition to the seemingly neverending “Will it Doom?” series. We’ve seen the classic game ported to everything from a GPS to a kitchen “bump bar” computer and even to an oscilloscope.
Continue reading “A Smart Light Bulb Running Doom Is A Pretty Bright Idea”