Adding MMIO RAM On The RP2040

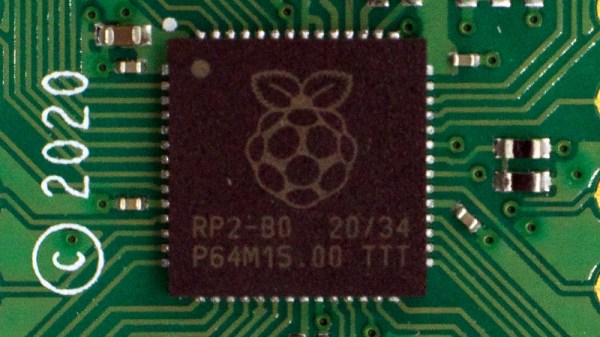
[Dmitry Grinberg] is an adept tinkerer who wanted a much larger RAM space on his Raspberry Pi 2040 (RP2040) than the measly 264kb on-board SRAM. The chip does support 16MB of off-flash memory via a QSPI bus, but this must be accessed explicitly rather than being memory mapped. With clever trickery involving XIP (Execute in Place), Dmitry mapped 8MB of external QSPI RAM into the address space.

XIP mode allows the chip to fetch data on-demand from an external chip and place it into RP2040 caches mapped at 0x10xxxxxx. The RP2040, although incredibly versatile, has a limitation – it can only perform read and execute operations in its XIP mode. The first step to solving this was to get data from persistent storage to RAM on boot. Armed with a dual-OR gate IC, an inverter, and two resistors, [Dmitry] can toggle the nCS pin that selects between flash and RAM. A first-stage bootloader copies the program from flash to RAM, then sets up XIP mode and launches into a second-stage loader.

Continue reading “Adding MMIO RAM On The RP2040”

Low-Cost Display Saved By RP2040

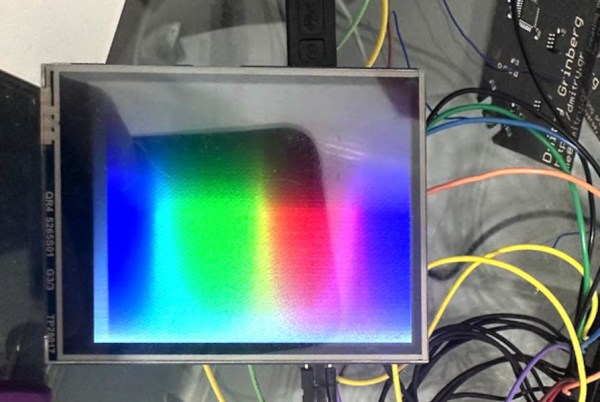
Anyone looking for components for electronics projects, especially robotics, microcontrollers, and IoT devices, has likely heard of Waveshare. They are additionally well-known suppliers of low-cost displays with a wide range of resolutions, sizes, and capabilities, but as [Dmitry Grinberg] found, they’re not all winners. He thought the price on this 2.8-inch display might outweigh its poor design and lack of documentation, and documented his process of bringing it up to a much higher standard with a custom driver for it.

The display is a 320×240 full-color LCD which also has a touchscreen function, but out-of-the-box only provides documentation for sending data to it manually. This makes it slow and, as [Dmitry] puts it, “pure insanity”. His ultimate solution after much poking and prodding was to bit-bang an SPI bus using GPIO on an RP2040 but even this wasn’t as straightforward as it should have been because there are a bunch of other peripherals, like an SD card, which share the bus. Additionally, an interrupt is needed to handle the touchscreen since its default touch system is borderline useless as well, but after everything was neatly stitched together he has a much faster and more versatile driver for this display and is able to fully take advantage of its low price.

For anyone else attracted to the low price of these displays, at least the grunt work is done now if a usable driver is needed to get them up and running. And, if you were curious as to what [Dmitry] is going to use this for, he’s been slowly building up a PalmOS port on hardware he’s assembling himself, and this screen is the perfect size and supports a touch interface. We’ll keep up with that project as it progresses, and for some of [Dmitry]’s other wizardry with esoteric displays make sure to see what he’s done with some inexpensive e-ink displays as well.

E-paper Price Tags Combined To Create A Large Wireless Display

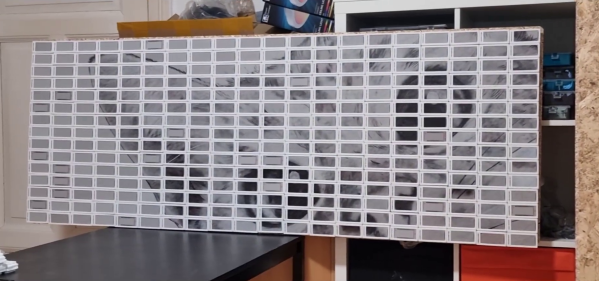
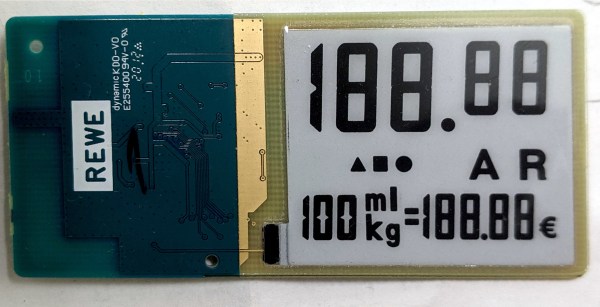
E-paper price tags have become popular for retail stores over the past few years, which is great for hackers since we now have some more cheap commodity hardware to play with. [Aaron Christophel] went all on creating grid displays with E-paper price tags, up to a 20×15 grid.

E-paper price tags are great for these kinds of projects, since they are wireless, lightweight, and can last a long time with the onboard batteries. To mount the individual tags on the plywood backboard,[Aaron] simply glued Velcro to the backboard of the tags. The displays’ firmware is based on the reverse engineering work of [Dmitry Grinberg], flashed to a few hundred tags using a convenient 3D printed pogo pin programming jig. All the displays are controlled via a Zigbee USB dongle plugged into a PC running station software.

[Aaron] is also experimenting with the displays removed from their enclosure and popped into a 3D printed grid frame. The disadvantage is the loss of the battery holders and the antenna, which are both integrated into the enclosure. He plans to get around this by powering the displays from a single large battery, and connecting an ESP32 to the displays via ISP or UART.

This project comes hot on the heels of another E-ink grid display project that uses Bluetooth and a rather clever update scheme.

Continue reading “E-paper Price Tags Combined To Create A Large Wireless Display”

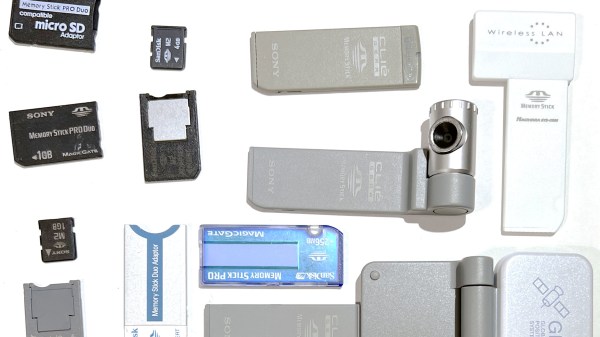
An assortment of MemoryStick cards and devices, some of them, arguably cursed, like a MemoryStick-slot-connected camera.

Hacker Challenges MemoryStick To A Fight And Wins

It’s amazing when a skilled hacker reverse-engineers a proprietary format and shares the nitty-gritty with everyone. Today is a day when we get one such write-up – about MemoryStick. It is one of those proprietary formats, a staple of Sony equipment, these SD-card-like storage devices were evidently designed to help pad Sony’s pockets, as we can see from the tight lock-in and inflated prices. As such, this format has always remained unapproachable to hackers. No more – [Dmitry Grinberg] is here with an extensive breakdown of MemoryStick protocol and internals.

If you ever want to read about a protocol that is not exactly sanely designed, from physical layer quirks to things like inexplicable large differences between MemoryStick and MemoryStick Pro, this will be an entertaining read for hackers of all calibers. Dmitry doesn’t just describe the bad parts of the design, however, as much as that rant is entertaining to read – most of the page is taken by register summaries, struct descriptions and insights, the substance about MemoryStick that we never got.

One sentence is taken to link to a related side project of [Dmitry] that’s a rabbithole on its own – he has binary patched MemoryStick drivers for PalmOS to add MemoryStick Pro support to some of the Sony Clie handhelds. Given the aforementioned differences between non-Pro and Pro standards, it’s a monumental undertaking for a device older than some of this site’s readers, and we can’t help but be impressed.

To finish the write-up off, [Dmitry] shares with us some MemoryStick bit-banging examples for the STM32. Anyone who ever wanted to approach MemoryStick, be it for making converter adapters to revive old tech, data recovery or preservation purposes, or simply hacker curiosity, now can feel a bit less alone in their efforts.

We are glad to see such great hacking on the MemoryStick front – it’s much needed, to the point where our only article mentioning MemoryStick is about avoiding use of the MemoryStick slot altogether. [Dmitry] is just the right person for reverse-engineering jobs like this, with extensive reverse-engineering history we’ve been keeping track of – his recent reverse-engineering journey of an unknown microcontroller in cheap E-Ink devices is to behold.

Reverse-Engineering An Unknown Microcontroller In E Ink Displays

For a monochrome display where refresh rate isn’t particularly important, there’s almost no better option than an E Ink display. They’re available in plenty of sizes and at various price points, but there’s almost no option cheaper than repurposing something mass-produced and widely available like an E Ink (sometime also called eInk or ePaper) price tag. At least, once all of the reverse engineering is complete.

[Dmitry Grinberg] has been making his way through a ton of different E Ink modules, unlocking their secrets as he goes. In this case he set about reverse engineering the unknown microcontroller on the small, cheap display show here. Initial research showed an obscure chip from the ZBS24x family, packaged with a SSD1623L2 E Ink controller. From there, he was able to solder to the communications wires and start talking to the device over ISP.

This endeavor is an impressive deep dive into the world of microcontrollers, from probing various registers to unlocking features one by one. It’s running an 8051 core so [Dmitry] gives a bit of background to help us all follow along, though it’s still a pretty impressive slog to fully take control of the system.

If you happen to have one of these price tags on hand it’s an invaluable resource to have to reprogram it, but it’s a great read in general as well. On the other hand, if you’re more interested in reverse-engineering various displays, take a look at this art installation which spans 50 years of working display technologies.

A Deep Dive Into E-Ink Tag Hacking

Over the last decade or so, e-ink price tags have become more and more ubiquitous, and they’ve now reached the point where surplus devices can be found inexpensively on various websites. [Dmitry Grinberg] found a few of these at bargain-basement prices and decided to reverse engineer and hack them into monochrome digital picture frames.

Often, the most difficult thing about repurposing surplus hardware is the potential lack of documentation. In the two tags [Dmitry] hacked, not only are the labels not documented at all, one even has an almost-undocumented SoC controlling it. After some poking around and some guesswork, he was able to find connections for both a UART and an SWD debugging interface. Fortunately, the manufacturers left the firmware unprotected, so dumping it was trivial.

Even with the firmware dumped, code for controlling peripherals (especially wireless devices) is often inscrutable. [Dmitry] overcomes this with a technique he calls “Librarification” in which he turns the manufacturer’s firmware into libraries for his custom code. Once he was able to implement his custom firmware, [Dmitry] developed his own code to wirelessly download and display both gray-scale and two-color images.

Even if you’re not interested in hacking e-ink tags, this is an incredible walk-through of how to approach reverse-engineering an embedded or IoT device. By hacking two different tags with completely different designs, [Dmitry] shows how to get into these systems with intuition, guesswork, and some sheer persistence.

If you’d like to see some more of [Dmitry]’s excellent reverse-engineering work, take a look at his reverse-engineering and ROM dump of the PokeWalker. If you’re interested in seeing what else e-ink tags can be made to do, take a look at this weather station made from the same 7.4″ e-ink tag.

Reverse Engineering A PokeWalker

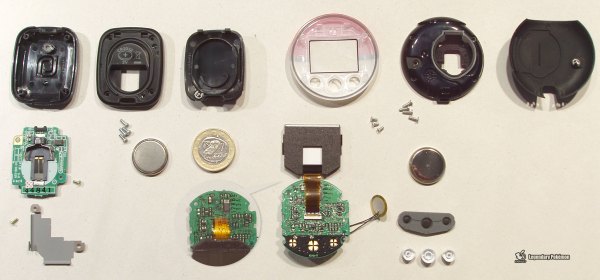
The PokeWalker is part of Nintendo’s long quest to get children (and likely some adults) walking and exercising. There’s the PokeWalker, Pokemon Pikachu, PokeBall Plus, Pokemon Pikachu 2, Pokemon mini, and of course Pokemon Go. Despite being out a decade, there wasn’t a ROM dump for the device and there was minimal documentation on the communication protocol. [Dmitry Grinberg] took it upon himself to change all that and crack the PokeWalker open.

At its heart, the PokeWalker is just a pedometer with an IR port and a 96×64 grayscale screen. It came out in 2009 to accompany the new Pokemon release for the Nintendo DS. Cracking open the device revealed a 64KB EEPROM, a Renesas H8/38606R CPU, a Bosch BMA150 accelerometer, and a generic IR transceiver. The CPU is particularly interesting as in addition to being quite rare, it has a mix of 8, 16, and 32 bits with 24-bit pointers. This gives it a 64K address space. While the CPU is programmable, any attempt to do so erases the onboard flash. The communication protocol packets have an 8-bit header that precedes each packet. The header has a checksum, a command byte, and four bytes of session id, and an unused byte. Curiously enough, every byte is XOR’d with 0xAA before being broadcast.

One command is an EEPROM write, which uses back-referencing compression. Each chunk of data to be written is packaged into 128-byte chunks, though 128 bytes likely won’t be sent thanks to the compression. The command can theoretically reference 4k bytes back, but in practice, it can only reference 256 bytes back. It was this command that laid the foundation for the exploit. By carefully crafting the command to send, the command can overflow the decompression buffer and into executable code. Only a few bytes can be overflowed so the payload needs to be carefully crafted. This allowed for an exploit that reads the system ROM and broadcasts it out the IR port. Only 22k bytes can be dumped before the watchdog reboots the device. By changing the starting address, it was easy to do multiple passes.

After the ROM was stitched together from the different passes, the different IR commands were analyzed. In particular, a command was found that allows direct writes into RAM. This makes for a much easier exploit as you can write your exploit, then override a pointer in the event table, then have the exploit revert the event table once the system naturally jumps to your exploit.

[Dmitry] finishes off this amazing exploit by writing a PalmOS app to dump the ROM from a PokeWalker as well as modify the system state. PalmOS was chosen as it is an easy and cheap way to have a programmable IR transciever. All in all, a gorgeous hack with a meticulous writeup. This isn’t the first video game accessory that’s been reverse engineered with a scrupulous writeup, and we’re sure it won’t be the last.

Continue reading “Reverse Engineering A PokeWalker”