TV Turned Automatic Etch A Sketch With Raspberry Pi

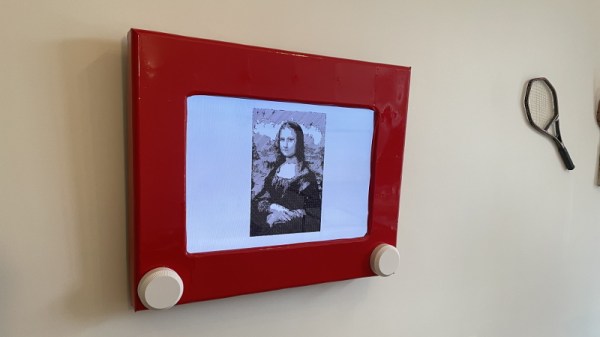
Considering one of the biggest draws of the original Etch a Sketch was how simple it was, it’s always interesting to see the incredible lengths folks will go to recreate that low-tech experience with modern hardware. A perfect example is this giant wall mounted rendition of the iconic art toy created by [Ben Bernstein]. With a Raspberry Pi and some custom electronics onboard, it can even do its own drawing while you sit back and watch.

At a high level, what we’re seeing here is a standard Samsung LCD TV with a 3D printed Etch a Sketch shell mounted on top of it. That alone would be a pretty neat project, and had [Ben] just thrown some videos of designs getting sketched out onto the display, he could have achieved a similar end result with a lot less work. But where’s the fun in that?
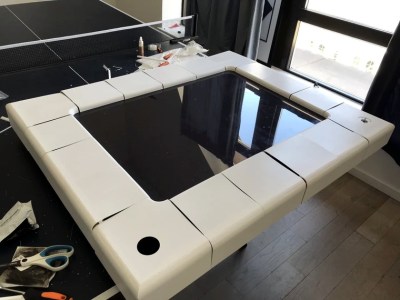
It took hundreds of hours to print the shell.

To make his jumbo Etch a Sketch functional, [Ben] spent more than a year developing the hardware and software necessary to read the user input from the two large 3D printed knobs mounted under the TV. The knobs are connected to stepper motors with custom PCBs mounted to their backs that hold a A4988 driver chip as well as a AS5600 absolute magnetic rotary encoder. This solution allows the Raspberry Pi to not only read the rotation of the knobs when a person is using the Etch a Sketch interactively, but spin them realistically when the software takes over and starts doing an autonomous drawing.

Several Python scripts pull all the various pieces of hardware together and produce the final user interface. The software [Ben] wrote can take an image and generate paths that the Etch a Sketch can use to realistically draw it. The points that the line is to pass through, as well as variables that control knob rotation and pointer speed, are saved into a JSON file so they can easily be loaded later. Towards the end of the Imgur gallery [Ben] has created for this project, you can see the software working its way through a few example sketches.

We’ve seen several projects that motorize an Etch a Sketch to draw complex images, but this may be the first example we’ve seen where everything was done in software. This digital version doesn’t need to follow the traditional “rules”, but we appreciate that [Ben] stuck to them anyway. Incidentally this isn’t the first Etch a Sketch TV conversion to grace these pages, though to be fair, the other project took a radically different approach.

Continue reading “TV Turned Automatic Etch A Sketch With Raspberry Pi”

Using E-Paper Displays For An Electronic Etch A Sketch

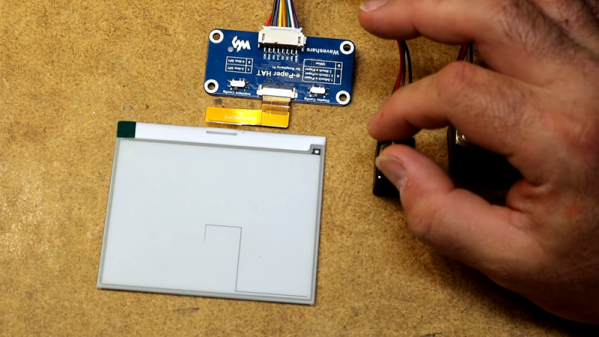
Electronic things are often most successful when they duplicate some non-electronic thing. Most screens, then, are poor replacements for paper. Except, of course, for E-paper. These displays have high contrast even in sunlight and they hold their image even with no power. When [smbakeryt] was looking at his daughter’s Etch-a-Sketch, he decided duplicating its operation would be a great way to learn about these paper-like displays.

You can see a video of his results and his findings below. He bought several displays and shows them all, including some three-color units which add a single spot color. The one thing you’ll notice is the displays are slow which is probably why they haven’t taken over the world.

The displays connect to a Raspberry Pi and many of the displays are meant to mount directly to a Pi. The largest display is nearly six inches and some of the smaller displays are even flexible. It appears the three color displays were much slower than the ones that use two colors. To combat the slow update speeds, some of the displays can support partial refresh.

The drawing toy uses optical encoders connected to the Raspberry Pi. The Python code is available. Even if you don’t want to duplicate the toy, the comparison of the displays is worth watching. We were really hoping he’d included an accelerometer to erase it by shaking, but you’ll have to add that feature yourself. By the way, in the video, he mentions the real Etch-a-Sketch might work with magnets. It doesn’t. It is an aluminum powder that sticks to the plastic until a stylus rubs it off.

We’ve seen these displays many times before, of course. If you are patient enough, you can even use them as Linux displays.

Continue reading “Using E-Paper Displays For An Electronic Etch A Sketch”

Bot Makes Etch A Sketch Art In One Continuous Line

Introduced in 1960 for the princely sum of $2.99 ($25.00 today), Etch A Sketch was to become a standard issue item for the Baby Boomers’ toy box. As enchanting as the toy seems, it’s hard to see why it had staying power: it was hard for young fingers to twirl the knobs, diagonal lines and smooth curves required a concert pianist’s fine motor control, and whatever drawings we managed to make were erased at the slightest jostle of the tablet.

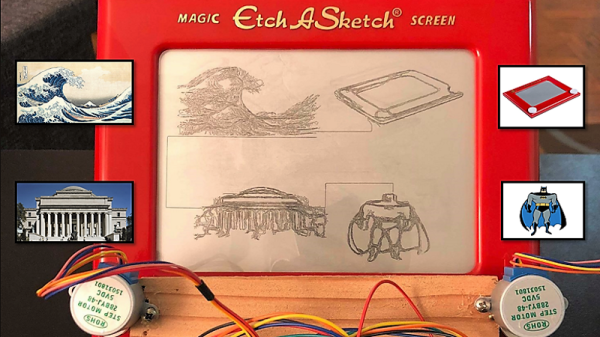
Intent on righting these wrongs, [Sunny Balasubramanian] not only motorized an Etch A Sketch, but he’s also given it a mind of its own in a way. For those unfamiliar with the toy, it’s basically a manual X-Y plotter that drags a stylus across the underside of a glass screen, scraping off a silver powder clinging to the glass to make dark lines. Replacing the knobs with steppers is straightforward, of course, but driving them is the trick. [Sunny] hooked his up to a Raspberry Pi and wrote some Python code to drive them. The Pi also accepts input image files and processes them for rendering through the plotter, first doing Canny edge detection in OpenCV, then plotting a single path through the largest collection of connected pixels in the image. From there it’s just a matter of spinning the motors to create surprisingly detailed images. Check out the short video below to see it in action.

It’s hardly the first automatic Etch A Sketch we’ve seen – here’s one that automates everything including the shake to erase the drawing. That one cheats a little though, in that it rasters across the screen like a CRT. We really like how this one just does a single path. Pretty clever.

Continue reading “Bot Makes Etch A Sketch Art In One Continuous Line”

Laser Cutter Becomes An Etch A Sketch

etch

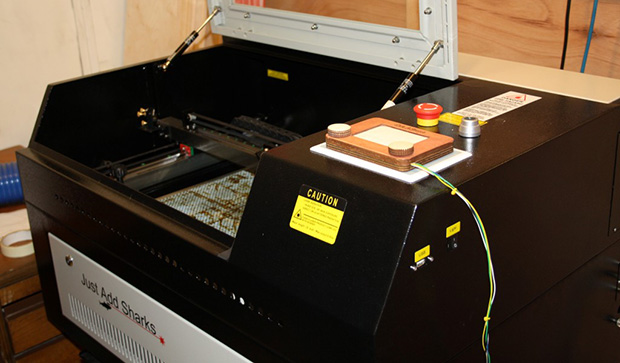
The mirror in a laser cutter moves along an X Y axis. An Etch A Sketch moves its stylus along an X Y axis. Honestly, this laser cutter with Etch A Sketch controls is so obvious, we’re shocked we haven’t seen it before.

The Etch A Sketch interface is extremely simple – just two rotary encoders attached to laser cut knobs set inside a small, laser cut frame. The lines from the encoders are connected to an Arduino Pro Mini that interfaces with the controller unit on the laser cutter, moving the steppers and turning on the laser only when the head is moving. There’s an additional safety that only turns on the laser when the lid is closed and the water pump is running.

The circuit is extremely simple, and with just a few connections, it’s possible to retrofit the Etch A Sketch controller to the laser cutter in just a few minutes.  Just the thing for a weekend hackerspace project.


Continue reading “Laser Cutter Becomes An Etch A Sketch”

Your Mug On An Etch A Sketch — Automatically

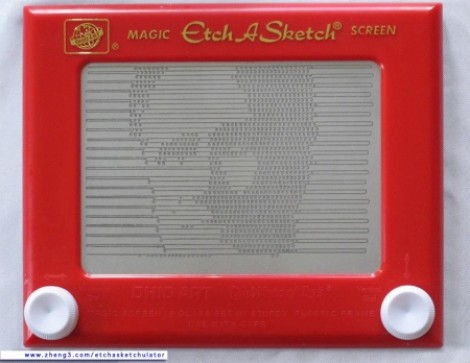
[Jim’s] pretty serious about his Etch a Sketch. He’s gone to the trouble of building a rig that will automatically render a photograph as Etch a Sketch art. Do you recognize the US political figure being plotted in this image? He actually cracks these open and removes all of the internals to preserve the artwork when the reassembled body is ready to be hung on a wall. But we like it for the hacker-friendly interface techniques he used.

He moves the knobs using a pair of stepper motors. They attach thanks to a pair of 3D printed gears he modeled which go over the stock knobs and secure with four set screws. He says he can be up and printing in five minutes using these along with the MDF jig that holds the body and the motors.

He converts photos to 1-bit images, then runs them through ImageMagick to convert them into a text file. A Python script parses that text, sending appropriate commands to an Arduino which drives the motors. The image is drawn much like a scanning CRT monitor. The stylus tracks one horizontal line at a time, drawing a squiggle if the pixel should be black, or skipping it if it should be white.

We wish there was a video of the printing process. Since we didn’t find one, there’s a bonus project unrelated to this one after the break. It’s an Etch a Sketch clock.

Continue reading “Your Mug On An Etch A Sketch — Automatically”

Giant Pencil Used As An Etch A Sketch Stylus

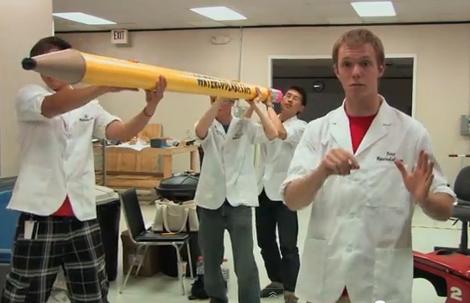
The gang over at Waterloo Labs decided to add a team-building aspect to a plain old Etch a Sketch. Instead of just twisting the two knobs with your own mitts, they’re converting this giant pencil’s movements into Etch a Sketch art.

The challenge here is figuring out a reliable way to track the tip of the pencil as it moves through the air. You may have already guess that they are using a Microsoft Kinect depth camera for this task. The Windows SDK for the device actually has a wrapper that helps it to play nicely with LabView, where the data is converted to position commands for the display.

On the Etch a Sketch side of things they’ve chosen the time-tested technique of adding gears and stepper motors to each of the toy’s knobs. As you can see from the video after the break, the results are mixed. We’d say from the CNC ‘W’ demo that is shown there’s room for improvement when it comes to the motor driver. We can’t really tell if the Kinect data translation is working as intended or not. But we say load it up and bring to a conference. We’re sure it’ll attract a lot of attention just like this giant version did.

Continue reading “Giant Pencil Used As An Etch A Sketch Stylus”

Two DJ Hero Controllers Turned Into A Giant Etch A Sketch

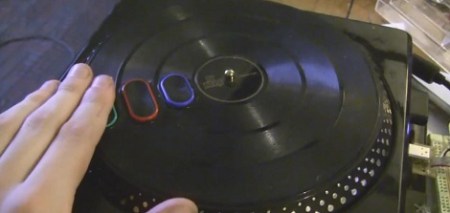
[Ryan] sent in a little project he’s been working on. After he got his hands on a pair of DJ Hero controllers, he figured he needed to pull controller data off them.

After plugging in his two DJ Hero controllers to a breakout board, [Ryan] discovered the turntables communicate on an I2C bus. A Teensy was thrown into the mix, and work began on decoding the turntable output. [Ryan] figured out that by pulling 23 bytes from the turn table, he was left with the necessary data. Byte 20 is the state of the green, red, and blue buttons, byte 21 is the distance traveled, and byte 23 indicates clockwise or counter-clockwise. After [Ryan] figured out how to pull data off his DJ Hero controllers, the only thing left to do was build a giant Etch A Sketch on a 55 inch TV.

By the time the Etch A Sketch was completed, [Ryan] figured out that he had a gigantic rotary encoder – perfect for some classic MAME action. He started up MAME and loaded up Cameltry and Off The Wall. The DJ Hero controllers seem to work just fine, even if the hunched-over [Ryan] can’t beat the levels.