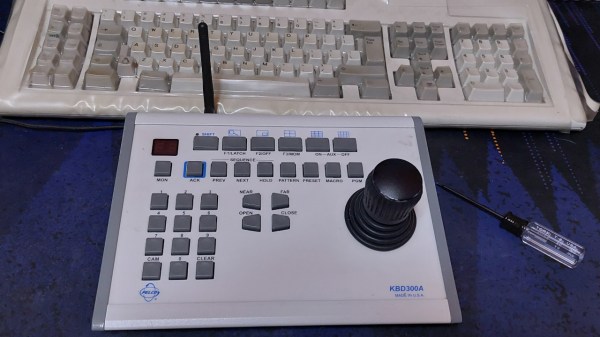
Having a game-tailored controller is a level-up in more ways than one, letting you perform in-game actions quickly and intuitively, instead of trying to map your actions to a clunky combination of keyboard and mouse movements. [abzman] took the Pelco KBD300A, a DVR-intended camera controller panel with a joystick, reverse-engineered it, and then rebuilt it into a Kerbal Space Program controller. What’s more, he documented every detail along the way!
The write-up is so extensive, it’s four separate posts — all of them worth reading without a doubt. In the first post, he describes the original hardware, the process of reverse-engineering it, and a few tips for your own RE journeys. Next, he covers about making his own board, showing all the small decisions he’s had to make, with plenty of KiCad screenshots. If you are on the lookout for designing such a board, there’s plenty to learn!
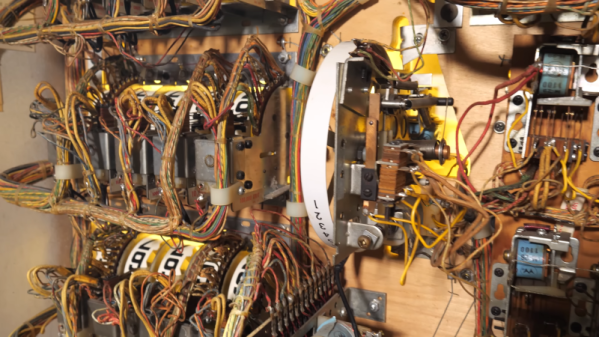
The original hardware didn’t go down without a fight — the third post talks about taming the seven-segment displays, the onboard joystick, and fighting with the key matrix wired in exactly the way you wouldn’t want. In the end, he shows us how you could tie a controller easily into Kerbal Space Program.
One more piece of hardware liberated, one more win for the hacker world. Whether it’s a Macintosh SE, a classic ThinkPad, or even a generic rotary tool, these upgrades are always a joy to see. If you wanted to learn to do such an upgrade yourself, here’s us showing how you can pull this off with a classic Sony Vaio!