When Pi Supply Falls Short, Thin Clients Stand Tall For Home Automation And Low Power Computing

Do you need a cheap, small computer for a low power computing project? Historically, many of us would reach straight for a Raspberry Pi, even if we didn’t absolutely need the GPIO. But with prices elevated and supplies in the dumps, [Andreas Spiess] decided that it was time to look for alternatives to now-expensive Pi’s which you can see in the video below the break.

Setting up Debian for IOTstack

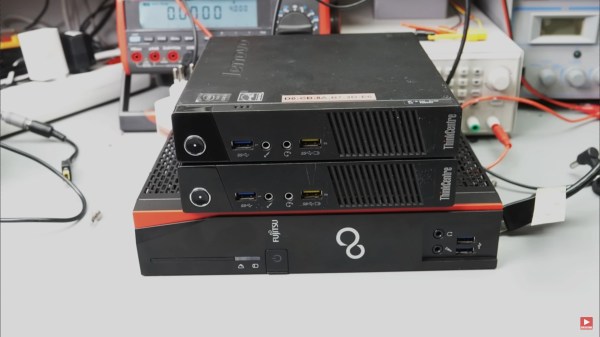
Many simply use the Pi for its software ecosystem, its lower power requirements, and diminutive size. [Andreas] has searched eBay, looking for thin PC clients that can be had for as little as $10-15. A few slightly more expensive units were also chosen, and in the video some comparisons are made. How do these thin clients compare to a Pi for power consumption, computing power, and cost? The results may surprise you!

Software is another issue, since many Pi projects rely on Raspbian, a Pi-specific ARM64 Linux distribution. Since Raspbian is based on Debian, [Andreas] chose it as a basis for experimentation. He thoughtfully included such powerful software as Proxmox for virtualization, IOTstack, and Home Assistant, walking the viewer through each step of running Home Assistant on x86-64 hardware and noting the differences between the Linux distributions.

All in all, if you’ve ever considered stepping out of the Pi ecosystem and into general Linux computing, this tutorial will be an excellent starting point. Of course [Andreas] isn’t the first to bark up this tree, and we featured another thin client running Klipper for your 3D printer earlier this month. Have you found your own perfect Pi replacement in these Pi-less times? Let us know in the comments below.

Continue reading “When Pi Supply Falls Short, Thin Clients Stand Tall For Home Automation And Low Power Computing”

Unlocking A Locked-Down Inverter

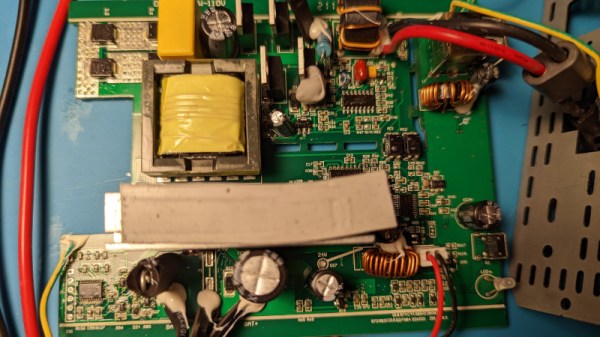
There was a time when a mains inverter was a heavy, expensive, and not particularly powerful item, but thanks to switch-mode technology we are now spoiled for choice. Most inverters still work with 12 V or 24 V supplies though, so when [Chris Jones] was looking for one to run from 36 V batteries, he found a limited supply. Sadly the Greenworks model he ended up with was affordable, but locked to a particular battery by means of a serial line between battery and inverter. Buy the special battery? No, he did what any hacker would do, and modified the inverter to do without it.

Tracing the serial link led to a mystery chip, probably a microcontroller but without available data. It in turn had a line to an 8051 derivative that seemed to be the brains of the operation. Acting on a hunch he pulled down the line with a resistor, and as if by magic, a working inverter appeared.

As you might expect, here at Hackaday we abhor such tricks by manufacturers, and thus any moves to circumvent them are to be applauded. It would be extremely interesting were anyone to have the Greenworks battery to subject to some reverse engineering of the profile.

Meanwhile if this is a little complex for you, there is a much simpler way to make a rough and ready inverter.

Jansen's linkage, paper model of a bar linkage

Making Paper Strandbeesten

We love the artistry of paper mechanisms.  Simple tools and techniques creating humor, beauty, and amazement.

[Federico Tobon] from [Wolfcat Workshop] makes amazing automata, crosses between cut paper art, origami, and traditional carved wood automata.  He’s put out a useful new video on making linkages in paper parts.

In this short video, [Federico] shows us how to make a paper version of the leg mechanism for [Theo Jansen]’s classic Strandbeest, which we’ve covered in many variations.

Rotating joints in paper automata are sometimes done with a mechanical fastener like a post screw, but it violates the simplicity of the affair and often looks clunky.  [Federico] uses a simple self fastener. A 5 mm hole in one part mates with two “flaps” in the other part. He’s made a separate video covering how to make the fastenings. He’s using a paper crafter’s Cricut-type machine to cut the parts.  Pretty cool.

We’ve covered lots of other cool stuf from [Wolfcat Workshop]. If you want more of his automata eye candy, check out Simple Automata Extravaganza.

Squish That Stack With Rampart

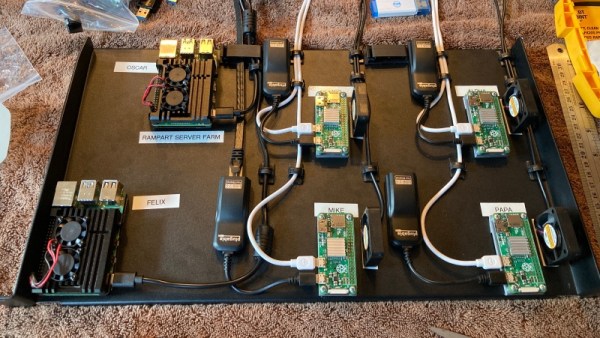
[P B Richards] and [Aaron Flin] were bemoaning the resource hunger of modern JavaScript environments and planned to produce a system that was much stingier with memory and CPU, that would fit better on lower-end platforms. Think Nginx, NodeJS, and your flavour of database and how much resource that all needs to run properly. Now try wedge that lot onto a Raspberry Pi Zero. Well, they did, creating Rampart: a JavaScript-based complete stack development environment.

The usual web applications have lots of tricks to optimise for speed, but according to the developers, Rampart is still pretty fast. Its reason for existence is purely about resource usage, and looking at a screen grab, the Rampart HTTP server weighs in at less than 10 MB of RAM. It appears to support a decent slew of technologies, such as HTTPS, WebSockets, SQL search, REDIS, as well as various utility and OS functions, so shouldn’t be so lightweight as to make developing non-trivial applications too much work. One interesting point they make is that in making Rampart so frugal when deployed onto modern server farms it could be rather efficient. Anyway, it may be worth a look if you have a reasonable application to wedge onto a small platform.

We’ve seen many JavaScript runtimes over the years, like this recent effort, but there’s always room for one more.

Homebrew LED Bulbs Keep Your Circadian Rhythms Steady

There was a time when LED light bulbs were a premium product that commanded a premium price, mainly because of limited supply and the usual marketing tricks. But now is not that time, since you can pick up an LED bulb for a buck or two at pretty much any store. So why in the world would you go to the effort to make your own light bulb?

For [DiodeGoneWild], the answer is simple: it’s all about staying in rhythm. Circadian rhythm, that is. We all know how light toward the blue end of the spectrum is bad for our sleep cycle, since it convinces our lizard brain that dawn is at hand. But even if you pick an LED bulb with a warm, or reddish, color temperature, there’s still a lot of UV light being emitted thanks to the phosphor LEDs that are typically used in them.

[DiodeGoneWild]’s first attempt at a design, in the first video below, mostly avoids phosphor LEDs in favor of a mix of yellow, red, and yellow-green LEDs to get a warmer spectrum. He used the housing and base from an expired bulb to enclose his custom circular PCB, the fabrication of which using a hand drill as a lathe and a Dremel to machine concentric tracks in the cladding was a real treat. So was the power supply, for that matter — a dropping capacitor followed by a bridge rectifier and a filtering cap. We like the discharge resistors across the caps and the fusible resistor on the mains side — it’s nice to see safety factored in from the start. And what’s not to like about using a DVD as a makeshift spectroscope?

We see that [DiodeGoneWild] has just dropped a second design, this time in a much smaller bulb and with relatively more phosphor LEDs.

Continue reading “Homebrew LED Bulbs Keep Your Circadian Rhythms Steady”

Electroplated 3D Printed Sword: Shiny!

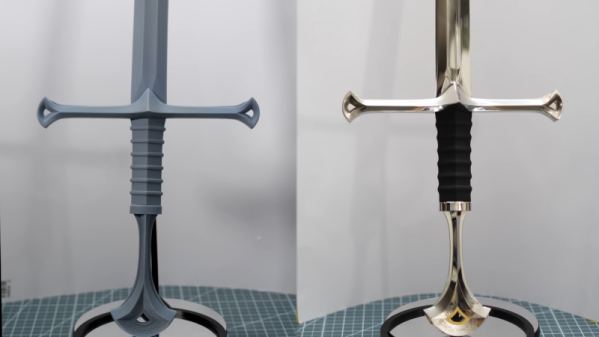
We all want to 3D print metals, but the equipment to do that is still beyond most home workshops. However, [HEN3DRIK] takes resin 3D-printed items and electroplates them. Might not be as good as printing in metal, but it sure looks metallic. As you can see in the video below, the sword looks like it was crafted from highly-polished steel.

The sword comes out in four pieces. He repeats several times that sanding is the key because you must have flat surfaces. Using sandpaper and steel wool, he worked the parts to a fine finish. The parts assemble along an M8 threaded rod to form a whole. The next step was to electroplate with copper.

Continue reading “Electroplated 3D Printed Sword: Shiny!”

Racing Cars On A PCB

Carl Friedrich Gauss was, to put it mildly, a polymath responsible for a large percentage of the things we take for granted in the modern world. As a physicist and mathematician he pioneered several fields of study including within the field of magnetism. But since he died decades before the first car was built, it’s unlikely he could have imagined this creation, a magnetic slot-car race track called the Gauss Speedway by [Jeff McBride], which bears the name of the famous scientist.

The Gauss Speedway takes its inspiration from a recent development in robotics, where many small robots can travel around a large area with the help of circuit traces integrated into their operating area. With the right current applied to these traces, magnetic fields are generated which propel the robots. [Jeff] wanted to build something similar, integrated into a printed circuit board directly, and came up with the slot car idea. The small cars have tiny magnets in them which interact with the traces in the PCB, allowing the cars to move with high precision around the track. He did abandon the traditional slot car controller in favor of a push-button style one directly on the PCB too, which means everything is completely integrated.

While this was more of a demonstration or proof-of-concept, some of the features of this style of robot can be seen in this video, which shows them moving extremely rapidly with high precision, on uneven surfaces, or even up walls. Magnetic robots like these are seeing quite a renaissance, and we’ve even seen some that use magnetism to shape-shift.

Continue reading “Racing Cars On A PCB”