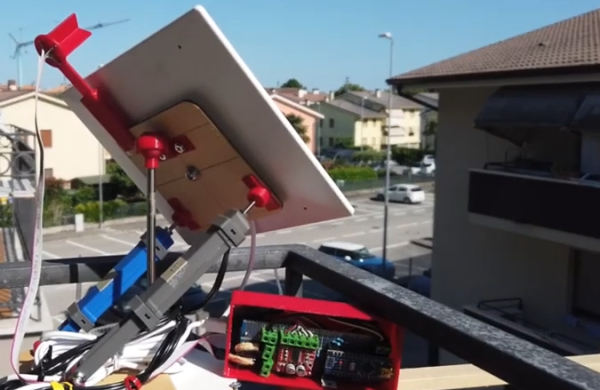
An Off-Grid Makeshift Cell Network

When traveling into the wilderness with a group of people, it’s good to have a method of communications set up both for safety and practicality. In the past people often relied on radios like FRS, CB, or ham bands if they had licenses, but nowadays almost everyone has a built-in communications device in their pocket that’s ready to use. Rather than have all of his friends grab a CB to put in their vehicle for their adventures together, [Keegan] built an off-grid network which allows any Android phone to communicate with text even if a cell network isn’t available.

The communications system is built on the LoRa communications standard for increased range over other methods like WiFi using a SX1278 chip and an ESP8266. The hardware claims a 10 km radius using this method which is more than enough for [Keegan]’s needs. Actually connecting to the network is only half of the solution though; the devices will still need a method of communication. For that, a custom Android app was created which allows up to 8 devices to connect to the network and exchange text messages with each other similar to a group text message.

For off-grid adventures a solution like this is an elegant solution to a communications problem. It uses mostly existing hardware since everyone carries their own phones already, plus the LoRa standard means that even the ESP8266 base station and transmitter are using only a tiny bit of what is likely battery power. If you’re new to this wireless communications method, we recently featured a LoRa tutorial as well.

Dummy The Robot Arm Is Not So Dumb

[Zhihui Jun] is a name you’re going to want to remember because this Chinese maker has created quite probably one of the most complete open-source robot arms (video in Chinese with subtitles, embedded below) we’ve ever seen. This project has to be seen to be believed. Every aspect of the design from concept, mechanical CAD, electronics design and software covering embedded, 3D GUI, and so on, is the work of one maker, in just their spare time! Sound like we’re talking it up too much? Just watch the video and try to keep up!

After an initial review of toy robots versus more industrial units, it was quickly decided that servos weren’t going to cut it – too little torque and lacking in precision. BLDC motors offer great precision and torque when paired with a good controller, but they are tricky to make small enough, so an off-the-shelf compact harmonic drive was selected and paired with a stepper motor to get the required performance. This was multiplied by six and dropped into some slick CNC machined aluminum parts to complete the mechanics. A custom closed-loop stepper controller mounts directly to the rear of each motor. That’s really nice too.

Stepper controller mounts on the motor rear – smart!

Control electronics are based around the STM32 using an ESP32 for Wi-Fi connectivity, but the pace of the video is so fast it’s hard to keep up with how much of the design operates. There is a brief mention that the controller runs the LiteOS kernel for Harmony OS, but no details we can find. The project GitHub has many of the gory details to pore over perhaps a bit light in places but the promise is made to expand that. For remote control, there’s a BLE-connected teaching device (called ‘Peak’) with a touch screen, again details pending. Oh, did we mention there’s a force-feedback (a PS5 Adaptive Trigger had to die for the cause) remote control unit that uses binocular cameras to track motion, with an AHRS setup giving orientation and that all this is powered by a Huawei Atlas edge AI processing system? This was greatly glossed over in the video like it was just some side-note not worth talking about. We hope details of that get made public soon!

Threading a needle through a grape by remote control

The dedicated GUI, written in what looks like Unity, allows robot programming and motion planning, but since those harmonic drives are back-drivable, the robot can be moved by hand and record movements for replaying later. Some work with AR has been started, but that looks like early in the process, the features just keep on coming!

Quite frankly there is so much happening that it’s hard to summarise here and do the project any sort of justice, so to that end we suggest popping over to YT and taking a look for yourselves.

We love robots ’round these parts, especially robot arms, here’s a big one by [Jeremy Fielding],  and if you think stepper motors aren’t necessary, because servo motors can be made to work just fine, you may be right.

Continue reading “Dummy The Robot Arm Is Not So Dumb”

Rotary Valve Engine Gets A Second Chance, Smokes The Competition

It’s a dedicated hacker who has the patience to build an engine from scratch. And it’s a borderline obsessed hacker who does it twice. [Meanwhile In the Garage] is of the second ilk, and in the video below the break, he takes a failed engine design and musters up the oomph to get it running.

The whole build began with an idea for a different kind of intake and exhaust valve. [Meanwhile In the Garage] dreamed up a design that does away with the traditional poppet valve. Instead of valves that open by being pushed away from their seat by a camshaft, this design uses a cylinder that is scooped so that as it rotates, its ports are exposed to either the intake or the exhaust.

Four Stroke Cycle with Poppet valves. Courtesy Wikipedia, CC BY-SA 3.0

During the compression stroke, the valve cylinder becomes part of the combustion chamber, with both ports facing away from the piston. If you read the comments, you’ll find that multiple people have come up with the idea through the years. With his mill, lathe, and know-how, [Meanwhile In the Garage] made it happen. But not without some trouble.

The first iteration resisted all valiant attempts at getting it started. The hour-long video preceding this one ended up in a no-start. Despite his beautiful machine work and a well thought out design, it wasn’t to be. Fire came from the engine either through the exhaust or the carburetor, but it never ran. In this version, several parts have been re-worked and the effect is immediate! The engine fired up nicely and even seems to rev up pretty well. Being a first-generation prototype, it lacks seals and other fancy parts to keep oil out of the combustion chamber. Normal engine oil has been added to the fuel as a precaution as well. The fact that it smokes quite badly isn’t a surprise and only proves that the design will benefit from another iteration. Isn’t that true for most prototypes, though?

Home-grown engines aren’t a new thing at Hackaday, and one of This Author’s favorite jet turbines used a toilet paper holder. Yes, really.  Thanks to [Keith] for the Tip!

Continue reading “Rotary Valve Engine Gets A Second Chance, Smokes The Competition”

Pre-exploded PSU close-up: shown is inductor with the heatsink it shorted against.

The Little Replacement PSU That Could: Kill A Microsoft Surface And Monitor

Recently [Big Clive], everyone’s favorite purveyor of anything electronic that’s dodgy, cheap, cheerful, decidedly crispy or any combination thereof, got sent a very dead external power supply unit. Being clearly a third-party PSU with poorly written and many (likely not truthful) safety approval markings on its label, this PSU had the dubious honor of having destroyed a Microsoft Surface computer as well as the monitor that was connected at the time.

In [Clive]’s video (also embedded after the break) the black and very crispy board is examined, showing a wealth of vaporized traces and plenty of soot. What’s however most fascinating is the failure mode: instead of something obvious like e.g. the main transformer between the primary and secondary side failing, here it would seem that an inductor (see heading image) on the secondary side had its insulation rubbed off and shorted on a nearby heatsink. A heatsink that just happened to be also electrically connected on the primary (mains-level) side.

Judging by the former owner’s report and aftermath, this led to a very sudden and violent demise of the PSU, with mains power very likely making its way into the unsuspecting Surface system and connected monitor. The number of ‘very nope’ design decisions made in this PSU are astounding, and a lesson for both aspiring EEs and anyone considering getting a ‘cheap’ third-party replacement PSU.

(Thanks to [Helge] for the tip)

Continue reading “The Little Replacement PSU That Could: Kill A Microsoft Surface And Monitor”

A Ball Lens For Optical Fiber Coupling On The Cheap

It’s fair to say that for most of us, using a fiber optic cable for digital audio or maybe networking will involve the use of an off-the-shelf termination. We snap the cable into the receptacle, and off we go. We know that inside there will be an LED and some lenses, but that’s it. [TedYapo] though has gone a little further into the realm of fibers, by building his own termination. Faced with the relatively high cost of the ball lenses used to focus light from an LED into the end of the fiber he started looking outside the box. He discovered that spherical glass anti-bumping balls used when boiling fluids in laboratories make an acceptable and much cheaper alternative.

A ball lens has an extremely short focal length, meaning that this same property which allowed Antonie van Leeuwenhoek to use them in his microscopes is ideal for LED focusing in a small space at the end of a fiber. Chromatic aberrations are of no consequence for light of a single wavelength. It seems that the glass balls are uniformly spherical enough to do the job. Fitted with the LED and fiber termination in a 3D-printed block, the relative position of the ball can be controlled for optimum light transfer. It’s a relatively simple hack mentioned in passing in a Twitter thread, but we like it because of its cheapness and also for an insight into the world of optical fiber termination.

Curious to know more about optical fibers? We covered just the video for you back in 2011.

On the left, four through-hole USB-C connectors laid out on a purple cutting mat. On the right, a teardown picture shows that there's neither resistors nor CC connections inside such a connector, resulting in consequences described in the article.

The USB-C Connectors You Never Knew You Wanted To Avoid

On Tech Twitter, some people are known for Their Thing – for example, [A13 (@sad_electronics)], (when they’re not busy designing electronics), searches the net to find outstanding parts to marvel at. A good portion of the parts that they find are outstanding for all the wrong reasons. Today, that’s a through-hole two-pin USB Type-C socket. Observing the cheap tech we get from China (or the UK!), you might conclude that two 5.1K pulldown resistors are very hard to add to a product – this socket makes it literally impossible.

We’ve seen two-pin THT MicroUSB sockets before, sometimes used for hobbyist kits. This one, however, goes against the main requirement of Type-C connectors – sink (Type-C-powered) devices having pulldowns on CC pins, and source devices (PSUs and host ports) having pull up resistors to VBUS. As disassembly shows, this connector has neither of these nor the capability for you to add anything, as the CC pins are physically not present. If you use this port to make a USB-C-powered device, a Type-C-compliant PSU will not give it power. If you try to make a Type-C PSU with it, a compliant device shall (rightfully!) refuse to charge from it. The only thing this port is good for is when a device using it is bundled with a USB-A to USB-C cable – actively setting back whatever progress Type-C connectors managed to make.

As much as USB Type-C basics are straightforward, manufacturers get it wrong on the regular – back in 2016, a wrong cable could kill your $1.5k MacBook. Nowadays, we might only need to mod a device with a pair of 5.1K resistors every now and then. We can only hope that the new EU laws will force devices to get it right and stop ruining the convenience for everyone, so we can finally enjoy what was promised to us. Hackers have been making more and more devices with USB-C ports, and even retrofitting iPhones here and there. If you wanted to get into mischief territory and abuse the extended capabilities of new tech, you could even make a device that enumerates in different ways if you flip the cable, or make a “BGA on an FPC” dongle that is fully hidden inside a Type-C cable end!

Immersive Stereo Sound Recording With This Binaural Microphone

Sound recording has been a consumer technology for so long now that it is ubiquitous, reaching for a mobile device and firing up an app takes only an instant. Anyone who takes an interest in audio recording further will find that while it’s relatively straightforward to make simple recordings. But, as those among you who have fashioned a pair of Shure SM58s into an X configuration with gaffer tape will know, it can be challenging to create a stereo image when recording outside the studio. In the quest to perfect this, [Kevin Loughin] has created a binaural microphone, which simulates a human head with microphones placed as ears to produce ambient recordings with an almost-immersive stereo image.

Commercial binaural microphones can cost thousands of dollars, but this one opts for a more budget design using an off-the-shelf mannequin head sold for hairdressers. It’s filled with high-density foam, and in its ears [Kevin] placed 3D-printed ear canals with electret microphone capsules. On the back goes a battery and a box for the bias circuitry.

The results as you can hear in the video below the break are impressive, certainly so for the cost. It’s not the first such microphone we’ve shown you, compare it with one using a foam-only head.

Continue reading “Immersive Stereo Sound Recording With This Binaural Microphone”