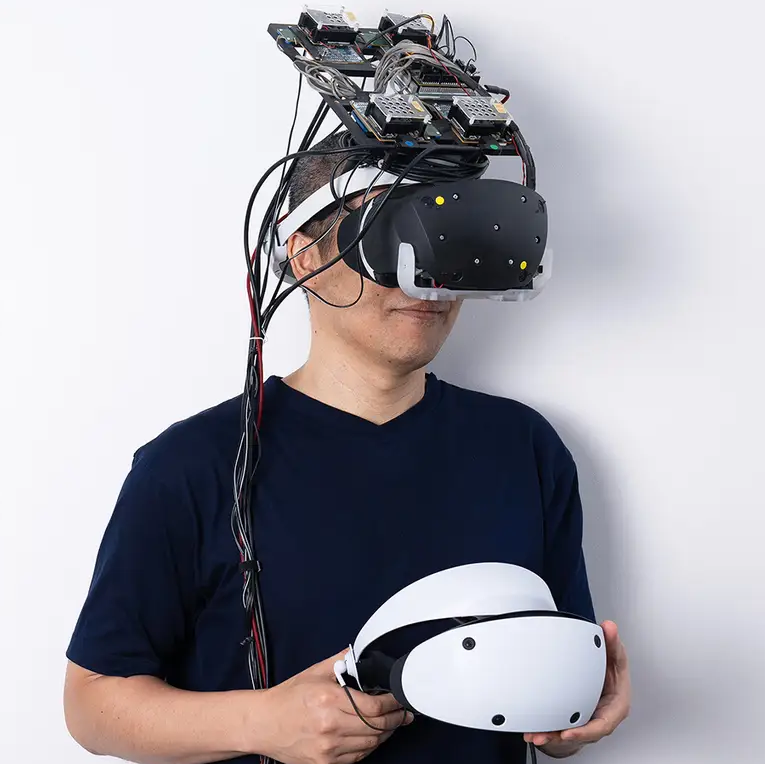
Every finished product stands at the end of a long line of prototypes, and Sony have recently shared an interview and images of their PlayStation VR2 prototypes.
Many of the prototypes focus on a specific functionality, and readers who are not familiar with building things might find it a bit wild to see just how big and ungainly un-optimized hardware can be.
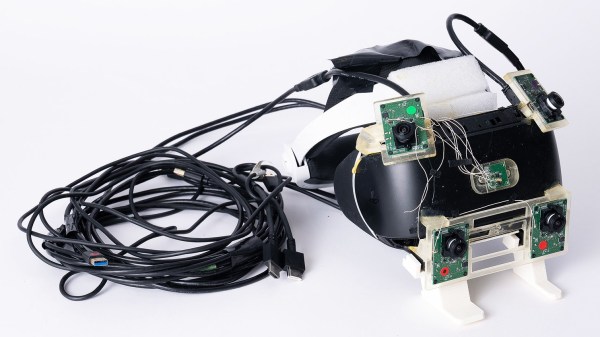
The images are definitely the best part of that link, but the interview has a few interesting bits. For example, one prototype was optimized for evaluating and testing camera placement with a high degree of accuracy, and it hardly looks like a VR headset at all.
The controllers on the other hand seem to have gone though more iterations based on the ergonomics and physical layout of controls. The VR2 controllers integrate the adaptive triggers from the PlayStation 5, which are of a genuinely clever design capable of variable resistance as well as an active force feedback effect that’s not quite like anything that’s come before.
There’s a lot of work that goes into developing something like a VR headset, as we see here and we’ve seen with Facebook’s (now Meta) VR research prototypes. But even when one can leverage pre-made modules as much as possible and doesn’t need to start entirely from scratch, making a VR headset remains a whole heap of work.