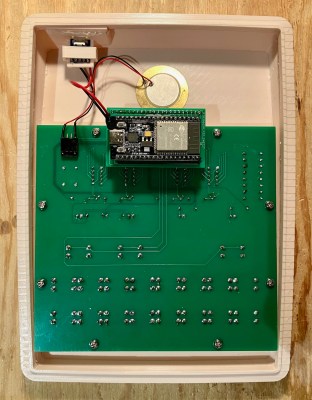
Embedded Dashboard Definitely Displays Data

Oftentimes, we’ll find ourselves using an PC attached to a project for serial debugging. Other times, we’ll be squinting at a status LED trying to remember the flash code we invented. This embedded dashboard from [hgrodriguez] aims to land somewhere in the middle.

The dashboard features LEDs, several 5×7 matrix displays, and will also mount a small OLED display as well. Everything onboard is driven by an ItsyBitsy board, featuring an Atmega32u4 microcontroller. Data can be fed to the ItsyBitsy via UART, SPI, or eventually, I2C as well.

With the ItsyBitsy handling actually driving the various displays, your project only need send out debug data over one of the listed interfaces. The ItsyBitsy will then display your byte values or word values on the matrix displays, flash the LEDs as required, and so on.

The result is a useful little console that can show you what’s going on in the brain of your microcontroller project. It’s no substitute for a full serial terminal, but it could definitely come in handy when you need to get eyes on a few variables in RAM!

Overwhelmed By Odd Inputs: The Contest Winners And More

The Odd Inputs and Peculiar Peripherals Contest wrapped up last week, and our judges have been hard at work sifting through their favorite projects. And this was no easy task – we had 75 entries and so many of them were cool in their own right that all we can say is go check them all out. Really.

But we had to pick winners, not the least because Digi-Key put up three $150 gift certificates. So without further ado, here are the top three projects and as many honorable mentions as you have fingers and toes – if you don’t count your thumbs.

The Prize Winners

Keybon should be a mainstream commercial product. It’s a macro keypad with an OLED screen per key. It talks to an application on your desktop that detects the program that you currently have focused, and adapts the keypress action and the OLED labels to match. It’s a super-slick 3D-printed design to boot. It’s the dream of the Optimus Maximus, but made both DIY and significantly more reasonable as a macro pad. It’s the coolest thing to have on your desk, and it’s a big winner!

On the ridiculous side of keyboards, meet the Cree-board. [Matt] says he got the idea of using beefy COB LEDs as keycaps from the bad pun in the name, but we love the effect when you press down on the otherwise blinding light – they’re so bright that they use your entire meaty finger as a diffuser. Plus, it really does look like a keypad of sunny-side up eggs. It’s wacky, unique, and what’s not to love about that in a macropad?

Finally, [Josh EJ] turned an exercise bike into a wireless gamepad, obliterating the choice between getting fit and getting high scores by enabling both at the same time. An ESP32-turned-Bluetooth-gamepad is the brains, and he documents in detail how he hooked up a homebrew cadence sensor, used the heart-rate pads as buttons, and even added some extra controls on top. Watching clips of him pedaling his heart out in order to push the virtual pedal to the metal in GRID Autosport, we only wish he were screaming “vroooom”. Continue reading “Overwhelmed By Odd Inputs: The Contest Winners And More”

A 3D-printed five-key chorded keyboard

Odd Inputs And Peculiar Peripherals: Chorded Keyset Recreates Engelbart’s Vision

Douglas Engelbart’s 1968 “Mother of all Demos” introduced the world to a whole range of technologies we take for granted today, the most prominent being his great invention, the computer mouse. However, the MOAD also showcased things like cut-and-paste text editing, a point-and-click interface, video conferencing, and even online collaboration à la Google Docs. One of the innovations shown that for some reason didn’t stand the test of time was the chorded keyboard: an input device with five keys that can be pressed simultaneously in different combinations, the same way you would play chords on a piano.

A 3D-printed five-key chorded keyboard
The Engelbart Keyset comes with both USB host and USB client ports

While a handful of attempts have been made over the years to bring new life to the “chorder”, it failed to achieve mainstream appeal and remains a curiosity to this day. That makes it a natural fit for the Odd Inputs and Peculiar Peripherals contest, as we can see in [Russ Nelson]’s submission called the Engelbart Keyset, which aims to create a modern 3D printed chorder that works exactly as Engelbart intended it.

It’s important to note that the chorded keyboard was not meant to be just an additional set of five keys. Instead, Engelbart showed the clever interplay between the chorder and the mouse: the five keys under his left hand and the three mouse buttons under his right could be combined to create a full 8-bit input device. [Russ]’s device therefore includes a USB host interface to connect a USB mouse as well as a USB client interface that presents itself as a combination mouse/keyboard device to the PC.

The brains of the device are formed by a Teensy 4.1, which reads out the codes sent by the mouse as well as the five keys on top. If one or more of those keys are pressed together with a mouse button, then a keyboard code is generated corresponding to Engelbart’s original keycode mapping. We’re wondering how practical this whole setup would be in real life; it looks like something you’d have to try hands-on to find out. Fortunately, all the schematics, code and STL files are available on the project page, so with just a bit of work you can have your own MOAD setup on your desk today.

We’ve featured a couple of chorded keyboards on these pages; the Pico Chord, the Chordie and the BAT spring to mind. If you’re looking for a recap of Engelbart’s stunning presentation, check out our piece on the Mother of all Demos, 50 years on.

Commodore C64: The Most Popular Home Computer Ever Turns 40

This year marks the anniversary of the most popular selling home computer ever, the Commodore 64, which made its debut in 1982. Note that I am saying “home computer” and not personal computer (PC) because back then the term PC was not yet in use for home computer users.

Some of you have probably not heard of Commodore, which is kind of sad, though there is a simple reason why — Commodore is no longer around to maintain its legacy. If one were to watch a documentary about the 1980s they may see a picture of an Apple computer or its founders but most likely would not see a picture of a Commodore computer in spite of selling tens of millions of units.

To understand the success of the C64 I would first back up and talk about the fabled era of home computers which starts with understanding the microprocessor of the day, the venerable 6502. Check out the video and follow along below.

Continue reading “Commodore C64: The Most Popular Home Computer Ever Turns 40”

OpenMower: Open Source Robotic Lawn Mower With RTK GPS

Robotic mowers are becoming a common sight in some places, enabled by the cost of motors and the needed control electronics being much lower, thanks to the pace of modern engineering. But, in many cases, they still appear to be really rather dumb, little more than a jacked up bump-and-go with a spinning blade. [Clemens Elflein] has taken a cheap, dumb mower and given it a brain transplant based around a Raspberry Pi 4 paired up with a Raspberry Pi Pico for the real time control side of things. [Clemens] is calling this OpenMower, with the motivation to create an open source robot mower controller with support for GPS navigation, using RTK for extra precision.

The donor robot was a YardForce Classic 500, and after inspection of the control PCB, it looks like many other robot mower models are likely to use the same controller and thus be compatible with the openmower platform. A custom mainboard houses the Pi 4 and Pico, an ArduSimple RTK GPS module (giving a reported navigational accuracy of 1 cm,) as well as three BLDC motor drivers for the wheels and rotor. Everything is based on modules, plugging into the mainboard, reducing the complexity of the project significantly. For a cheap mower platform, the Yardforce unit has a good build quality, with connectors everywhere, making OpenMower a plug and play solution. Even the user interface on top of the mower was usable, with a custom PCB below presenting some push buttons at the appropriate positions.

OpenMower mainboard

Motor control is courtesy of the xESC project, which provides FOC motor control for low cost, interfacing with the host controller via a serial link. This is worth looking into in its own right! On the software side of things, [Clemens] is using ROS, which implements the low level robot control, path planning (using code taken from Slic3r) as well a kinematics constraints for object avoidance. The video below, shows how simple the machine is to operate — just drive it around the perimeter of lawn with a handheld controller, and show it where obstacles such as trees are, and then set it going. The mower is even capable of mowing multiple lawns, making the journey between them automatically!

Robotic mower projects are not new around here, here’s the mysterious TK with an interesting take, another using RTK GPS for good (or possibly bad) and quite probably the jankiest one we’ve seen in a while, which uses a LoRa base-station to transmit RTK corrections. We’d recommend keeping well away from that last one.

Continue reading “OpenMower: Open Source Robotic Lawn Mower With RTK GPS”

Researchers Build Neural Networks With Actual Neurons

Neural networks have become a hot topic over the last decade, put to work on jobs from recognizing image content to generating text and even playing video games. However, these artificial neural networks are essentially just piles of maths inside a computer, and while they are capable of great things, the technology hasn’t yet shown the capability to produce genuine intelligence.

Cortical Labs, based down in Melbourne, Australia, has a different approach. Rather than rely solely on silicon, their work involves growing real biological neurons on electrode arrays, allowing them to be interfaced with digital systems. Their latest work has shown promise that these real biological neural networks can be made to learn, according to a pre-print paper that is yet to go through peer review.
Continue reading “Researchers Build Neural Networks With Actual Neurons”

A pinout diagram of the new Pi 4, showing all the alternate interfaces available.

Did You Know That The Raspberry Pi 4 Has More SPI, I2C, UART Ports?

We’ve gotten used to the GPIO-available functions of Raspberry Pi computers remaining largely the same over the years, which is why it might have flown a little bit under the radar: the Raspberry Pi 4 has six SPI controllers, six I2C controllers, and six UARTs – all on its 40-pin header. You can’t make use of all of these at once, but with up to four different connections wired to a single pin you can carve out a pretty powerful combination of peripherals for your next robotics, automation or cat herding project.

The datasheet for these peripherals is pleasant to go through, with all the register maps nicely laid out – even if you don’t plan to work with the register mappings yourself, the maintainers of your preferred hardware enablement libraries will have an easier time! And, of course, these peripherals are present on the Compute Module 4, too. It might feel like such a deluge of interfaces is excessive, however, it lets you achieve some pretty cool stuff that wouldn’t be possible otherwise.

Having multiple I2C interfaces helps deal with various I2C-specific problems, such as address conflicts, throughput issues, and mixing devices that support different maximum speeds, which means you no longer need fancy mux chips to run five low-resolution Melexis thermal camera sensors at once. (Oh, and the I2C clock stretching bug has been fixed!) SPI interfaces are used for devices with high bandwidth, and with a few separate SPI ports, you could run multiple relatively high-resolution displays at once, No-Nixie Nixie clock style.

As for UARTs, the Raspberry Pi’s one-and-a-half UART interface has long been an issue in robotics and home automation applications. With a slew of devices like radio receivers/transmitters, LIDARs and resilient RS485 multi-drop interfaces available in UART form, it’s nice that you no longer have to sacrifice Bluetooth or a debug console to get some fancy sensors wired up to your robot’s brain. You can enable up to six UARTs. Continue reading “Did You Know That The Raspberry Pi 4 Has More SPI, I2C, UART Ports?”