Today, you likely often authenticate or pay for things with a tap, either using a chip in your card, or with your phone, or maybe even with your watch or a Yubikey. Now, imagine doing all these things way back in 1998 with a single wearable device that you could shower or swim with. Sound crazy?
These types of transactions and authentications were more than possible then. In fact, the Java ring and its iButton brethren were poised to take over all kinds of informational handshakes, from unlocking doors and computers to paying for things, sharing medical records, making coffee according to preference, and much more. So, what happened?
There are a lot of fantastic things about Hackaday Supercon, but for me personally, the highlight is always seeing the dizzying array of electronic bits and bobs that folks bring with them. If you’ve never had the chance to join us in Pasadena, it’s a bit like a hardware show-and-tell, where half the people you meet are eager to pull some homemade gadget out of their bag for an impromptu demonstration. But what’s really cool is that they’ve often made enough of said device that they can hand them out to anyone who’s interested. Put simply, it’s very easy to leave Supercon with a whole lot more stuff than when you came in with.
Most people would look at this as a benefit of attending, which of course it is. But in a way, the experience bummed me out for the first couple of years. Sure, I got to take home a literal sack of incredible hardware created by members of our community, and I’ve cherished each piece. But I never had anything to give them in return, and that didn’t quite sit right with me.
So last year I decided to be a bit more proactive and make my own Simple Add-On (SAO) in time for Supercon 2023. With a stack of these in my bag, I’d have a personalized piece of hardware to hand out that attendees could plug right into their badge and enjoy. From previous years I also knew there was something of an underground SAO market at Supercon, and that I’d find plenty of people who would be happy to swap one for their own add-ons for mine.
To say that designing, building, and distributing my first SAO was a rewarding experience would be something of an understatement. It made such an impression on me that it ended up helping to guide our brainstorming sessions for what would become the 2024 Supercon badge and the ongoing SAO Contest. Put simply, making an SAO and swapping it with other attendees adds an exciting new element to a hacker con, and you should absolutely do it.
So while you’ve still got time to get PCBs ordered, let’s take a look at some of the unique aspects of creating your own Simple Add-On.
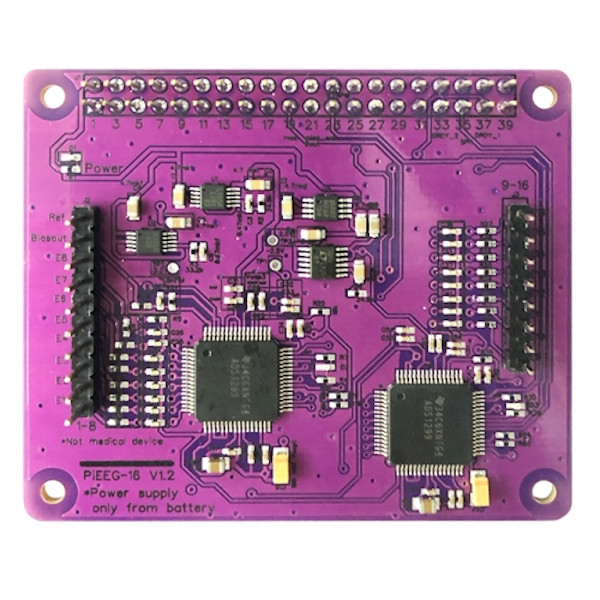
We’ve previously covered the PiEEG, an affordable brain-computer interface (BCI) shield designed to connect to the Raspberry Pi. The open source project developed by [Ildar Rakhmatulin] is intended to allow students and hobbyists to experiment with detecting electroencephalography (EEG), electromyography (EMG), and electrocardiography (ECG) biosignals — unlocking a wide array of applications ranging from assistive tech to gaming.
Now, the PiEEG hardware has been upgraded to detect sixteen channels via either wet or dry electrodes. The new board, referred to as the PiEEG-16, offers up the same ease of use and features as its predecessor, including the ability to read out signals from the device using Python scripts. Compared to the eight channels supported by the previous generation of hardware, the PiEEG-16 promises to provide the fine-grain data required for more complex operations.
Since we last checked in with the PiEEG back in 2023, [Ildar] says the project has attracted plenty of attention. To help document how the community is using the capability offered by these BCIs, he’s added a page on the project’s site to show off what folks are building with the technology.
Inevitably, some express concern when talking about non-professionals working with brain interfacing hardware. But the project’s documentation is quick to point out that efforts have been taken to make the endeavour as risk-free as possible. The most important thing to remember is that the Raspberry Pi and PiEEG are intended to be powered by batteries so as to remain completely isolated. Similarly, there’s no need to connect the devices to a mains-powered computer, as everything happens on the Pi itself.
Even still, it’s made clear that the PiEEG-16 is not a medical device, and has received no formal certifications. If you want to experiment with this technology, you do so at your own risk. Just something to keep in mind…no pun intended.
In a world that has no shortage of macropads, the duckyPad still managed to set itself apart. The open source mechanical pad offered an incredible array of customization options, and thanks to its onboard OLED display, you never had to wonder which key did what. But there’s always room for improvement.
Announced earlier today, the duckyPad Pro is the culmination of everything creator [dekuNukem] learned from developing, marketing, and supporting the original duckyPad. Much hasn’t changed — it looks largely the same, offers the same RGB-backlit mechanical switches, and the trademark OLED is still there, although it’s gotten a little larger. The obvious changes are the addition of five more keys, and a pair of rotary encoders.
Hackaday readers are likely the kind of folks that have a favorite keyboard, so you can probably imagine how devastating it would be to find out that the board you’ve sworn by for years is going out of production. Even worse, the board has some internal gremlins that show up after a few years of use, so functional ones in the second-hand market are becoming increasingly rare. So what do you do?
This is the position [TechBeret] recently found himself in with his beloved Sculpt keyboard. When Microsoft decided to step back from the peripheral market last year, he started looking at alternatives. Finding none of them appealing, he decided instead to breathe new life into the ergonomic keyboard with the RP2040. Every aspect of the resurrection is covered in a phenomenally detailed write-up on his blog, making this a valuable case study in modernizing peripherals with the popular microcontroller.
Have you built yourself a macro pad yet? They’re all sorts of programmable fun, whether you game, stream, or just plain work, and there are tons of ideas out there.
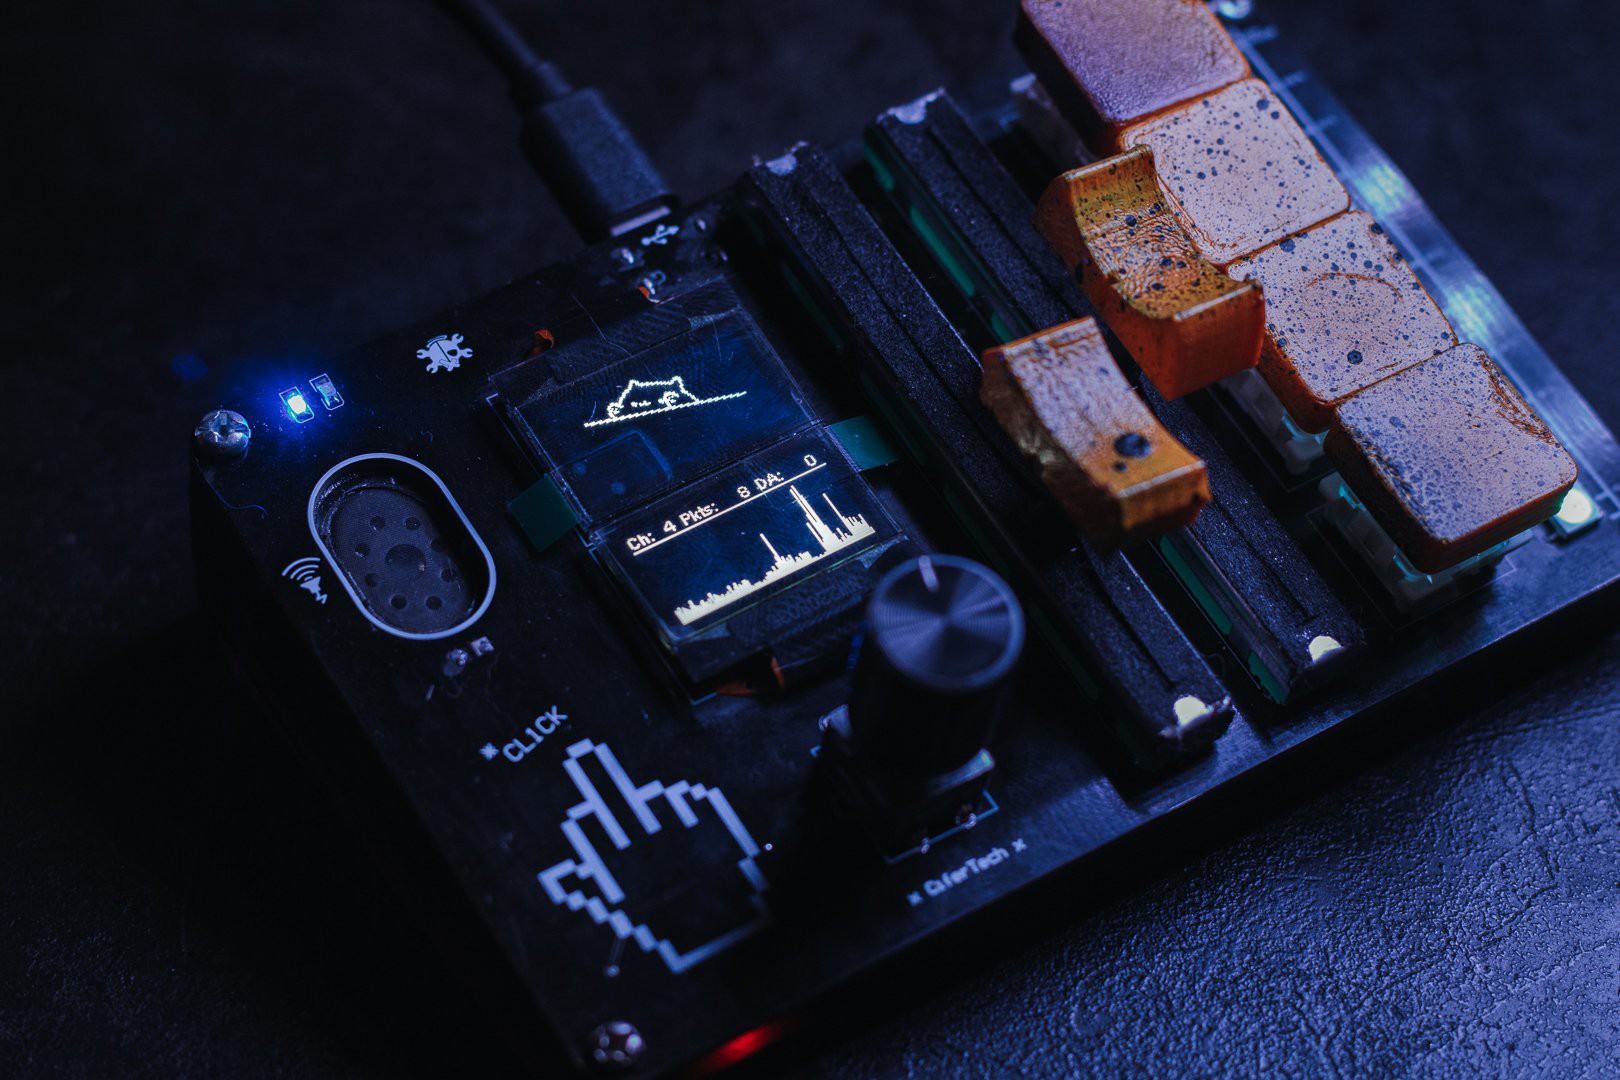
Image by [CiferTech] via Hackaday.IOBut if you don’t want to re-invent the wheel, [CiferTech]’s MicroClick (or MacroClick — the jury is still out) might be just what you need to get started straight down the keyboard rabbit hole.
This baby runs on an ATmega32U4, which known for its Human Interface Device (HID) capabilities. [CiferTech] went with my own personal favorite, blue switches, but of course, the choice is yours.
There are not one but two linear potentiometers for volume, and these are integrated with WS2812 LEDs to show where you are, loudness-wise. For everything else, there’s an SSD1306 OLED display.
But that’s not all — there’s a secondary microcontroller, an ESP8266-07 module that in the current build serves as a packet monitor. There’s also a rotary encoder for navigating menus and such. Make it yours, and show us!
A spare monitor and keyboard are handy things to have around, but they’re a bit of a hassle. They are useful for hardware development, plugging in to headless servers, or firing up a Raspberry Pi or similar single-board computer (SBC). If that’s something you do and portability and storage space are important to you, then you may be interested in the CrowView Note.
I got an opportunity to test and provide feedback on an early version of this unusual device, which is functionally a portable spare monitor plus keyboard (and touchpad) without the bulk and extra cables. Heck, it’s even giving me ideas as the guts of a Cyberdeck build. Let’s take a look.
What It Is
It really looks like a laptop, but it’s actually a 14″ 1920 x 1280 monitor and USB keyboard in a laptop form factor.
There is also an integrated trackpad, speakers and mic, and a rechargeable battery. That makes it capable of providing its own power, and it can even function as a power bank in a pinch. There’s an HDMI input on one side, and on the other is a full-featured USB-C port that accepts video input via the DisplayPort altmode.
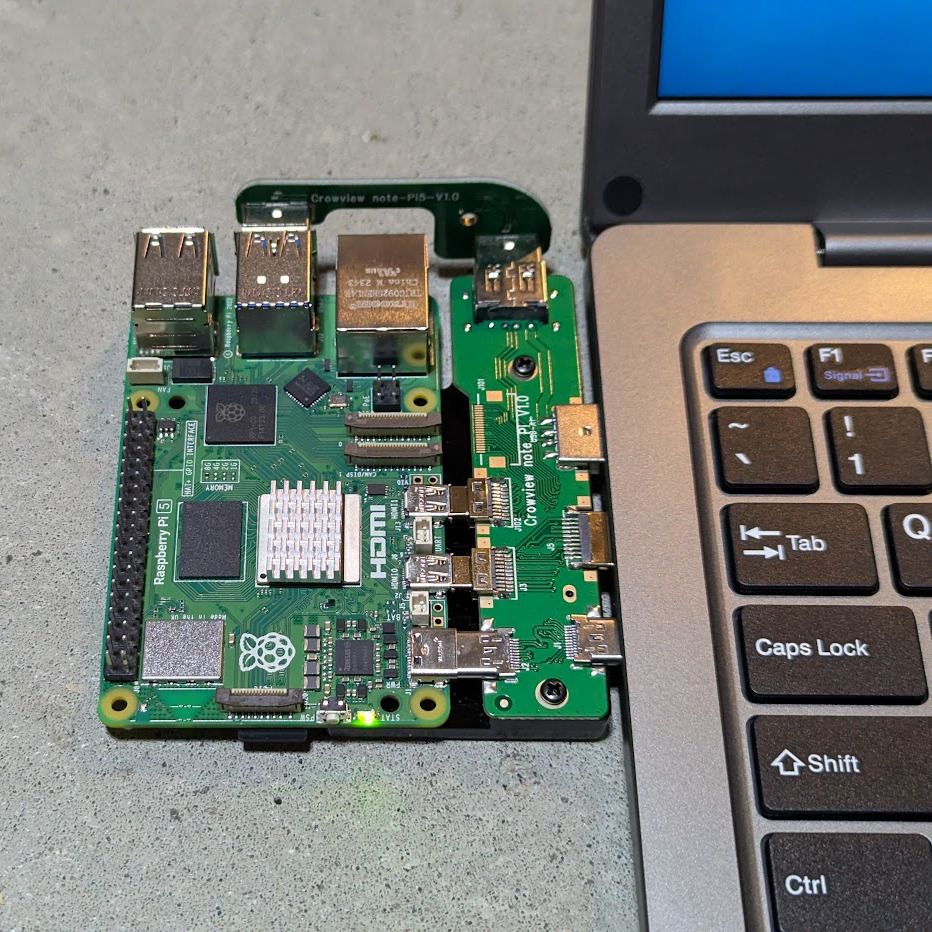
Pictured here is a Raspberry Pi 5 with optional PCB adapter to eliminate cables. The three ports (HDMI in, USB-C 5 V out, and USB-A for peripherals) provide all the board needs.
The CrowView Note is a pretty useful device for a workbench where one is often plugging hardware in for development or testing, because there’s no need to manage a separate monitor, keyboard, and mouse.
It is not a laptop, but attaching an SBC like a Raspberry Pi makes it act like one. The three ports conveniently located on the left-hand side (HDMI in, USB-C out for power to the SBC, and USB-A in for peripherals like keyboard and trackpad) are all that are needed in this case. Elecrow offers a “cable eliminator” PCB adapters to make the process of connecting a Raspberry Pi 5 or a Jetson Nano as simple as possible. The result is something that looks and works just like a laptop.
Well, almost. The SBC will still be a separate piece of hardware, whether connected by cables or by one of Elecrow’s PCB adapters. The result is OK for bench work, but especially in the case of the PCB adapter, not particularly rugged. Still, it’s a nice option and makes working on such boards convenient and cable-free.