Conventional wisdom says that rigidity is the name of the game when it comes to machine tool performance. After all, there’s got to be a reason for CNC machines that need specialized rigging companies just to deliver them. But is there perhaps a way for the hobby machinist to cheat a little on that?
From the look of [Ryan]’s PocketNC spindle upgrade, it seems like the answer just might be yes. The PocketNC, a much-coveted five-axis CNC mill sized for the home shop, has a lot going for it, but as with most things, there are trade-offs. Chief among these is a lack of the usual huge, heavy castings used for CNC machines, which results in the tendency for the cutting tool to chatter or even stall out if you push the speeds and feeds too far. After a good intro to some of the important metrics of machining, such as “material removal rate,” the video below delves into how MRR affects chip load which in turn results in chatter.
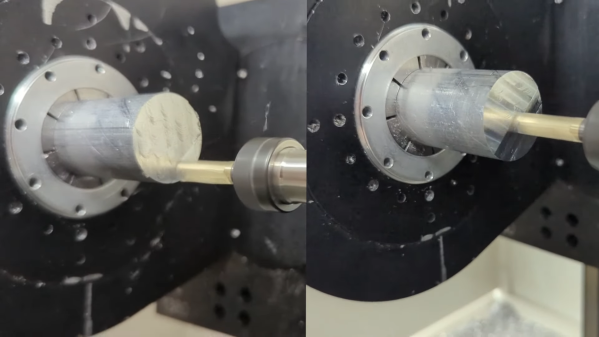
The easy fix for chatter, of course, is to take smaller cuts. But [Ryan] decided to increase the spindle speed to take lighter cuts, but to do it really fast. The hardware for this includes a 3,500 KV high-torque brushless DC motor and a custom spindle attachment. The motor is connected to the spindle shaft using pulleys and a drive belt, and the shaft is supported with stout bearings that can be pre-loaded to fight backlash. The end result is three times the stock 10,000 RPM spindle speed, which lets [Ryan] see a 300% increase in cycle time on his PocketNC. And as a bonus, the whole thing requires no permanent modification to the machine and can be easily removed.
We think [Ryan] did a great job breaking this problem down to the essentials and hacking up a low-cost solution to the problem. Continue reading “Spindle Upgrade Makes PocketNC Faster And Smoother” →