close up hands holding lighting pcb

Circuit Secrets: Exploring A $5 Emergency Light

Who would’ve thought a cheap AliExpress emergency light could be packed with such crafty design choices? Found for about $5, this unit uses simple components yet achieves surprisingly sophisticated behaviors. Its self-latching feature and decisive illumination shut-off are just the beginning. A detailed analysis by [BigCliveDotCom] reveals a smart circuit that defies its humble price.

The circuit operates via a capacitive dropper, a cost-effective way to power low-current devices. What stands out, though, is its self-latching behavior. During a power failure, transistors manage to keep the LEDs illuminated until the battery voltage drops below a precise threshold, avoiding the dreaded fade-to-black. Equally clever is the automatic shut-off when the voltage dips too low, sparing the battery from a full drain.

Modifications are possible, too. For regions with 220V+ mains, swapping the dropper capacitor with a 470nF one can reduce heat dissipation. Replacing the discharge resistor (220k) with a higher value improves longevity by running cooler. What remarkable reverse engineering marvels have you come across? Share it in the comments!  After all, it is fun to hack into consumer stuff. Even if it is just a software hack.

Continue reading “Circuit Secrets: Exploring A $5 Emergency Light”

Let It Snow With A Sub $100 Snowmaking Machine.

[Mattmopar] figured out how to get a white Christmas even if the weather isn’t frightful. He built a simple DIY snow making machine with a few plumbing parts, and tools you probably already have. Snowmaking machines used on the ski slopes cost tens of thousands of dollars. Even the “low-cost” home versions are $400 and up.

[Matt] cut things down to the basics.  Snowmaking requires two ingredients: Water and compressed air.  The water is coming from a cheap electric pressure washer he found used.  The air pressure is from an old air compressor. [Matt] is using his shop compressor – but even a cheap compressor will do fine.

The cold is an unforgiving environment though – so a few changes are needed. The trick is to use garden hose instead of air hose. Traditional air hose has a rather small hole. This leads to ice clogs coming from the compressor itself.  A check valve also ensures that water from the pressure washer doesn’t back up into the compressor.

The nozzles are pressure washer nozzles.  Two 40 degree nozzles for the water, and a 65 degree nozzle for the air/water mix. In true hacker style, the frame of the machine is a ladder, and the gun attached via zip-ties.

Of course you still need cold temperatures for this to work, but that’s not too hard in the winter months. Now if you have the opposite problem of too much snow, check out this self clearing concrete.

Continue reading “Let It Snow With A Sub $100 Snowmaking Machine.”

A Low-Cost Spectrometer Uses Discrete LEDs And Math

A spectrometer is a pretty common lab instrument, useful for determining the absorbance of a sample across a spectrum of light. The standard design is simple; a prism or diffraction grating to break up a light source into a spectrum and a detector to measure light intensity. Shine the light through your sample, scan through the spectrum, and graph the results. Pretty easy.

That’s not the only way to do it, though, as [Markus Bindhammer] shows with this proof-of-concept UV/visible spectrometer. Rather than a single light source, [Marb] uses six discrete LEDs, each with a different wavelength. The almost-a-rainbow’s-worth of LEDs are mounted on circular PCB, which is mounted to a stepper motor through a gear train. This allows the instrument to scan through all six colors, shining each on the sample one at a time. On the other side of the flow-through sample cuvette is an AS7341 10-channel color sensor, which can measure almost the entire spectrum from UV to IR.

The one place where this design seems iffy is that the light source spectrum isn’t continuous, as it would be in a more traditional design. But [Marb] has an answer for that; after gathering data at each wavelength, he applies a cubic spline interpolation to derive the spectrum. It’s demonstrated in the video below using chlorophyll extracted from spinach leaves, and it seems to generate a reasonable spectrum. We suppose this might miss a narrow absorbance spike, but perhaps this could be mitigated by adding a few more LEDs to the color wheel.

Continue reading “A Low-Cost Spectrometer Uses Discrete LEDs And Math”

Building A 3D Printed Phone Handset With Mil-Spec Style

In general, military gear is designed to be rugged and reliable. A side effect of this is that the equipment usually has a distinct visual look that many people find appealing. You might not need a laptop that can survive being in a war zone, but plenty of hackers have picked such machines up on the second hand market anyway.

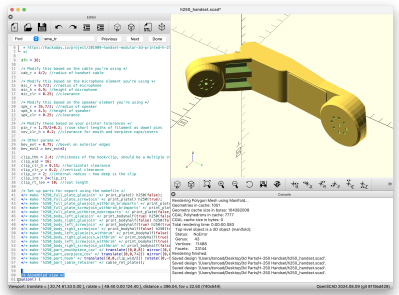
Case in point, the H-250 telephone handset. [Tobias] didn’t actually need a combat-ready phone handset, but loved the way it looked. Technically you can pick these up on eBay for a reasonable price, but then you’ve still got to deal with the weirdo military components inside it. So why not design a look-alike and 3D print it?

[Tobias] came up with a design in OpenSCAD that has a very close resemblance to its military counterpart. Not only has he made the source code for the 3D model available for others who might want to print their own look-alike handset, but the Hackaday.io page also includes a breakdown of the hardware that needs to be added to the printed parts to make it a functional handset.

If you think the H-250 handset looks familiar, it’s probably because it comes standard issue on the TA-1042 field telephone — another very slick looking piece of military gear that we’ve covered previously.

FallingWater Clock Puts New Spin On A Common LCD

Sometimes, all it takes is looking at an existing piece of tech in a new way to come up with something unique. That’s the whole idea behind FallingWater, a gorgeous Art Deco inspired clock created by [Mark Wilson] — while the vertical LCD might look like some wild custom component, it’s simply a common DM8BA10 display module that’s been rotated 90 degrees.

As demonstrated in the video below, by turning the LCD on its side, [Mark] is able to produce some visually striking animations. At the same time the display is still perfectly capable of showing letters and numbers, albeit in a single column and with noticeably wider characters.

In another application it might look odd, but when combined with the “sunburst” style enclosure, it really comes together. Speaking of the enclosure, [Mark] used OpenSCAD to visualize the five layer stack-up, which was then recreated in Inkscape so it could ultimately be laser-cut from acrylic.

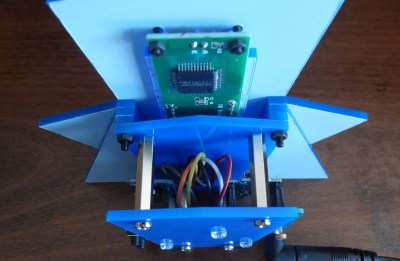
Rounding out the build is a “Leonardo Tiny” ATmega32U4 board, a DS3221 real-time clock (RTC), a couple of pushbuttons, and a light dependent resistor (LDR) used to dim the display when the ambient light level is low. All of the electronics are housed on a small custom PCB, making for a nicely compact package.

This build is as simple as it is stylish, and we wouldn’t be surprised if it inspired more than a few clones. At the time of writing, [Mark] hadn’t published the source code for the ATmega, but he has provided the code to generate the cut files for the enclosure, as well as the Gerber files for the PCB. If you come up with your own version of this retro-futuristic timepiece, let us know.

Continue reading “FallingWater Clock Puts New Spin On A Common LCD”

Experimental sequence for the Ramsey-type phonon anharmonicity measurement. (Credit: Yu Yang et al., Science, 2024)

Creating A Mechanical Qubit That Lasts Longer Than Other Qubits

Among the current challenges with creating quantum computers is that the timespan that a singular qubit remains coherent is quite limited, restricting their usefulness. Usually such qubits consist of an electromagnetic resonator (boson), which have the advantage of possessing discrete energy states that lend themselves well to the anharmonicity required for qubits. Using mechanical resonators would be beneficial due to the generally slower decoherence rate, but these have oscillations (phonons) that are harmonic in nature. Now researchers may have found a way to use both electromagnetic qubits and mechanical resonators to create a hybrid form that acts like a mechanical qubit, with quite long (200 µs) coherence time.

As per the research paper by [Yu Yang] and colleagues in Science (open access preprint), their experimental mechanical qubit (piezoelectric disc and superconducting qubit on sapphire) was able to be initialized and read out, with single-qubit gates demonstrated. The experimental sequence for the phonon anharmonicity measurement is shown in the above image (figure 2 in the paper), including the iSWAP operations which initialize the hybrid qubit. Effectively this demonstrates the viability of such a hybrid, mechanical qubit, even if this experimental version is not impressive yet compared to the best electromagnetic qubit. Those have managed to hit a coherence time of 1 ms.

The lead researcher, [Yu Yang] expresses his confidence that they can improve this coherence time with more optimized designs and materials, with future experiments likely to involve more complex quantum gates as well as sensor designs.

Playing Around With The MH-CD42 Charger Board

If you’ve ever worked with adding lithium-ion batteries to one of your projects, you’ve likely spent some quality time with a TP4056. Whether you implemented the circuit yourself, or took the easy way out and picked up one of the dirt cheap modules available online, the battery management IC is simple to work with and gets the job done.

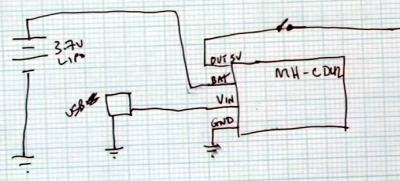
But there’s always room for improvement. In a recent video, [Det] and [Rich] from Learn Electronics Repair go over using a more modern battery management board that’s sold online as the MH-CD42. This board, which is generally based on a clone of the IP5306, seems intended for USB battery banks — but as it so happens, plenty of projects that makers and hardware hackers work on have very similar requirements.

So not only will the MH-CD42 charge your lithium-ion cells when given a nominal USB input voltage (4.5 – 5 VDC), it will also provide essential protections for the battery. That means looking out for short circuits, over-charge, and over-discharge conditions. It can charge at up to 2 A (up from 1 A on the TP4056), and includes a handy LED “battery gauge” on the board. But perhaps best of all for our purposes, it includes the necessary circuitry to boost the output from the battery up to 5 V.

If there’s a downside to this board, it’s that it has an automatic cut-off for when it thinks you’ve finished using it; a feature inherited from its USB battery bank origins. In practice, that means this board might not be the right choice for projects that aren’t drawing more than a hundred milliamps or so.

Continue reading “Playing Around With The MH-CD42 Charger Board”