Flashing TI Chips With An ESP

Texas Instruments is best known to the general public for building obsolete calculators and selling them at extraordinary prices to students, but they also build some interesting (and reasonably-priced) microcontrollers as well. While not as ubiquitous as Atmel and the Arduino platform, they can still be found in plenty of consumer electronics and reprogrammed, and [Aaron] aka [atc1441] demonstrates how to modify them with an ESP32 as an intermediary.

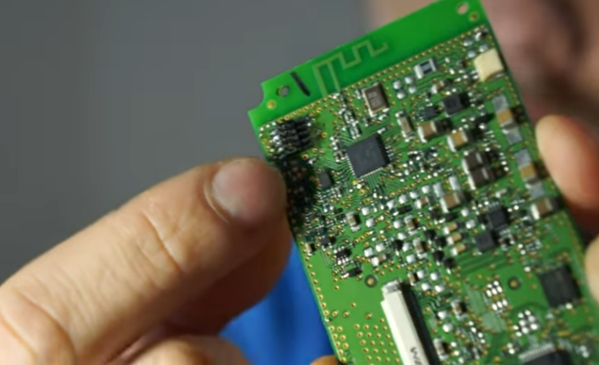
Specifically, the TI chips in this build revolve around the 8051-core  microcontrollers, which [Aaron] has found in small e-paper price tags and other RF hardware. He’s using an ESP32 to reprogram the TI chips, and leveraging a web server on the ESP in order to be able to re-flash them over WiFi. Some of the e-paper displays have built-in header pins which makes connecting them to the ESP fairly easy, and once that’s out of the way [Aaron] also provides an entire software library for interacting with these microcontrollers through the browser interface.

Right now the project supports the CC2430, CC2510 and CC1110 variants, but [Aaron] plans to add support for more in the future. It’s a fairly comprehensive build, and much better than buying the proprietary TI programmer, so if you have some of these e-paper displays laying around the barrier to entry has been dramatically lowered. If you don’t have this specific type of display laying around, we’ve seen similar teardowns and repurposing of other e-paper devices in the past as well.

Continue reading “Flashing TI Chips With An ESP”

Don’t Tune Your 3D Printer To Middle ‘C’ After All

Layer shift caused by the belt being way too loose.

3D printer belt tension seems like a simple thing to deal with — you set the tension and then check it’s good now and then. If it gets really loose, then the teeth can slip and you’ll get some shifts in the print, ruining it, but its an easy fix. But, we hear you ask, how do you determine what the correct tension is? Well, here’s [Lost in Tech] with a video showing some measurement techniques and analysis of a typical 3D printer, (video, embedded below) using nothing more special than a set of luggage scales. A simple theory suggested was that a tighter belt tension would result in increased radial load on the stepper motor bearings, which in turn, due to friction, would result in an increase in temperature of the motor.  After setting a few tension values on one of the belts, it was noted that tension values at the upper end of the range, resulted in a measured increased in temperature of two degrees celcius, and a large increase in noise. This can’t be good for the motor.

Continue reading “Don’t Tune Your 3D Printer To Middle ‘C’ After All”

Using Statistics Instead Of Sensors

Statistics often gets a bad rap in mathematics circles for being less than concrete at best, and being downright misleading at worst. While these sentiments might ring true for things like political polling, it hides the fact that statistical methods can be put to good use in engineering systems with fantastic results. [Mark Smith], for example, has been working on an espresso machine which can make the perfect shot of coffee, and turned to one of the tools in the statistics toolbox in order to solve a problem rather than adding another sensor to his complex coffee-brewing machine.

To make espresso, steam is generated which is then forced through finely ground coffee. [Mark] found that his espresso machine was often pouring too much or too little coffee, and in order to improve his machine’s accuracy in this area he turned to the linear regression parameter R2, also known as the coefficient of determination. By using a machine learning algorithm tuned to this value, which assesses predictable variation in a data set, a computer can more easily tell when the coffee begins pouring out of the portafilter and into the espresso cup based on the pressure and water flow in the machine itself rather than using some other input such as the weight of the cup.

We have seen in the past how seriously [Mark] takes his coffee-making, and this is another step in a series of improvements he has made to his equipment. In this iteration, he has additionally produced a simulation in JupyterLab to better assist him in modeling the system and making even more accurate predictions. It’s quite a bit more effort than adding sensors, but since his espresso machine already included quite a bit of computing power it’s not too big a leap for him to make.

A disassembled Game Boy-shaped Hackintosh

This Big 3D-Printed Game Boy Actually Runs MacOS

While mobile gaming has largely moved to smartphones these days, the classic Game Boy remains a hugely popular platform for retro enthusiasts, owing in no small part to its enormous library of quality games. The original Game Boy hardware is pretty much bulletproof, but feels a bit outdated today because it lacks modern conveniences like a large, backlit display or a rechargeable battery.

[iketsj] wanted to build a modern take on the Game Boy design and designed what’s in effect a 3D-printed, oversized copy of the classic handheld powered by a modern single-board computer. Most people would have gone for something obvious like a Raspberry Pi running Linux, but not [Ike]: he decided to go for a LattePanda Alpha board and run macOS Monterey on it. That makes this a Hackintosh, and probably one of the last ones as well since Apple is busy migrating all of its products onto its own proprietary CPUs.

The LattePanda also has an Arduino integrated on its board, which is used to read out the Game Boy’s buttons as well as the resistive touch screen. It communicates with the macOS system through a Python script that emulates mouse movements and keypresses. Sadly, the touch function is not working because [Ike] accidentally damaged the touch-sensitive system while trying to slim down the display module. Still, the seven pushbuttons are more than enough when running a Game Boy emulator, and there’s also a USB connector available to connect external peripherals like a keyboard, mouse or monitor.

We’ve seen several great Game Boy projects over the years: some made from brass, some very wide, and some that stuff modern computing platforms inside an original Game Boy case. Combining a Game Boy with a Hackintosh is definitely a new development, though it matches well with [Ike]’s history of unusual Hackintosh designs. Continue reading “This Big 3D-Printed Game Boy Actually Runs MacOS”

Compaq 286 Laptop Gets Raspberry Transfusion

We know, we know. A lot of you don’t like projects that consist of gutting a vintage computer (or anything else, for that matter) and replacing its internals with modern electronics. But can you really look at the clunky Compaq LTE 286 laptop that [Dmitry Brant] hacked a Raspberry Pi into and honestly say it’s a machine worthy of historical preservation? The 30+ year old laptop had all the design cues of a saltine cracker, and the performance to match. At least now with a Pi under the hood, you can play some newer games on the thing.

Besides, [Dmitry] says the machine was damaged beyond the point of economical repair anyway. The only stock hardware that’s left beyond the case itself is the keyboard, which he was able to get talking USB thanks to a Teensy microcontroller. It’s not immediately clear if any attempt has been made to get the switches above the keyboard working, but we imagine it wouldn’t be too hard to tie them into some spare GPIO pins on the MCU for a bit of added authenticity.

The bottom half of the machine was cleared out to the point of it literally being a husk of its former self, which gave him plenty of room to hold the Pi 3B and the HDMI driver board that controls the new 9-inch TFT display. Speaking of which, the new panel was a close enough match to the original’s aspect ratio that only minor bezel modifications were required to get it to fit. The modern LCD makes for a massive improvement over the original, without looking too conspicuous.

While there’s still plenty of available space inside the Compaq, [Dmitry] has opted not to include an onboard battery at this time. Instead, power is provided to the Pi and associated hardware through a bulkhead mount USB connector on the side of the machine. It looks like it wouldn’t be too much trouble to add support for an off-the-shelf USB battery bank, as we recently saw with a particularly well engineered retro-futuristic folding cyberdeck, but far from us to tell a hacker what they should do with their bespoke computer.

Retrotechtacular: The Transatlantic Radiotelephone System Of The 1930s

With the web of undersea cables lacing the continents together now, it’s hard to imagine that it wasn’t until 1956 that the first transatlantic telephone cable was laid. Sure, there were telegraph cables under the Atlantic starting as early as the late 1800s, but getting your voice across the ocean on copper was a long time coming. So what was the discerning 1930s gentleman of business to do when only a voice call would do? He’d have used a radiotelephone, probably at an outrageous expense, which as this video on the receiving end of the New York to London radio connection shows, was probably entirely justified.

The video details the shortwave radiotelephone system that linked New York and London in the 1930s. It starts with a brief but thorough explanation of ionospheric refraction, and how that atmospheric phenomenon makes it possible to communicate over vast distances. It also offers a great explanation on the problems inherent with radio connections, like multipath interference and the dependency on the solar cycle for usable skip. To overcome these issues, the Cooling Radio Station was built, and its construction is the main thrust of the video.

Continue reading “Retrotechtacular: The Transatlantic Radiotelephone System Of The 1930s”

A portable water quality monitor

Monitoring Water Quality Using Lots Of Sensors And Machine Learning

Despite great progress over the past century, more than a billion people still don’t have access to clean drinking water today. Much of the water on Earth’s surface is polluted, but it’s not always easy to tell a dirty stream from a clean one. Professional kit for water analysis can be expensive, which is why [kutluhan_aktar] decided to design a portable, internet-connected water pollution monitor.

A bowl of water with several sensors immersed in it, and a blue box connected to them
Calibrating the system using a bowl of clean water.

There is no single parameter that determines the quality of a water sample, so the pollution monitor has no less than five different sensors. These can determine the oxidation-reduction potential (a chemical indicator), the pH (acidity), total dissolved solids (mainly salts), turbidity (suspended particles) and temperature. To combine all these numbers into a simple “yes/maybe/no” indicator, [kutluhan] trained a neural network with data gathered from a large number of places around his hometown.

This neural network runs on an Arduino MKR GSM 1400 module. While not a typical platform for AI applications, the neural network runs just fine on it thanks to the Neuton framework, a software plaform designed to run machine learning applications on microcontroller systems like the Arduino. It also has a GSM/3G modem, allowing it to report the measured water quality to a central database.

All of this is housed in a 3D-printed enclosure that makes the whole setup easy to carry and operate in any location. Collecting data across a wide area should help to locate sources of pollution, and hopefully contribute to an improvement in water quality for everyone. Here at Hackaday we love citizen science initiatives like this: previously we’ve featured projects to measure things as varied as air quality and ocean waves.