Simple 3D Printed Seven-Segment Displays

7-segment LED displays were revolutionary, finally providing a clear, readable and low-power numerical display solution. We’ve got plenty of other cheap display options now, but sometimes you just need the old nought-through-nine, and in a big, visible package, to boot. For those circumstances, consider whipping up a set of these 3D-printed seven-segment displays.

The build consists of a 3D printed frame, with each segment containing two WS2812B addressable LEDs. Each 7-segment assembly is then wired so they can be daisy chained, passing on data to the next digit in the chain. Paper is used to diffuse the LEDs for a smoother look, and a white 3D printed cover is printed for each digit to further spread the light and give a clean finish.

Being based on the WS2812Bs, it’s easy to drive such displays with just about any microcontroller or GPIO-equipped Linux board out there. We love big, beautiful displays – and the more artistic, the better. Video after the break.

Continue reading “Simple 3D Printed Seven-Segment Displays”

Linear Pong Loses A Dimension But Remains Challenging

When Pong hit the scene in the early 70s, there was something about the simplicity of the 2D monochrome tennis game that made it engaging enough that enthusiastic proto-gamers shorted-out machines by stuffing their coin boxes to overflowing.  But even with the simplicity of Pong’s 2D gameplay, the question becomes: could it by made simpler and still be playable?

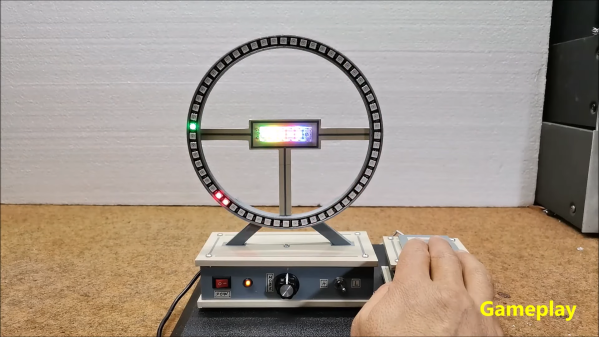
Surprisingly, if this one-dimensional Pong game is any indication, it actually seems like it can. Where the original Pong made you line up your paddle with the incoming ball, with the main variable being the angle of the carom from your opponent, [mircemk]’s version, limited to a linear game field, makes the ball’s speed the variable. Players take control of the game with a pair of buttons at the far ends of a 60-LED strip of WS2812s. The ball travels back and forth along the strip, bouncing off a player’s paddle only if they push their button at the exact moment the ball arrives. Each reflection back to the opponent occurs at a random speed, making it hard to get into a rhythm. To add some variety, each player has a “Boost” button to put a little spice on their shot, and score is kept by LEDs in the center of the play field. Video of the game play plus build info is below the break.

With just a Neopixel strip, an Arduino Nano, and a small handful of common parts, it should be easy enough to whip up your own copy of this surprisingly engaging game. But if the 2D-version is still more your speed, maybe you should check out the story of its inventor, [Ted Dabney]. Or, perhaps building a clock that plays Pong with itself to idle the days away is more your speed.

Continue reading “Linear Pong Loses A Dimension But Remains Challenging”

Raspberry Pi Enters Microcontroller Game With $4 Pico

Raspberry Pi was synonymous with single-board Linux computers. No longer. The $4 Raspberry Pi Pico board is their attempt to break into the crowded microcontroller module market.

The microcontroller in question, the RP2040, is also Raspberry Pi’s first foray into custom silicon, and it’s got a dual-core Cortex M0+ with luxurious amounts of SRAM and some very interesting custom I/O peripheral hardware that will likely mean that you never have to bit-bang again. But a bare microcontroller is no fun without a dev board, and the Raspberry Pi Pico adds 2 MB of flash, USB connectivity, and nice power management.

As with the Raspberry Pi Linux machines, the emphasis is on getting you up and running quickly, and there is copious documentation: from “Getting Started” type guides for both the C/C++ and MicroPython SDKs with code examples, to serious datasheets for the Pico and the RP2040 itself, to hardware design notes and KiCAD breakout boards, and even the contents of the on-board Boot ROM. The Pico seems designed to make a friendly introduction to microcontrollers using MicroPython, but there’s enough guidance available for you to go as deep down the rabbit hole as you’d like.

Our quick take: the RP2040 is a very well thought-out microcontroller, with myriad nice design touches throughout, enough power to get most jobs done, and an innovative and very hacker-friendly software-defined hardware I/O peripheral. It’s backed by good documentation and many working examples, and at the end of the day it runs a pair of familiar ARM MO+ CPU cores. If this hits the shelves at the proposed $4 price, we can see it becoming the go-to board for many projects that don’t require wireless connectivity.

But you want more detail, right? Read on.

Continue reading “Raspberry Pi Enters Microcontroller Game With $4 Pico”

RGB Glasses Built From PCBs

Shutter shades were cool once upon a time, but if you really want to stand out, it’s hard to go past aggressively bright LEDs right in the middle of your face. A great way to achieve that is by building a pair of RGB glasses, as [Arnov Sharma] did.

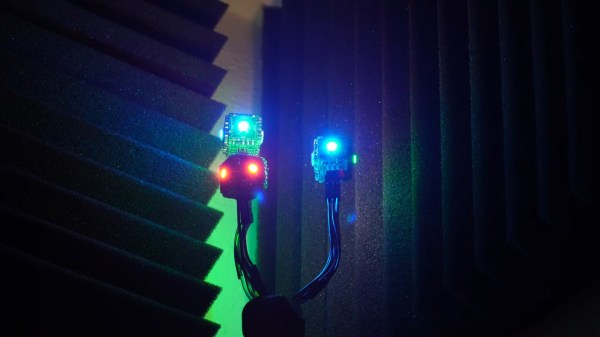
The design intelligently makes use of PCBs to form the entire structure of the glasses. One PCB makes up the left arm of the glasses, carrying an ESP12F microcontroller and the requisite support circuitry. It’s fitted to the front PCB through a slot, and soldered in place. The V+, GND, and DATA connections for the WS2812B LEDs also serve as the mechanical connection. The right arm of the glasses is held on in the same way, being the same as the left arm PCB but simply left unpopulated. A little glue is also used to stiffen up the connection.

It’s a tidy build, and one that can be easily controlled from a smartphone as the ESP12F runs a basic webserver which allows the color of the glasses to be changed. It’s not the first time we’ve seen a flashy pair of LED shades either! Video after the break.

Continue reading “RGB Glasses Built From PCBs”

Hex Matrix Clock Does It With Six Sides

LED matrixes were once a total headache, requiring careful consideration to make the most of limited I/O pins and available microcontroller resources. These days, addressable LED strings have made it all a cinch. Thus, going a little out of the box isn’t so daunting. [w.r.simpson] did just that with this hex-matrix clock.

Relying on hexes instead of a normal Cartesian grid requires some attention to how the rows and columns are laid out, but the Instructable goes through the necessary coordinate system to address the display. The whole display was built without a 3D printer, instead relying on some basic craft skills and a picture frame as the enclosure. Strips of WS2812B LEDs were used to build the hexagonal matrix, run by a Adafruit Metro Mini 328. To give each hexagonal pixel, or hexel, a crisp outline, a shadow grid was built using black paper to stop the light bleeding between the display segments when switched on. Smoked plexiglas wasn’t available, so instead, tinted window film was used to darken the front of the display.

The result is impressive; while some glue marks from the shadow grid are visible closeup, from a distance the final product looks incredibly futuristic thanks to the hexagonal layout. We can imagine this would make a great set dressing in a futuristic film clip; we fully expect to see this concept in the background of the next Ariana Grande single. If this build isn’t enough six-sided fun to sate your appetite, consider getting into Super Hexagon too!

Smart Power Delivery For Long LED Strips

Addressable LED strips, most commonly using the WS2812B, have revolutionized the pursuit of the glowiest and flashiest of builds. No longer does a maker have to compromise on full RGB color or number of LEDs due to the limitations of their chosen microcontroller, or fuss around with multiplexing schemes. However, the long strips of bright LEDs do have an issue with voltage drop on long runs, leading to dimming and color irregularities. Thankfully, [Jan Mrázek] has come up with a useful solution in the form of the Neopixel Booster.

The device consists of a small PCB which packs a 5 volt regulator capable of putting out up to 4 amps. It’s designed with pads that match typical Neopixel strips, such that it can be neatly soldered in every 50cm or every 60 LEDs or so. Each booster PCB is fed with a set of fat power wires, at between 6-18 volts. This allows electricity to be fed to the full length of the strip at higher voltage, and thus lower current, greatly reducing resistive power losses. By having several regulators along the length of the strip, it helps guarantee that the whole length of a long run is receiving plenty of voltage and current and can light up the correct color as desired.

It’s a well thought out solution to a frustrating problem, and [Jan’s] efforts on the design front mean that a 5 meter long waterproof strip can be converted in around about an hour. We can imagine this could be manufactured into strips in future, too. If you’re wondering what to do with all those LEDs, consider making yourself a custom display.

Party Canoe Lights Up The Water

Generally, any activity out on the water is more dangerous when done at night. Hazards are less visible, and it can be easy to get into trouble. [Xyla Foxlin]’s party canoe can’t help with that, but it does look the business after dark.

The canoe is made out of fiberglass, directly formed onto an existing canoe to make getting the shape right easy. It was formed in two halves, with special care taken to make the final result as clear as possible. Obviously, fiberglass is never going to be perfectly transparent, but [Xyla] does a great job of getting a nice translucent frosted look. The final effect means that it’s the perfect canoe to stuff full of addressable LEDs. A string of WS2812Bs, hooked up to an Arduino, make for an appealing lightshow when boating at night.

The diffusive nature of the fiberglass really makes the difference here. We’ve talked about the topic before – it’s the key to making your glowy project really pop. Video after the break.

Continue reading “Party Canoe Lights Up The Water”