It wasn’t long after early humans started banging rocks together that somebody in the tribe thought they could improve on things a bit by doing it with a little rhythm. As such the first musician was born, and since it would be a couple million years before humanity figured out how to record sound, musical performances had to be experienced live throughout most of history. On the cosmic scale of things, Spotify only shows up about a zeptosecond before the big bash at midnight.
So its only fitting that [Linus Åkesson] has perfected the musical floppy drive to the point that it can now be played live. We understand the irony of this being demonstrated via the video below the break, but we think it still gets the point across — rather than having to get a whole array of carefully-scripted drives going to perform something that even comes close to a musical number, he’s able to produce tones by manipulating a single drive in real-time.
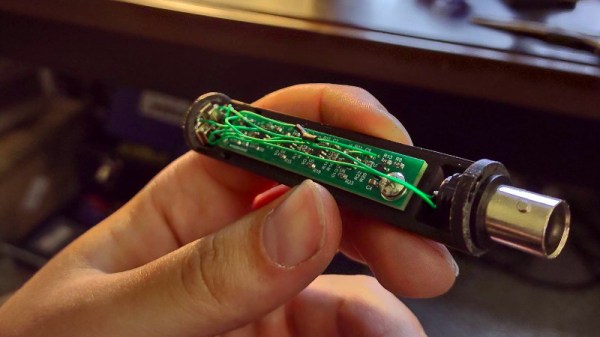
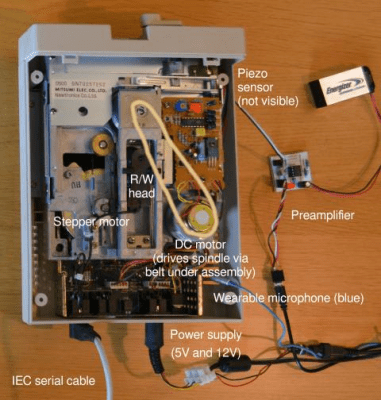 In his write-up, [Linus] not only goes over the general nuts and bolts of making music with floppy drives, but specifically explains how this Commodore 1541-II drive has been modified for its new life as a digital virtuoso. From his experiments to determine which drive moves corresponded to the most pleasing sounds, to the addition of a small microphone and a piezo sensor paired with an LMC662-based amplifier to provide a high-fidelity capture of the drive’s sounds and vibrations, there’s a lot of valuable info here for anyone else looking to make some sweet tunes with their old gear.
We’ve seen something of a resurgence of the floppy drive this year, with folks like Adafruit digging into the classic storage medium, and an experimental project to allow the Arduino IDE to create bootable x86 floppies. You won’t hear any complaints from us — while they might not offer much capacity compared to more modern tech, there’s something about a stack of multi-colored disks with hastily applied labels that warms our cold robotic hearts.
Continue reading “Live Floppy Music Adds Elegance To Any Event” →