This week’s Hacklet is dedicated to arcade games. The arcade parlors of the 80’s and early 90’s may have given way to today’s consoles and PC games, but the classic stand-up arcade cabinet lives on! Plenty of hackers have restored old arcade cabinets, or even built their own. We’re going to take a look at some of the best arcade game-related hacks on Hackaday.io!
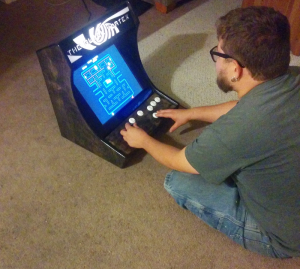 [Brayden] starts things off with his Raspberry Pi Vintage Arcade. The Black Vortex is a tabletop arcade cabinet using a Raspberry Pi, an old monitor, and some nice carpentry skills. Black Vortex uses a Raspberry Pi B+. The extra GPIO pins make interfacing buttons and joystick switches easy. On the software side, [Brayden] is using the popular PiMame (now PiPlay) flavor of Linux built for gaming and emulation. Black Vortex’s shell is plywood. [Brayden] used a pocket hole jig to build a sturdy, cabinet without extra support blocks. A stain finish really works on this one!
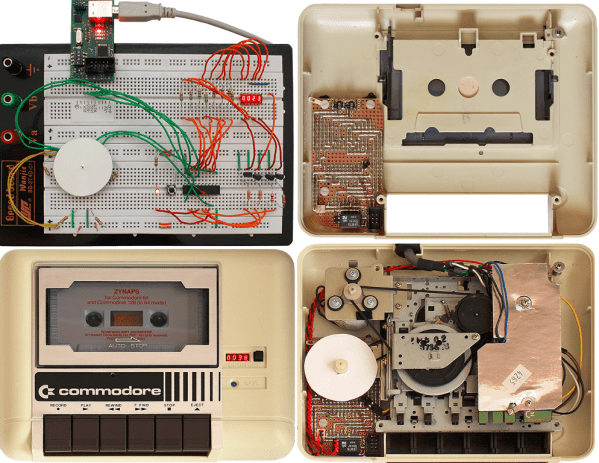
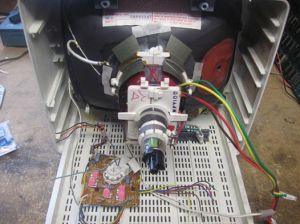 Next up, [fredkono] blows our minds with the Arcade XY Monitor From Scratch. [fredkono] repairs classic Atari vector game PCBs. He needed a test monitor for his lab. The original Amplifone and WG6100 color XY monitors used in games like Tempest and Star Wars are becoming rather rare. Not a problem, as [fredkono] is building his own. Much like the WG6100, [fredkono] started with a standard color TV CRT. He removed and rewound the yoke for vector operation. The TV’s electronics were replaced with [fredkono’s] own deflection amplifier PCBs. [fredkono] was sure to include the all- important spot killer circuit, which shuts down the electron guns before a spot can burn-in the CRT.
 [Rhys] keeps things rolling with a pair of projects dedicated to arcade controls. His TI Launchpad Arcade Control to USB Interface contains instructions and code to use a Texas Instruments Tiva C launchpad as a USB interface for arcade controls. [Rhys] puts all that to good use in his Arcade Control Panel. The control panel features MAME buttons, as well as the standard 2 player fighting game button layout. He finished off his panel with some slick graphics featuring red and blue dragons.
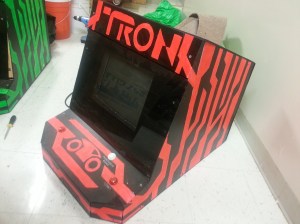 [Sarah and Raymond] hosted a Tron:Legacy release party back in 2010. An epic arcade movie calls for an epic arcade game, or in this case, games. 16 table top arcades to be exact. All 16 machines were built in just 6 days. 8 of the machines ran Armegatron Advanced, a networked version of the classic Tron lightcycle game. The others ran a mix of classic games like PacMan or modern bullet hell shooters like Tou-Hou. The cabinets were built from expanded PVC with wood blocks as a support structure. [Sarah and Raymond] custom painted each cabinet with UV black light paint. We love the custom artwork on their personal signature machines!
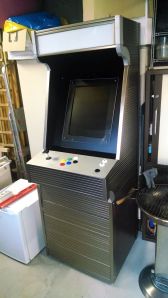 [Mike] takes us back to the 80’s with Just Another Arcade Machine. Under the hood, this machine uses the standard Raspberry Pi and PiMame (now PiPlay) suite. [Mike] even added a trackball so he could play Centipede. What makes this arcade special is the cabinet. [Mike] found an old wardrobe with that perfect 80’s style metallic strip cladding. [Mike] removed the cladding, and cut up the chipboard frame. He re-assembled things into a stand-up arcade cabinet that looks like it came right out of Sears’ Electronics department in 1985.
Ok folks, that’s it for another episode of The Hacklet. As always, see you next week. Same hack time, same hack channel, bringing you the best of Hackaday.io!
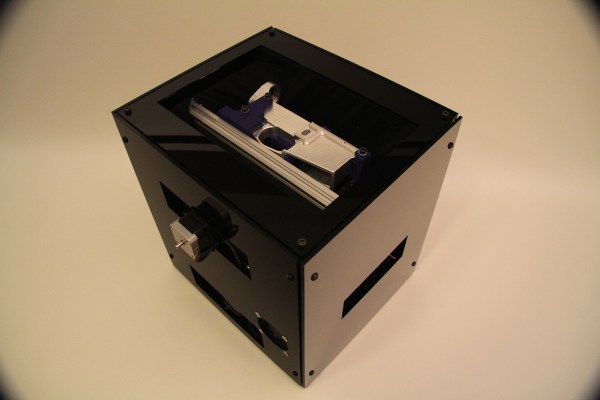
 Anyone can legally buy a barrel, trigger, stock, upper receiver, and various other parts to build an AR-15. To complete the weapon, they only need to buy an 80% lower receiver and perform the last 20% of the metal work. This work can be performed with everything from a drill press to a milling machine to hand tools. Ghost Gunner partially automates this process, making it easier and faster to complete lower receivers and build weapons.