Anodize Aluminum Easily

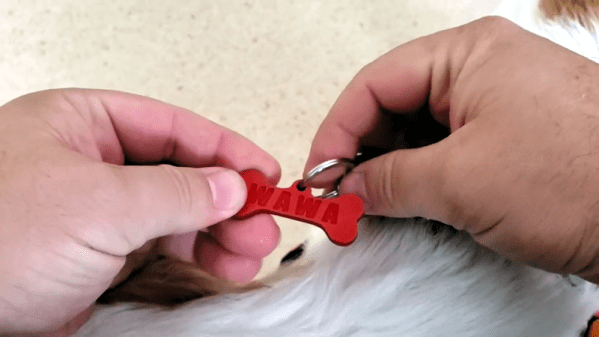
We’ve all seen brightly-colored pieces of aluminum and can identify them as anodized. But what does that mean, exactly? A recent video from [Ariel Yahni] starring [Wawa] — a four-legged assistant — shows how to create pieces like this yourself. You can see [Wawa’s] new dog tag, below.

[Ariel] found a lot of how to information on using sulphuric acid, but that’s dangerous stuff. One web page we covered years ago, though, discussed a safer chemistry. The process requires lye and a common pool chemical used to decrease pH. Sodium hydroxide isn’t super safe, but it is much less problem to buy, store, and use than battery acid.

Continue reading “Anodize Aluminum Easily”

Threading 3D Printed Parts: How To Use Heat-Set Inserts

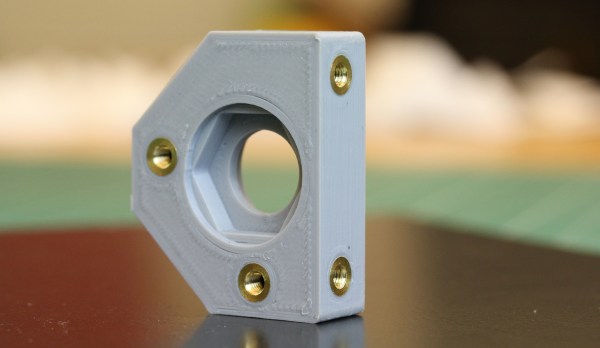
We can make our 3D-printed parts even more capable when we start mixing them with some essential “mechanical vitamins.” By combining prints with screws, nuts, fasteners, and pins, we get a rich ecosystem for mechanism-making with capabilities beyond what we could simply print alone.

Today I’d like to share some tips on one of my favorite functional 3D-printing techniques: adding heat-set inserts. As someone who’s been installing them into plastic parts for years manually, I think many guides overlook some process details crucial to getting consistent results.

Make no mistake; there are a handful of insert guides already out there [1, 2]. (In fact, I encourage you to look there first for a good jump-start.) Over the years though, I’ve added my own finishing move (nothing exotic or difficult) which I call the Plate-Press Technique that gives me a major boost in consistency.

Join me below as I fill in the knowledge gaps (and some literal ones too) to send you back to the lab equipped with a technique that will give you perfectly-seated inserts every time.

Continue reading “Threading 3D Printed Parts: How To Use Heat-Set Inserts”

Does WiFi Kill Houseplants?

Spoiler alert: No.

To come to that conclusion, which runs counter to the combined wisdom of several recent YouTube videos, [Andrew McNeil] ran a pretty neat little experiment. [Andrew] has a not inconsiderable amount of expertise in this area, as an RF engineer and prolific maker of many homebrew WiFi antennas, some of which we’ve featured on these pages before. His experiment centered on cress seeds sprouting in compost. Two identical containers were prepared, with one bathed from above in RF energy from three separate 2.4 GHz transmitters. Each transmitter was coupled to an amplifier and a PCB bi-quad antenna to radiate about 300 mW in slightly different parts of the WiFi spectrum. Both setups were placed in separate rooms in east-facing windows, and each was swapped between rooms every other day, to average out microenvironmental effects.

After only a few days, the cress sprouted in both pots and continued to grow. There was no apparent inhibition of the RF-blasted sprouts – in fact, they appeared a bit lusher than the pristine pot. [Andrew] points out that it’s not real science until it’s quantified, so his next step is to repeat the experiment and take careful biomass measurements. He’s also planning to ramp up the power on the next round as well.

We’d like to think this will put the “WiFi killed my houseplants” nonsense to rest – WiFi can even help keep your plants alive, after all. But somehow we doubt that the debate will die anytime soon.

Continue reading “Does WiFi Kill Houseplants?”

Inside The Secret World Of Crimping

At some point in your electrical pursuits, you’ll need to make a connector. Maybe you’re designing something that will connect to another device, or maybe the spaghetti mess of wires coming out of your Raspberry Pi has become a pain to deal with. Whatever the reason, a proper connector can solve a lot of headaches in electronics projects.

Your first thought might be to run to your favorite component distributor and order the connectors, terminals, and crimping tool. Unfortunately, those tools can cost thousands of dollars. Maybe you’ll just solder the connectors instead? Don’t! It makes for easily damaged connections.

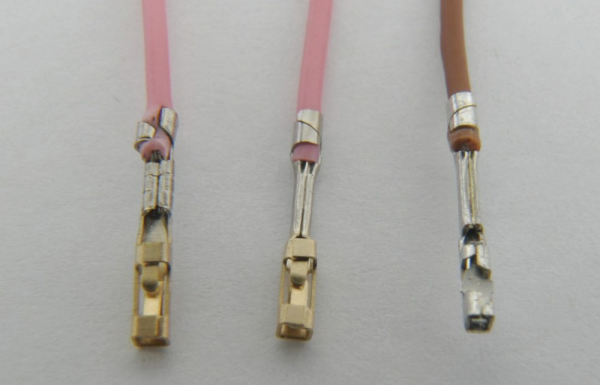
Fortunately, [Matt Millman] has a great guide on wire-to-board connectors. This guide will explain why you should never solder crimp terminals and then get into working with some of the most common wire-to-board connector families.

For example, the Mini-PV series (which often get called “Dupont”) are one of the most ubiquitous connectors in hobbyist electronics. They’re the connector on those rainbow colored jumper wire sets, and connect perfectly to 0.1″ pin headers. The connectors and terminals are cheap, but the official HT-0095 crimp tool costs over $1500. Most crimp tools make a mess of these terminals since they require a cylindrical jaw to crimp correctly. By using a combination of two unofficial tools, you can crimp these connectors properly for under $60.

If you want to learn more about the art of wiring, the NASA Workmanship Standards are an interesting read.

[Thanks to MarkMLl for the tip!]

Arduino Revives A Classic 1980s Minitel Terminal

Before there was the Internet, there were a lot of would-be Internets. Compuserve comes to mind, as do Prodigy, GEnie, Delphi, and the innumerable BBS systems that were once gateways to worlds beyond our CRT monitors and 300 baud Hayes Supermodems.

Service providers varied by region, of course. The French postal and telephone service rolled out their service, Médium interactif par numérisation d’information téléphonique, in 1978. Mercifully and memorably shortened to Minitel, the service was originally intended primarily as an online telephone directory, and later expanded to include other services. [Kevin Driscoll] and [Julien Mailland] recently resurrected a Minitel terminal, a Videotex terminal that was the gateway to the service. The terminal they used, a model 1B, is a stylish machine with a monochrome CRT display and compact “AZERTY” keyboard. [Kevin] and [Julien] built a Videotex server for it using an Uno and a logic-level converter to keep the two talking. Using the hardware, they’ve developed a Twitter client, a webcam display, and dumb Linux terminal.

[Julien] and  [Kevin] previously authored a great history of Minitel that’s worth a read. And we’ve seen a few Minitel hacks before, including converting one to USB for use as a Raspberry Pi terminal.

Ceramic Aerogel Meets Stretch Goals

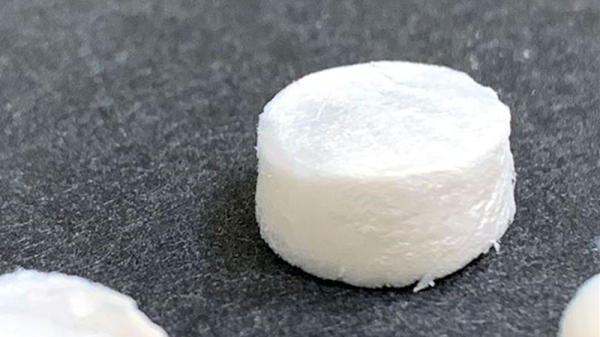
Aerogels have changed how a lot of high tech equipment is insulated. Resembling frozen smoke, the gel is lightweight and has extremely low thermal conductivity. However there’s always a downside, traditional aerogel material is brittle. Any attempt to compress it beyond 20% of its original size will change the material. Researchers at UCLA and eight other universities around the world have found a new form of ceramic aerogel that can compress down to 5% of its original size and still recover. It is also lighter and able to withstand extreme temperature cycles compared to conventional material. The full paper is behind a paywall, but you can view the abstract.

Traditional aerogel is more likely to fracture when exposed to high temperatures or repeated temperature swings, but the new material is more robust. Made from boron nitride, the atoms have a hexagonal pattern which makes it stronger.

Continue reading “Ceramic Aerogel Meets Stretch Goals”

Flexible PCB Robot Flops Around To Get Around

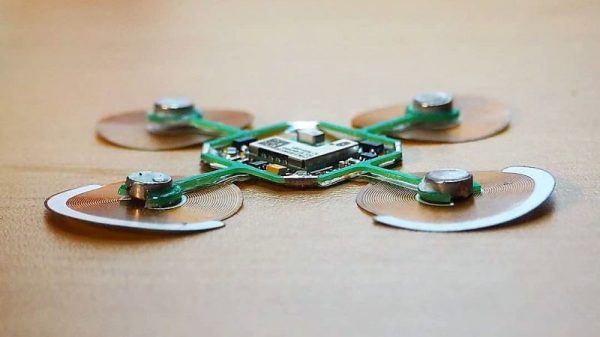
In his continuing quest to reduce the parts count of a robot as far as possible, [Carl Bugeja] has hit upon an unusual design: robots built of almost nothing but PCBs.

Admittedly, calling these floppy four-legged critters robots is still a bit of a stretch at this point. The video below shows that while they certainly move under their own power, there’s not a lot of control to the movement – yet. [Carl]’s design uses an incredibly fragile looking upper arm assembly made from FR4. Each arm holds a small neodymium magnet suspended over the center of a flexible PCB coil, quite like those we’ve seen him use before as actuators and speakers. The coils are controlled by a microcontroller living where the four legs intersect. After a few uninspiring tethered tests revealed some problems with the overly compliant FR4 magnet supports, [Carl] made a few changes and upped the frequency of the leg movements. This led to actual motion and eventually to untethered operation, with the bot buzzing around merrily.

There are still issues with the lack of stiffness of the magnet arms, but we’re optimistic that [Carl] can overcome them. We like this idea a lot, and can see all sort of neat applications for flapping and flopping locomotion.

Continue reading “Flexible PCB Robot Flops Around To Get Around”